Have you ever tried sewing on fabric that frays and ravels on you? There’s usually a big mess of tangled threads that get in your way. Many store bought garments pop out at the seams because the seam allowance was very narrow to begin with and the fabric started fraying. This may sound weird, but you might want to check the seam allowances of the garments before you buy them. It might save you alot of work and heartache. However, I know many of you are buying your clothing online now and you can’t inspect the item before you purchase it. I don’t have this happen often, but when I do, I like to have a solution.
So, let’s fix that.
Have you heard of Fray Block?

I don’t mean Fray Check:

I used Fray Check for years, but it always left behind a harsh, crusty, scratchy feel to it and if you used it on a garment where it touched your skin, it would irritate you all day long. It also showed once it dried, so it wasn’t transparent. If it is all you can find, it’s certainly better than nothing.
So, I learned about Fray Block when a sales clerk at a local fabric store gave me the tip. I couldn’t resist when I heard of all its benefits. By the way, you can buy it at most fabric stores or online . I found the best price for Fray Block to be at Hobby Lobby.
These products are a liquid, but I don’t know what the ingredients are. They have a very slight odor that disappears in a few seconds.
When you purchase a tube of Fray Block, begin by poking a tiny hole at the end of the tube with a pin. You apply it the same way as you do Fray Check…with the tip of the tube against the fabric. I don’t even squeeze the tube at all because it comes out faster than you think. So, be prepared!
Try using it on a scrap piece of fabric first (especially if what you’re working on is an expensive fabric or is irreplaceable). If you don’t have a scrap, try it on a seam allowance.
You gotta move quickly because if you leave it at one spot too long, it may leak and leave a big puddle on your fabric. Sometimes that puddle can migrate past the seam allowance, so that is why using a scrap is so important until you get the hang of it.
Always put a piece of thick paper behind the fabric you’re working on so it doesn’t leak through and cause you problems. I don’t think it will stain a countertop or any surface, but I don’t like having to wipe things up after the fact, so I just protect the surface with some paper. The paper can also act as an absorbent product if you happen to squeeze out too much on your fabric.
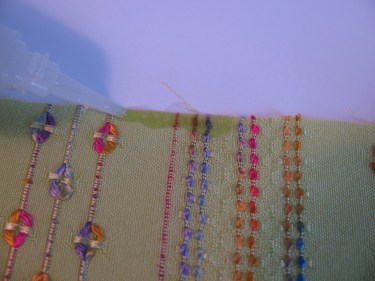
Do you see the tip of the tube on the upper left side of this photo below? I ran the tip along the edge of the fabric. I didn’t move very quickly because I was trying to use the Fray Block with my left hand while taking a photo with my right hand. But you get the idea.
If it is a very small area or you are concerned with any excess dripping, it might make sense to put some of the Fray Block on a Q-tip or a toothpick first and then apply it.
After your test piece has dried (which takes about ten minutes), make sure it looks good to you before you try it on the garment or craft project you are working on.
When it is dry, it should look like this:
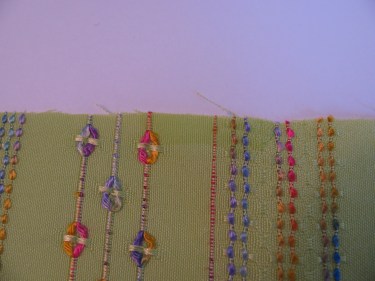
It should be soft to the touch.
You’ll want to store the tube in an upright position so it doesn’t clog the tip. I store mine in my pencil keeper right next to my sewing machine.
I like to use it on fabric before I wash it if I am making a project from fabric, that way it doesn’t ravel in the dryer. It is also a great product to use if you don’t have an overlock machine or serger.
Well, there you have it……. A fabulous way to keep fabric from fraying!

Wow that does look better than Fray Check. I never knew there was anything else. TFS
I will try this product for unhemmed kites.
I hope it works well. Sounds like a fun project.
Have you used this on Burlap? If so, any tips you can send my way?
No, I haven’t used this on burlap. Just try it on a little scrap and see what it does.
Can you iron over it after it dries?
Hi Bridgette, good question! Yes you can iron over it after it dries. I just make sure the iron isn’t too hot.