
You, or someone you love, (think Father’s Day!) own an expensive fishing pole and don’t want to get it scratched up, right?
Well, I have a super fast and very simple solution to the problem.
You may already have a hard case for it, but this bag will give it extra protection from scratching and rubbing against the hard case.
Whether you have a casting rod or a fly rod, this tutorial will help you make the perfect bag to protect it. Some fishing rods break down into 2 ,4, or more pieces. Even if you can’t break the pole down at all, this tutorial will teach you the technique to make the bag for your particular pole.
30 years ago, my husband, who was a fly fishing guide at the time, asked me to make him a bag just like this. Recently, he asked if I would make him another one, because the first one was finally worn out!
He likes to store this particular fly rod without the reel on it, so these measurements will coincide with taking the reel off. However, if you keep the reel on, just alter your measurements to make the bag big enough to fit over the reel on one of the sections.
***He puts the fly rod in this bag and then puts it in a hard case made of plastic, PVC or other substances to keep the tip of the rod from breaking off. This bag does not protect the rod as much as a hard case does. It is mostly to keep the pieces from scratching each other when they are stored in the hard case.
So, I looked at the old bag and made a new pattern, which I will share with you now.
All it takes is a small amount of nylon fabric, some double fold bias tape and about 30 minutes to complete this project.
It would make a perfect gift for yourself, Dad, Brother, Sister or Friend!
Let’s learn how to sew a nylon bag for your fishing pole!
Read through the instructions first, so you have a handle on all you need to do.
First, determine the length of your fishing pole (whether you break it down or not.)
If your fishing pole does not break down, you might need to make a seam halfway down the bag so that it will be long enough to accommodate the rod. That is because fabric comes in widths up to 60″ wide and we are going to cut our bag fabric across the width of the fabric so we aren’t using alot of fabric and having alot of waste.
The pattern I share today will be for a 2 section fly rod. One side of the bag will be 3″ across and the other section will be 2 1/4″ across.

You will need:
2/3 yard of rip stop or regular sport nylon fabric. I got my fabric at JoAnn Fabrics.
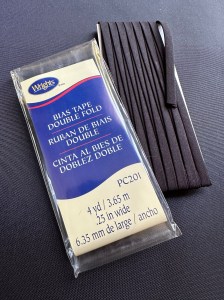
You’ll also need a package of double fold bias tape in the color of your choice. I like using the 1/4″ wide tape for this, but you could use the wider kind if you like it better.
Trim the selvage from the fabric and make sure the sides are perpendicular to the bottom and top edges of the fabric. You want the piece of fabric to be squared up and not crooked.

We are going to make this bag with a French seam which will make it extra durable. If you don’t want a French seam on it, just stitch the seam the regular way and finish the seam with a zig zag stitch or a overlock machine and skip the French seam instructions.
But, if you haven’t made a French seam before, this will be a really easy way to learn (on a straight seam and an easy project)!
Begin by folding the bag in half lengthwise with the WRONG sides together and stitch a 1/4″ seam all the way down the long side of the bag and also across the bottom of the bag:
The bottom edge of my bag is not even and that’s ok. Just trim off the excess after you stitch as you see in the photo below:

Turn the bag inside out and gently push the corners out to a point. I use a small flat head screwdriver to do this.

“Finger press” (using your fingernails) the sewn edges of the bag along the long side edge and the bottom of the fishing bag. This way, you don’t use an iron on it, which might be too hot and cause the bag to shrink, melt and pucker.

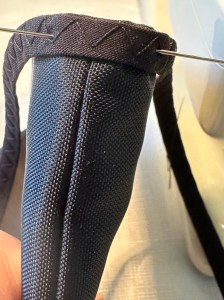
You will now stitch a 1/2″ seam. That folded side edge of the bag should line up with your 1/2″ mark on your sewing machine guide. I have pulled the fabric away a little and the point of my pin points to that 1/2″ line:
This is what the bag should look like after you sew that 1/2″ line…

Turn the bag right side out.
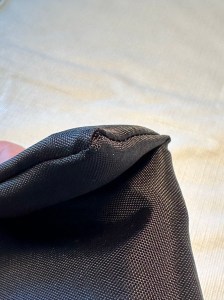
Poke out the corners using a gentle “push” to make nice corners.
Finger press the edges again…

Next, cut a 11 1/2″ inch piece (or whatever the measurement is of the opening of your bag. You will need at least 1/2″ more than your measurement. It doesn’t hurt to cut it even longer because you can always trim the excess later.)
Keeping the original folds in the bias tape, press under 1/2″ on one end of the tape like this:

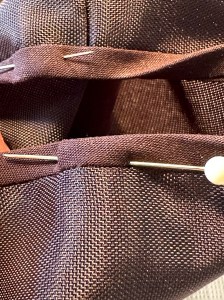
Now, find the point farthest away from the seamline in the top of the bag and put a pin there.

You can see that pin you just put in, in the photo below.
Now, pin the folded edge of the tape just below it, like in the photo below:

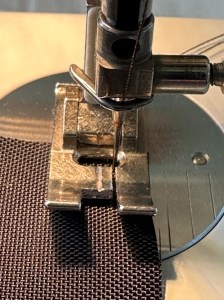
Put your bag under your presser foot, put the needle down to hold the tape in place, remove the original pins and pin the tape a few inches away to hold the rest of the tape in place. You will now sew the tape to the bag using the outer fold line as your guide, like you see in the photo below.
Your seam should look like this:

Turn the tape to the back side of the bag and pin in place like this:
I use a zig zag stitch to hold the tape in place because it is narrow. However, you can certainly use a straight stitch here.

Now, as I mentioned above, I know with this bag, that the two sections are different widths because the handle of the rod is wider than the rest of the fishing pole. So, one section will be 3″ wide to hold the handle part of the rod, and the other section will be 2 1/4″ to hold the other section of the rod.
If you are making a bag with 4 sections, you will have one section wider than the other 3. It’s only the handle part of the rod that is widest. The rest of the rod gets narrower the closer you get to the top of the rod. Make sense?
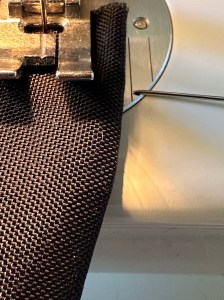
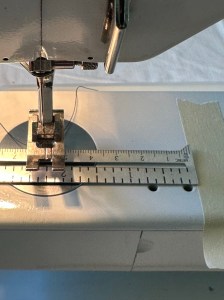
So, I will take my seam gauge and measure out 2 1/4″ from the needle and place a piece of masking tape parallel to the presser foot edge.
This will be my seam guide as I sew the bag. It makes it super easy to insure my sections are straight as I sew. Do you see the masking tape on the right side of the picture below?
Start at either the top or bottom of the bag and stitch, using the tape as your guide and keeping the side edges straight and tight as you sew.
***This is very important so that your bag doesn’t get twisted. You want it to lie flat, so stitch it flat here!

Here’s what it looks like now:

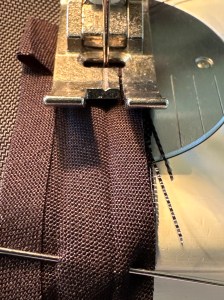
Next, cut a piece of the bias tape into a 26″ length and zig zag down the middle of it to hold the tape together. You don’t need to fold the raw edges under unless you want to. My husband’s bag ties never raveled in all those years!

Find the midpoint of the tape and pin it to the side seam of the bag like this:
Stitch across the tape several times to hold it in place.

And that’s all there is to it!
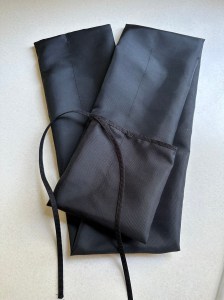
I hope you enjoyed making this bag and maybe even learning a few new techniques while you were at it, to incorporate into sewing other projects that you make in the future.
Tag me on Instagram @TheSewingGardenCO if you’d like me to share any of your creations! They would inspire others and I’d love to see what you make!
Happy Sewing!
