This is Part 3 in a series on how to cover a foam pad for a bench seat or cushion, the final steps.
Note: If you missed Part 1, click here to find the instructions for How to Cover a Foam Pad Bench Seat Cover. If you missed Part 2, that was the How To Make Piping post. If you didn’t put piping in your cushion, you only need to follow How To Cover a Foam Pad…Bench Seat Cushion (Part 1) and then this post (Final steps). Just ignore the instructions that have to do with piping.
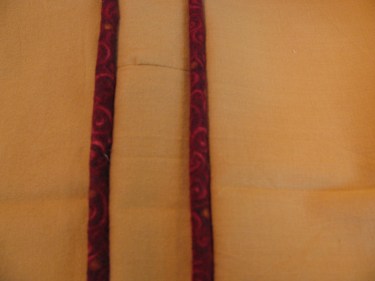
Now, let’s begin where Part 1 left off…..once your piping is in, it should look like this:
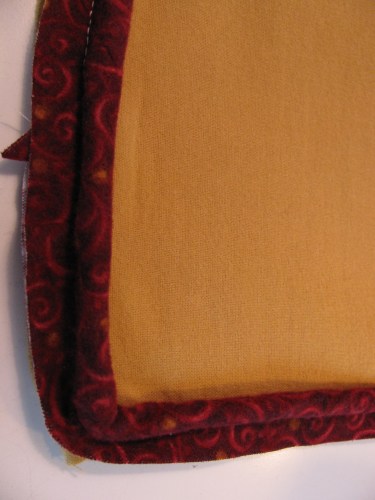
If you did not follow the post about how to make piping, I have switched to 2 contrasting fabrics so that you can see the process easier.
***Take this piece (above), that you have stitched the piping on and lay it over the foam. If you do not have piping on your cushion fabric, just ignore the reference to it, but still follow the instructions.
The photo above shows the piping already stitched onto the main fabric of the cushion. Make sure the entire piece isn’t too big for the foam. This is the time to make any corrections if you need to. You sure don’t want to have to rip the whole thing out and start over. It is ok if the fabric piece is a bit too small for the foam. That will make the cushion have a nice snug fit. But, you don’t want this piece to be too big because the cushion will look saggy in the final stage and you don’t want your cushion to look baggy or saggy.
If it is too big, take off all of the piping using a seam ripper. Then, figure out how much larger the seam allowances should be and then resew it on. In other words, you may need to move the piping in closer to the middle of the fabric all the way around the piece. Pin it first and see if the adjustment you are making is adequate. Make the same adjustment to the bottom piece.
Sew the piping back on to each piece.
Next, you are going to sew on the narrow strip that goes all around the cushion middle and covers the height of the cushion (or the thickness of it).
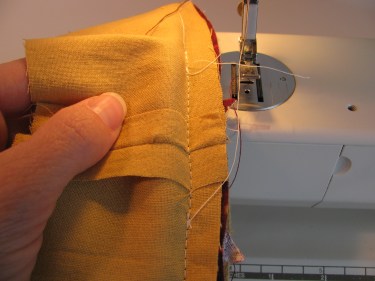
Take that narrow strip that will go all the way around the cushion and lay it right sides together on top of the piping. Leave about 3 inches free (or loose) before you start sewing. See photo below. Begin sewing in an area that is not close to a corner of your project. There are three reasons I do not start at a corner of the project.
First, it is too difficult to join the seams at a corner. Second, it looks too bulky to have the joining at the corner and third, it doesn’t look aesthetically pleasing to see the seams at a corner. If you look at any professionally made pillows or cushions, the seams are not in the corners. If there is a definite front and back to the item you are making, be sure to start on the back of the project so that this seam will be hidden.
I have turned the seam sideways in the photo below, so you can see where I began sewing:

Use a binding foot or a zipper foot if you have piping. In the photo above, I used a zipper foot. When using a zipper foot, make sure and position the needle to the far left or the far right of the zipper foot. If you keep the needle in the middle position, the needle will break when the machine starts to sew because the needle will hit the metal below.
If you don’t have piping, you can use a regular stitching foot.
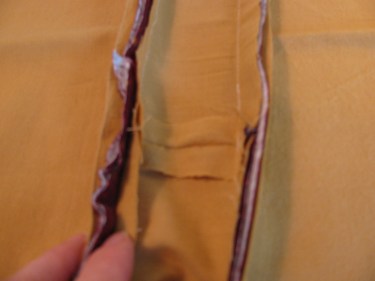
Stitch all the way around the cushion and stop when you get about 3 inches away from the end. Grab the two ends of fabric and pinch them until they meet and put a pin in that spot like this photo below:

Now, stitch straight across the narrow strip as shown:

Trim off the excess seam allowance to 1/2″. Open the seam and spread it flat. It won’t be necessary to press the seam open. You can use your fingernail to “press” it if you need to.
Then stitch the remainder of the seam closed:
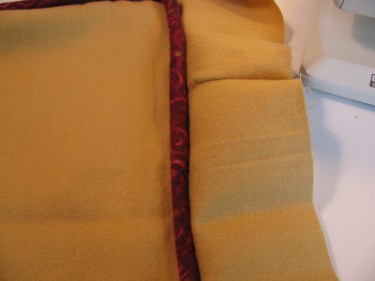
This is how it should look from the right side:
Now, you’re going to stitch the bottom piece of the cushion to this narrow strip. This time, make sure you pin it all the way around the edges to make sure they meet up well.
****Make sure your corners are matched at the correct points. This is the most important step of the entire project!! If your corners are not lined up well from top to bottom, the whole cushion will be lopsided and crooked. You will be pinning the bottom piece across the middle strip from the top piece, so you can see where the top corner is and match the bottom from there. It is not difficult, but you want to get it right the fist time, before you sew!!
Stitch all the way around the cushion leaving a wide enough area open to put the foam inside.
Turn the cushion right side out and make sure everything looks good and that your seams didn’t “catch” anywhere.
Once it looks good, turn it wrong side out again. Stitch right over the first seam using the zipper foot or piping foot again. This will reinforce your first stitches and make a stronger seam.
This is how it should look from the wrong side:
This is how it will look from the right side:
(I’m going back to showing you the original cushion fabric and photos that I made for my neighbor since the gold and red fabrics in the above photos were just samples for you to better see the actual sewing.)
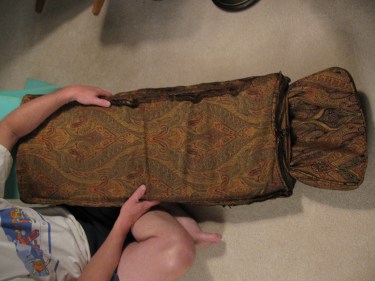
Next, you will need to put the foam inside the cushion. Because my cushion was so long, this was a two person job. My husband inserted the foam into the cushion. Notice the cushion is still wrong side out. When he pushed the foam all the way into the cushion and lined up the corners, my job was to reach into the cushion and hold those two corners and the foam together while he turned the cushion fabric right side out, over the foam:

Just keep working the fabric by pulling and adjusting it over the piece of foam:
When you have it turned all the way, and you like how it fits the foam, you’ll need to hand stitch the opening closed with a needle and thread:
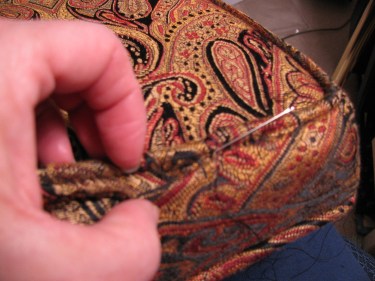
You’re finished!
That’s all there is to it. It’s not difficult, it just takes a few extra steps to get a professional looking cushion. Let me know in the comments down below if you have any questions.


I’ve spent most of the day reading your blog and I must say, I’m impressed with all the tips you have provided.
Here’s a little trick I learned from an upholstery shop. When you are inserting a form cushion into a cover, place the foam into a dry cleaner bag. It makes slipping the cover on to it much easier. Once you have the foam inside the cover, simply rip away all the plastic bag. I really works.
Thanks for the wonderful site and happy sewing!
Regards,
Laurie
That’s awesome! I remember when I was trying to get that cushion turned right side out, I tried something (and I can’t remember what now) to make that job easier, and it was a mess. But this sounds like the perfect solution!
Thank you!
You could also try spraying it with a spray silicone this works really well too.
THANK YOU!!! for your easy to follow step by step instructions 🙂 Im about to recover some couch cushions with denim so your instructions will be the ones to follow! Just a quick question, how would i go about adding a zipper?
Good question! Let’s say your cushion is 3″ across (or high). Measure what the zipper width would be and take that amount off of the 3″. That tells you how much width you need left over after you subtract the zipper. Now, divide that measurement in two (because you are going to need two panels (one on either side of the zipper.) Be sure and add seam allowances on both sides of those panels. I try to make the zipper the full length of the long side of the cushion. This make it easy to take off and on. Stitch the zipper to both of the panels and then treat the new piece as one unit and proceed through the rest of the instructions. Does that make sense? Someday when I get the call from another customer, I’ll write a post about it. I just don’t get the request very often.
Hope that helps, Linda
No one ever talks about how you manage the corners. Mine are a mess!
So are mine.starting from middle.see how that works.
Did you see the first two posts on this subject? It’s important to line up the corners correctly. It’s also important to clip the seam allowance at the corner.
Love your directions but I have one question regarding the height of foam do you add 1 inch to it? Thanks
If your seam allowances are one half inch, then yes, add a total of one inch to the fabric before cutting it out. If that’s not what you meant, let me know. Thanks!
Using a light plastic skim works. I was desperate to make sure the foam fit nicely that I used the bigger and thinner garbage bags to slide it in . upholstery shops have alot of tricks. I had one guy bring me the “egg crate” foam off his bed and wanted me to make bench cushions for him.! Judy
Hi Judy, thanks for your comments. When you say, “light plastic skim”, do you mean to first cover the foam with something like a dry cleaner bag before you try to insert it into the new cover? If so, I think that would really help!
That’s funny about the egg carton foam!!!