Update: April, 2023
Let’s look at some examples of piping, I’ll teach you how to make piping, and then show you how to install it in your project!
If you’re not familiar with it, piping is a decorative edging that gives definition to pillows, cushions and all sorts of home decor items. Sometimes, you’ll find it on backpacks and clothing as well.
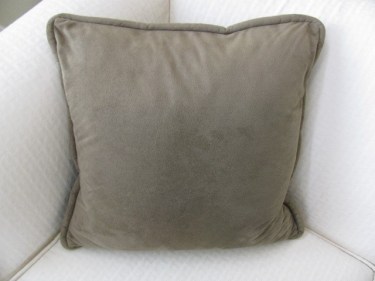
Here are some photos of piping. This pillow has thick piping around the edge.
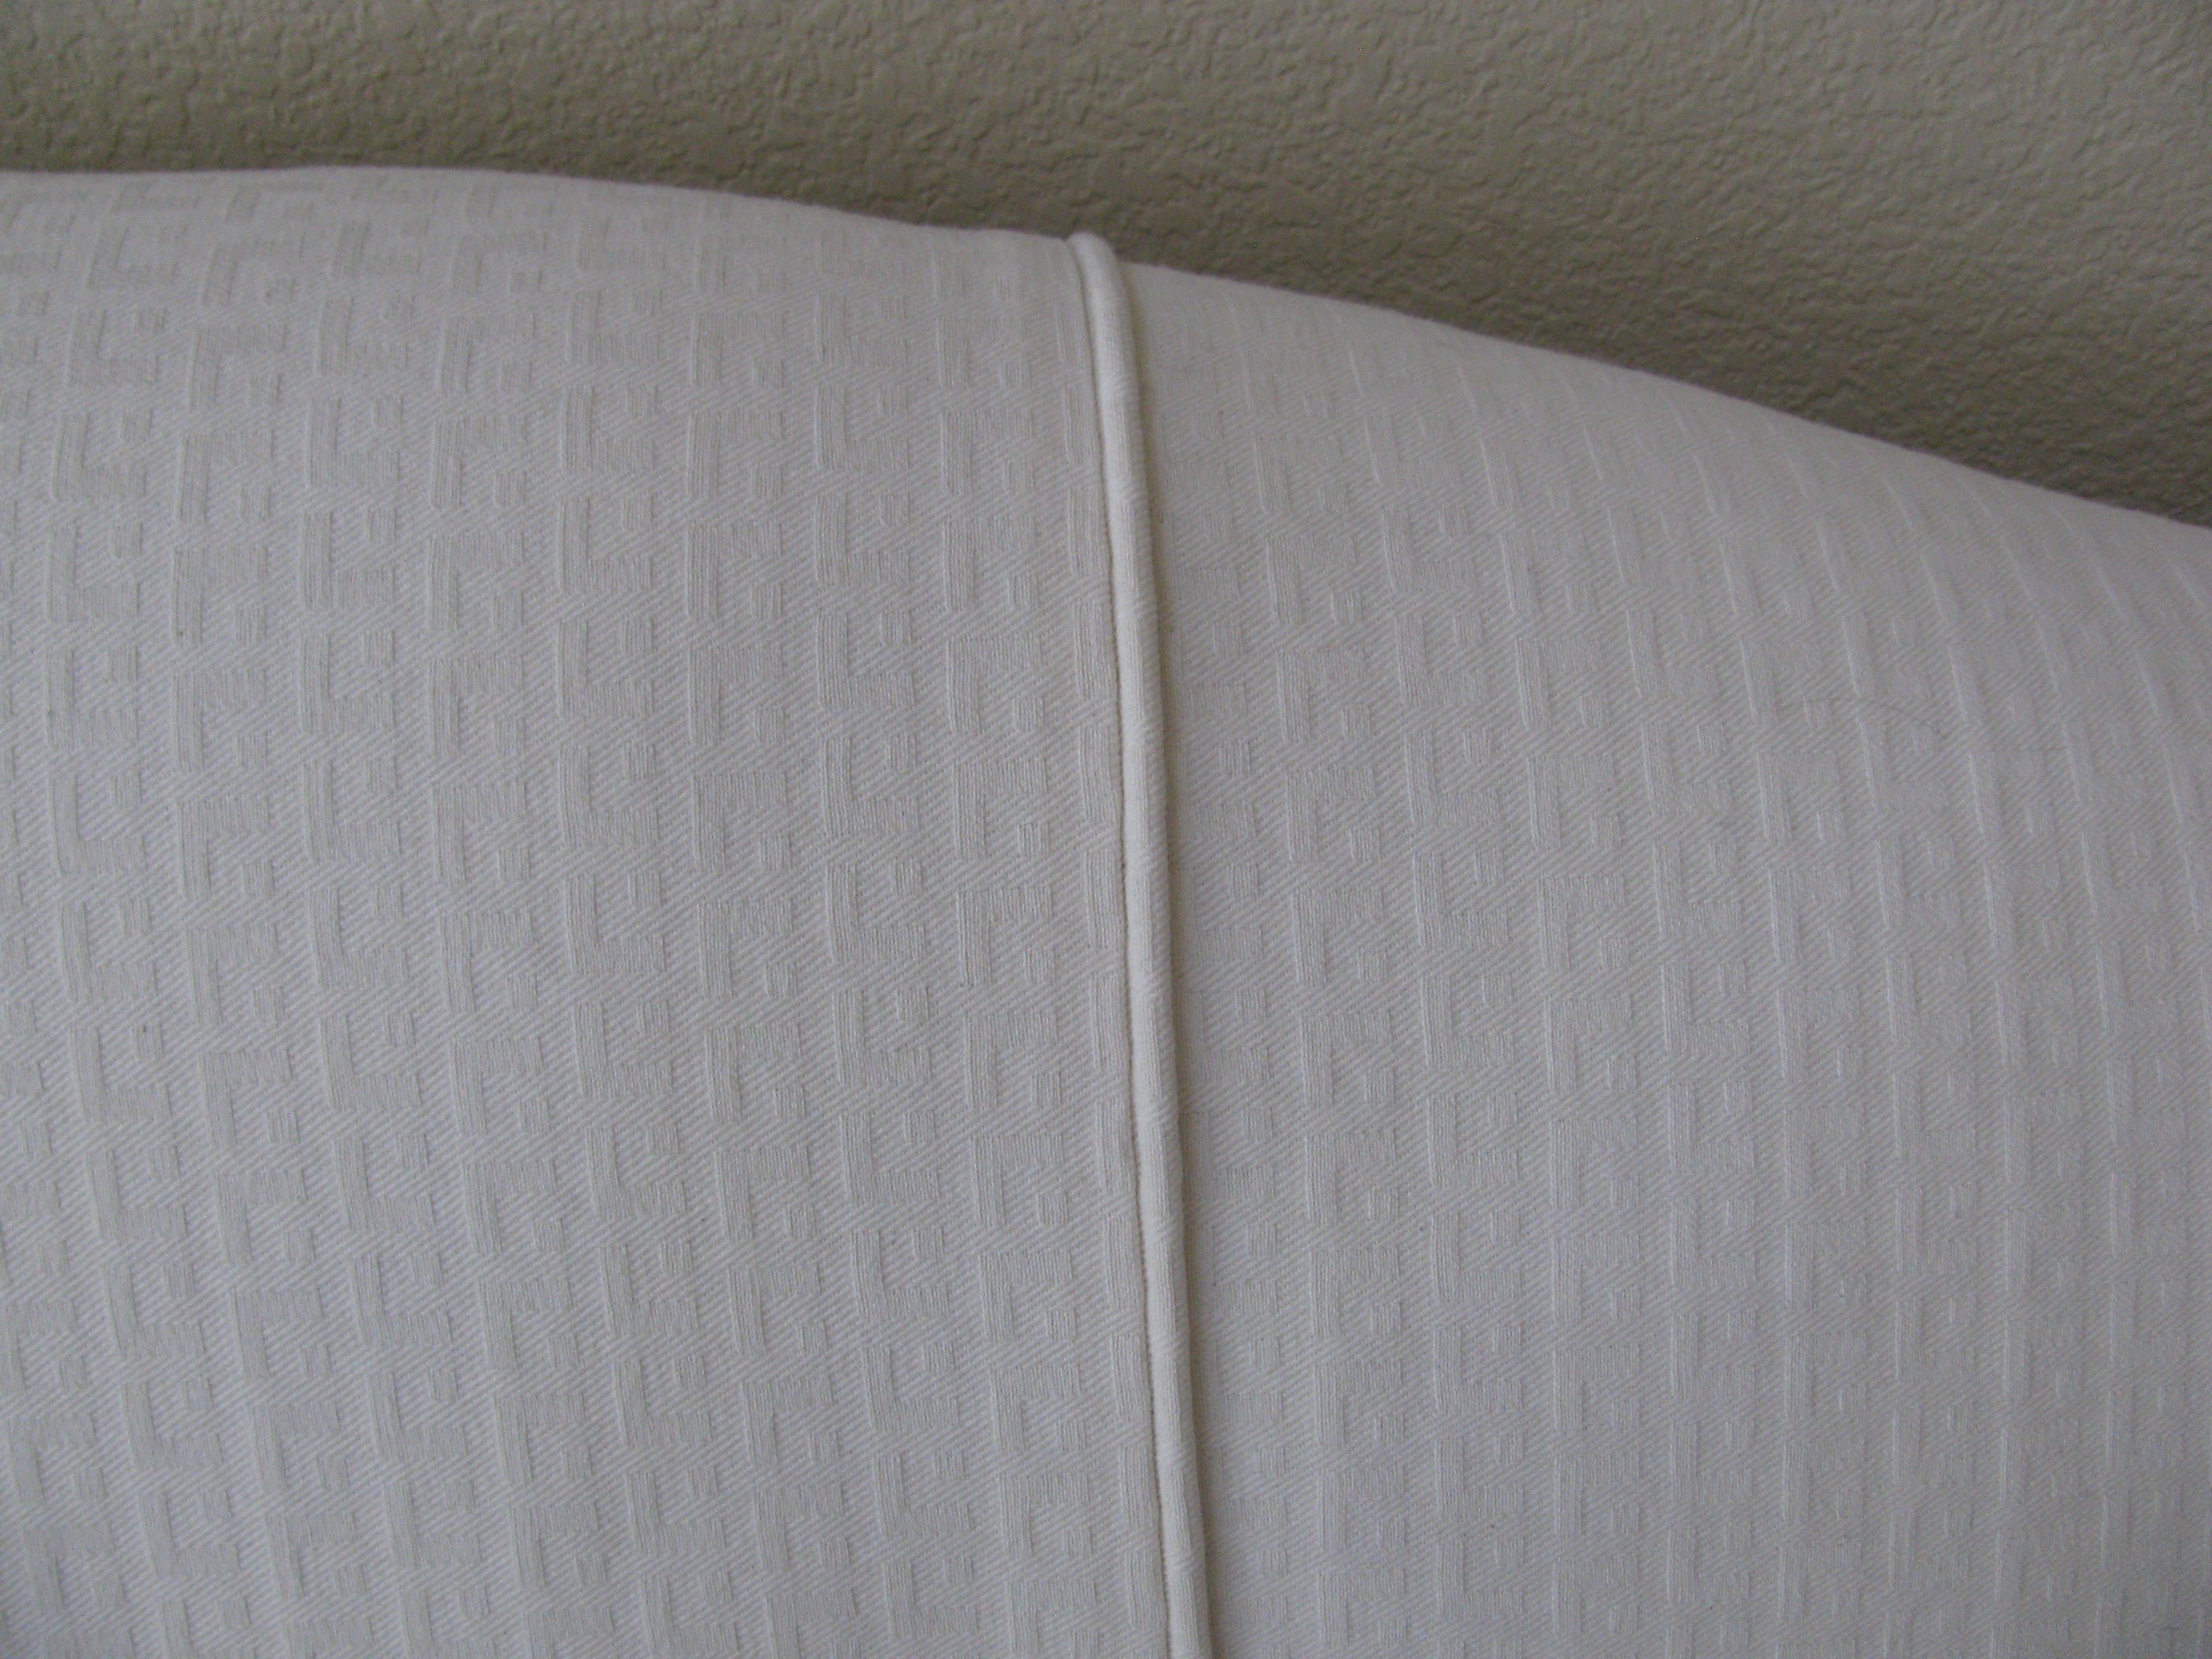
This piping is used as decorative trim on a couch:
I originally wrote this post as part of covering a bench seat cushion, but you can use these instructions for making piping on any project you are working on.
(If you’ve decided not to use piping on your cushion, stay tuned for the final instructions on putting the cushion together in the next post to follow.)
Now, let’s look at how to make piping!
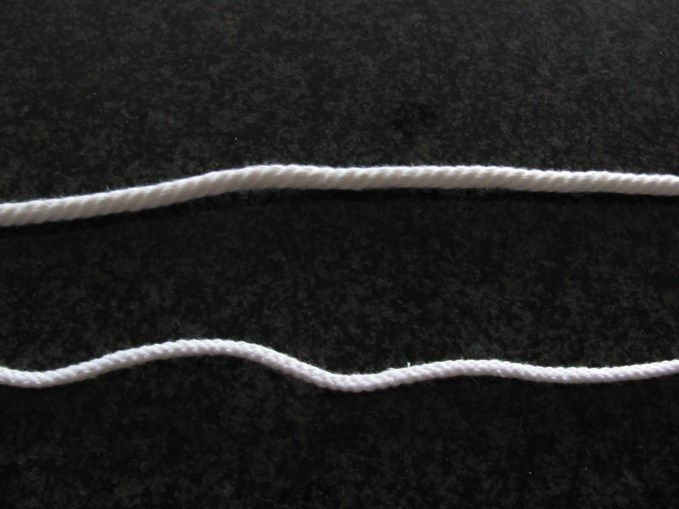
First, you will need to purchase some cording (looks like string). For clarification, cording is what goes inside piping, and piping is what you call the finished product once the cording is inside the fabric.
I found some cording made out of cotton in the upholstery section of my local fabric store. That’s where you’ll usually find it. Cording is not very expensive and is sold by the yard.
Cording comes in several thicknesses depending on the look you are going for. it is a personal preference, unless you are trying to replicate another item or “look”. Here are examples of two different thicknesses of cording. These are for making thin piping. In my example, I am going to use thick cotton cording and you’ll see that later in the post.
To figure out how much cording you need, measure around the pillow, cushion, dress waist or whatever item you’re going to put piping into. If you’re making a cushion, be sure to measure the top edges and the bottom edges all around the item and then add all the measurements together. Once you know the total amount in inches, convert it to yards by dividing the number by 36 and that will tell you how many yards you will need to purchase. Remember, the fabric store sells cording in yards if you’re in the United States. (If you are in another country, you might need to convert that measurement into centimeters).
In the following directions, I will be using contrasting fabrics in the photos so that you can see the piping better. I’ll also use contrasting thread so it’s easier to see.
We are going to cut 2 inch strips of fabric to make the piping. That should be plenty of width for your strips no matter how wide your cording is.
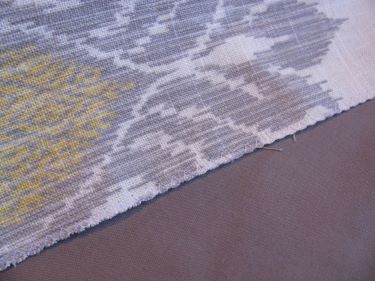
Now, take the fabric that you are going to make piping with, and fold it at a 45 degree angle. Can you see that I just took one corner and matched it to the edge on the opposite side of the fabric? (Refer to the photo below). For some reason, the fabric in the next few photos is looking pink. Hang in there and we will return to grey soon!

Now, looking at the photo below, use a straight edged ruler (see-through rulers are the best if you have one!) and line it up on the folded edge (the diagonal edge of the fabric). Do you see that I lined it up on the 1″ mark of the ruler? This is so that when I cut the strip, I will actually get a 2″ strip (because it is on the fold.) What I want is a 2″ wide strip.

If you don’t have a rotary cutter, go ahead and mark right on the fabric with a pen or other marker and draw a straight line and then cut it with scissors. Otherwise, cut it with the rotary cutter on the mat (not on your countertop or carpet or anything you value!)
Once you have that first strip cut out, move the ruler over to the TWO inch mark and cut again. (Be careful not to cut at the one inch mark anymore because you no longer have a folded edge that you are cutting from).

Cut as many strips as you need to get the length you need for the perimeter of the cushion or whatever item you are making.
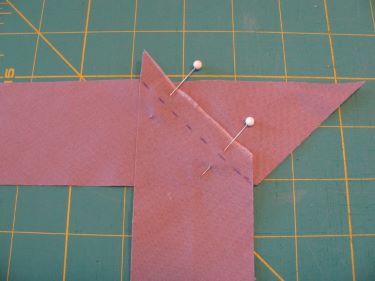
You may need to join some strips together to make the total amount you need. To do that, position them like I have them in the photo below. Since I am using a 1/2″ seam allowance on these strips, I will move the top strip up 1/2″ like shown in the photo below. This may look strange, but you’ll see why it works after you sew the strips together.

Mark a dotted line 1/2″ from the edge as shown below. This will become your stitching line.
Stitch on that dotted line. (You may want to pin it in place before you stitch.) You can see the white stitches in the photo below. Trim off the excess fabric.
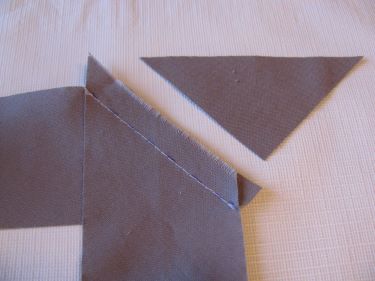
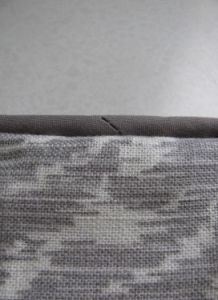
Press the seam open and lay it flat. You don’t have to have the edges perfect. This is close enough because the cording and edges will be hidden inside the piping:
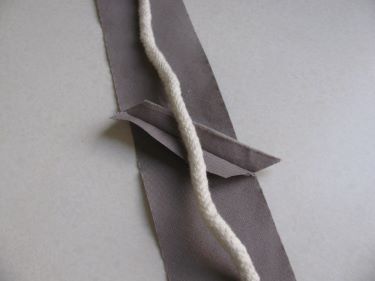
Now, fold the fabric strip over the cording. To clarify, cording is the “string” inside the strip of fabric. Piping is what you call the strip of fabric with the cording inside, after it is stitched up. Place the cording down the middle of the strip and fold the strip over the top and pin it. Now you are ready to sew it to your project.
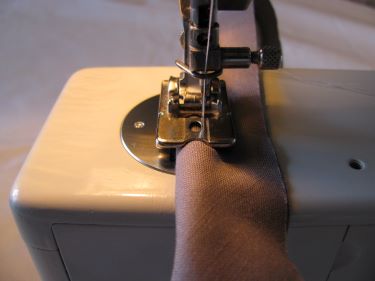
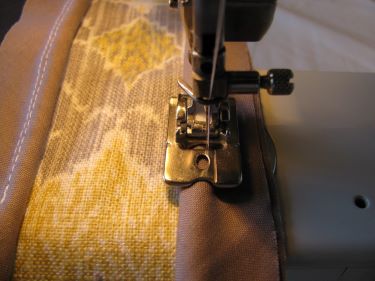
First, I like to baste the cording into the strip. You can use a zipper foot like this. You’ll want to make sure you move your needle to the far left position and stitch as close to the cording as possible.

However, if you have a cording foot, I like to use that instead. You can position the cording over the middle of the indentation in the foot and then move your needle to get it close tot he cording. I think it gives a more professional and snug fit, but if all you have is a zipper foot, then by all means use that. On this cording foot, you can see that I used the needle position 2 positions to the right of center:
Begin by starting your stitching about 3 or 4 inches from the end of the strip. We do this because we will join the ends of the piping together once you’ve sewn it all around the perimeter of your project. I’ll show you how at the end of this tutorial.

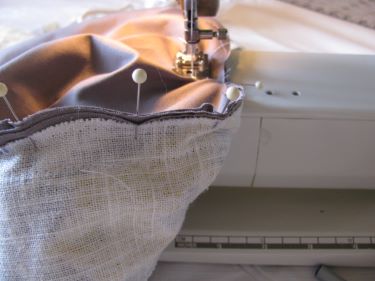
When adding piping into your project, always start at the back of the cushion, dress, or bottom of the pillow. Don’t start at the corner or the front of a project. Even though you are going to make a professional looking seam when you join the ends together (I’ll show you how below), you still don’t want a seam to show.
You are now ready to stitch the piping to the top piece of fabric.
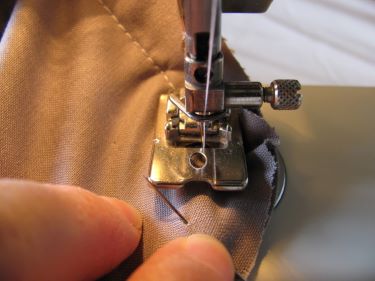
When stitching the piping to the main fabric, make sure you stitch the piping with the needle as close to the cording as possible, moving the needle just one position to the right. You don’t need to take out the first row of stitching. That will be hidden underneath in your project.

Remember how you left about 4″ at the beginning of the piping open?

You’re going to sew all the way around the cushion and stop stitching when you get about 4″ from where you began stitching.
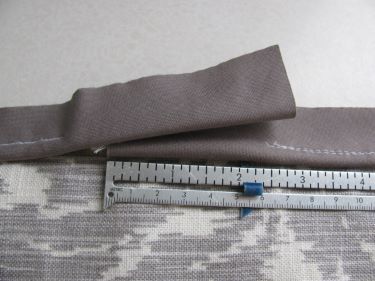
Because your piping strip is 2 inches wide (if you unfolded it now), you will overlap 2 inches just like the photo below and cut the ends of the strip as well as the cording inside:
Open up the piping strip. and lay it flat so the right side of the fabric is facing up.

S

Stitch where the pins are situated across the strips:
Before you trim the seam, fold up the connected strips and see how they lie against the fabric. If you are happy with that, trim the seam allowance on the joined strips.

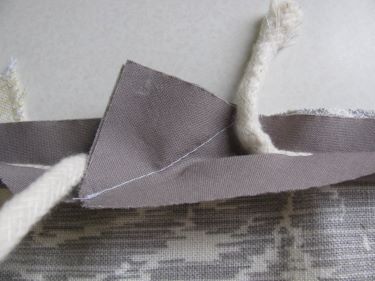
Open up that seam again and cut the edges of the cording to butt up against each other.

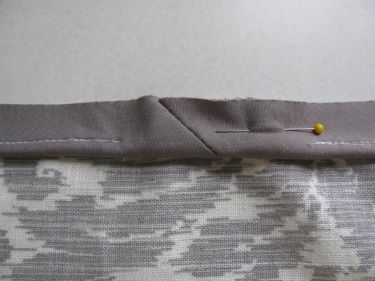
Pin and stitch the piping in place:
I sometimes stitch the piping down with a second row of stitching, getting even closer to the cording on the second pass.
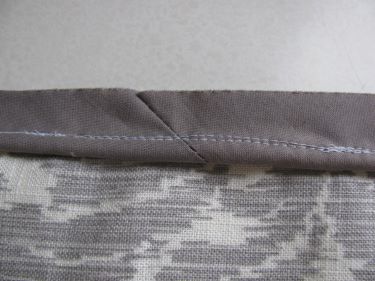
Turn the piping to the right side and it should look like this:
If you are making a cushion that has piping along both the top edge of the cushion and the bottom, let’s keep sewing!
Add the second edge of piping to the other edge of the cushion strip right sides together. Once you have joined the edges of the piping all along the entire edge of the cushion, you’ll need to sew on the cushion top (the fabric piece that you will sit on)
When you need to add a cushion top that has curves like a T-shaped cushion, or you just have a rectangular shaped cushion, pin that curve (or 90 degree angle) well before you sew.
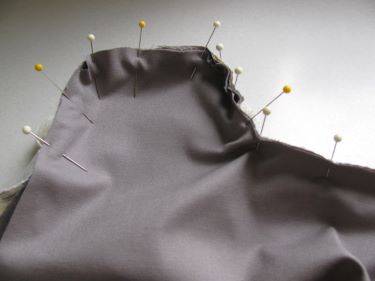
You are going to stitch a few stitches around the first curve, lift your presser foot and turn the fabric just a little. Then lower your presser foot and stitch about 3 more stitches. Then lift the presser foot and repeat until you’ve sewn all around the curved area.
As you sew, make sure you smooth the fabric underneath so you don’t get puckers. Go slowly and you’ll surely have success!
Your stitching should make a smooth curve. If not, take out any stitches you need to and stitch again. It should only take a minute or so to correct.
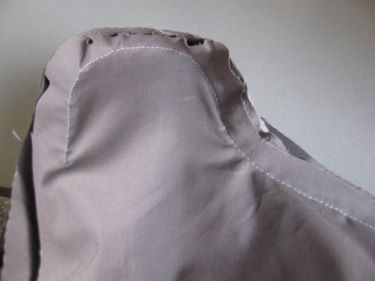
Check the back of the cushion strip to make sure there are no puckers before you move to the next step
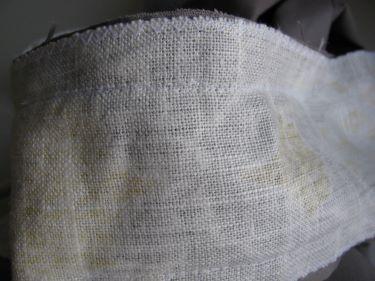
Even though there are no puckers, the curve or corner is probably not going to lie flat:
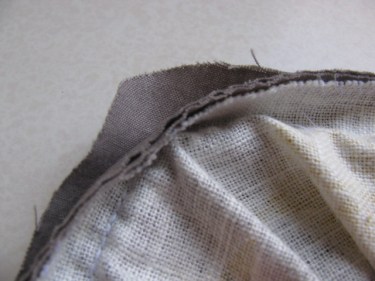
To remedy that, you’ll want to clip a few little snips into the fabric, with your scissor tips, right at the corner or curved edge so that the piping lays flatter, like this photo shows below. Be careful not to clip through the seam you just made. Clip close to it, but not through it.

Next, you will lay the bottom main fabric piece (in this case the bottom piece of the cushion), right sides together to the piping piece and stitch it all the way around the cushion (or the pillow, or whatever your project is).

Again, make sure that nothing puckers underneath while you sew.
If you are not going to put in a zipper, read this post on how to put the cushion together. It will teach you in more detail about how to sew the middle strip into your cushion. The instructions are very detailed and the photos are too!
If you want to learn how to put a zipper in your cushion, I’ll link this post soon!

How do I stop the material from twisting around the foam once we sit on the bench
Please send me a photo so I can see where it is twisting. I would love a photo of one of your corners from the view of the edge so I can see what happened. Thanks!
I know a lot of time has passed now, but for anyone else who might stumble upon this post like I did ….
Regarding Anon’s question above, I am wondering if maybe the fabric was twisting around the foam because there wasn’t a layer of batting or Dacron wrapped around the foam? The foam might be gripping onto the fabric and pulling.
I have an expensive long dress with a fishtail bottom in a lacy fabric with attached lining. I am a 5′ 3″ and purchased in a hurry…… for a Christening. How do I shorten the hem please? I made a fold-over further up the hem which bluffed me through the day and have now unpicked. My local tailer wants a fortune to carry out this alteration and I shall not pay anybody else if I can succeed myself…..
Yvonne
Hello Yvonne, I’m not quite sure what you meant by the word bluffed, but could you send me a photo of the lower half of your dress so I can see what you’re asking about? Also, let me know when you need to have this sewn by. Thank you!