
If the hem of your pants are frayed, torn or worn out, don’t throw them away!
They might be athletic pants made of nylon, stretch knit pants, cotton dockers, or dress pants.

Whatever the fabric, you might think they are not worth saving, but I want to teach you how to fix a ripped hem and double the life of your pants!
The example I am going to use is with a pair of nylon athletic pants that I received from a gentleman. These are warm up pants and the fabric is sort of like backpack fabric, but not ripstop nylon. It’s a little thicker than that.
This technique can be used on any type of fabric or pants you have.
(However, if you have jeans you’d like to shorten, check out this post on “How to Hem Jeans Using the Original Hem.” )
Now, let’s look at how to fix that ripped hem!
There are 3 main ways you can fix this hem:
1. You can just cut off the ragged edge, turn up the edge twice and stitch in place. The only trouble with this method, is that you lose alot of length in the pant.
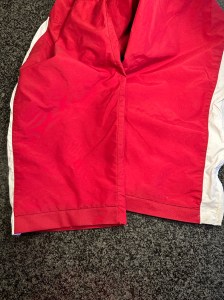
2. You can pin some extra fabric behind the holes and tears and use a tight zig zag stitch to stitch around all the jagged edges. This is the fastest way to fix the hem, but this might not be the look you were going for. See the jagged edge in the photo below?

If you were to stitch that jagged edge with a tight zig zag, it might look strange, but it would get the job done. The photo below shows what I’m talking about:

3. The third way is to cut away the ripped section and add in a piece of matching fabric, but the extra fabric is cut and sewn in such a way as to blend in with the pants and look natural.
The finished hem will look like the pants in the photo below. Doesn’t that look much better than a torn edge?!
Let’s get started!
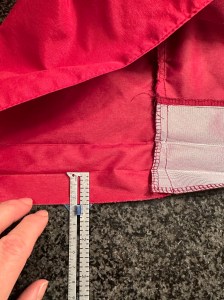
To fix these pants, first flip the pant leg to the inside and measure the opening where the rip is.

In the photo below, you can see I am measuring from side seam to side seam, across the back edge of the pants. The front edge was not affected, so we will leave that intact.
As you can see by the measuring tape, the width is about 9 inches across (from one side seam to the other.)

Next, measure the height of the hole, which in this case is about 2 inches. (But I need to add an additional 2 inches because I have folded the hem up on the fold lines in the photo below. I folded it up to see just how much fabric will show on the new hem.)

So, I will cut a rectangle of matching fabric about 5″ x 11″ just to be safe.
Now, find some fabric that matches as closely as possible to the main fabric of the garment.
I looked everywhere for some nylon fabric to match these pants, and I couldn’t find anything close enough. Thankfully, I found a 100% cotton fabric that is very close in color.
This fabric was a little flimsy and thin, so I ironed on some interfacing to the wrong side of the fabric to stiffen it and make it more durable.
Tip: Cut your interfacing a little smaller than the rectangle so that you have less bulk at the seams. That is true when you make any garment as well. I like iron on knit interfacing the best! I use it on everything that needs interfacing!
I also like to serge the edge of the rectangle to keep it from fraying.

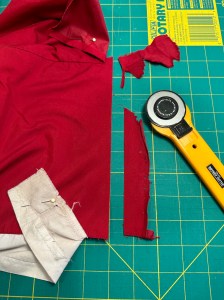
Unfold the hem and rip out the side seams about an inch higher up the leg than where the top of the rip is. This gives you access to the ripped fabric, so you can cut it out.

Fold back the side seam edges so they are out of the way. Cut off the ripped area, taking only what you have to and leaving as much of the pant length as possible. Be careful not to cut the pant itself. I use a straight edge ruler when I cut, so use one if you have one.
Take your new rectangle (with or without interfacing attached) and pin it right sides together to the lower edge of the pant along the newly cut edge, as shown below:
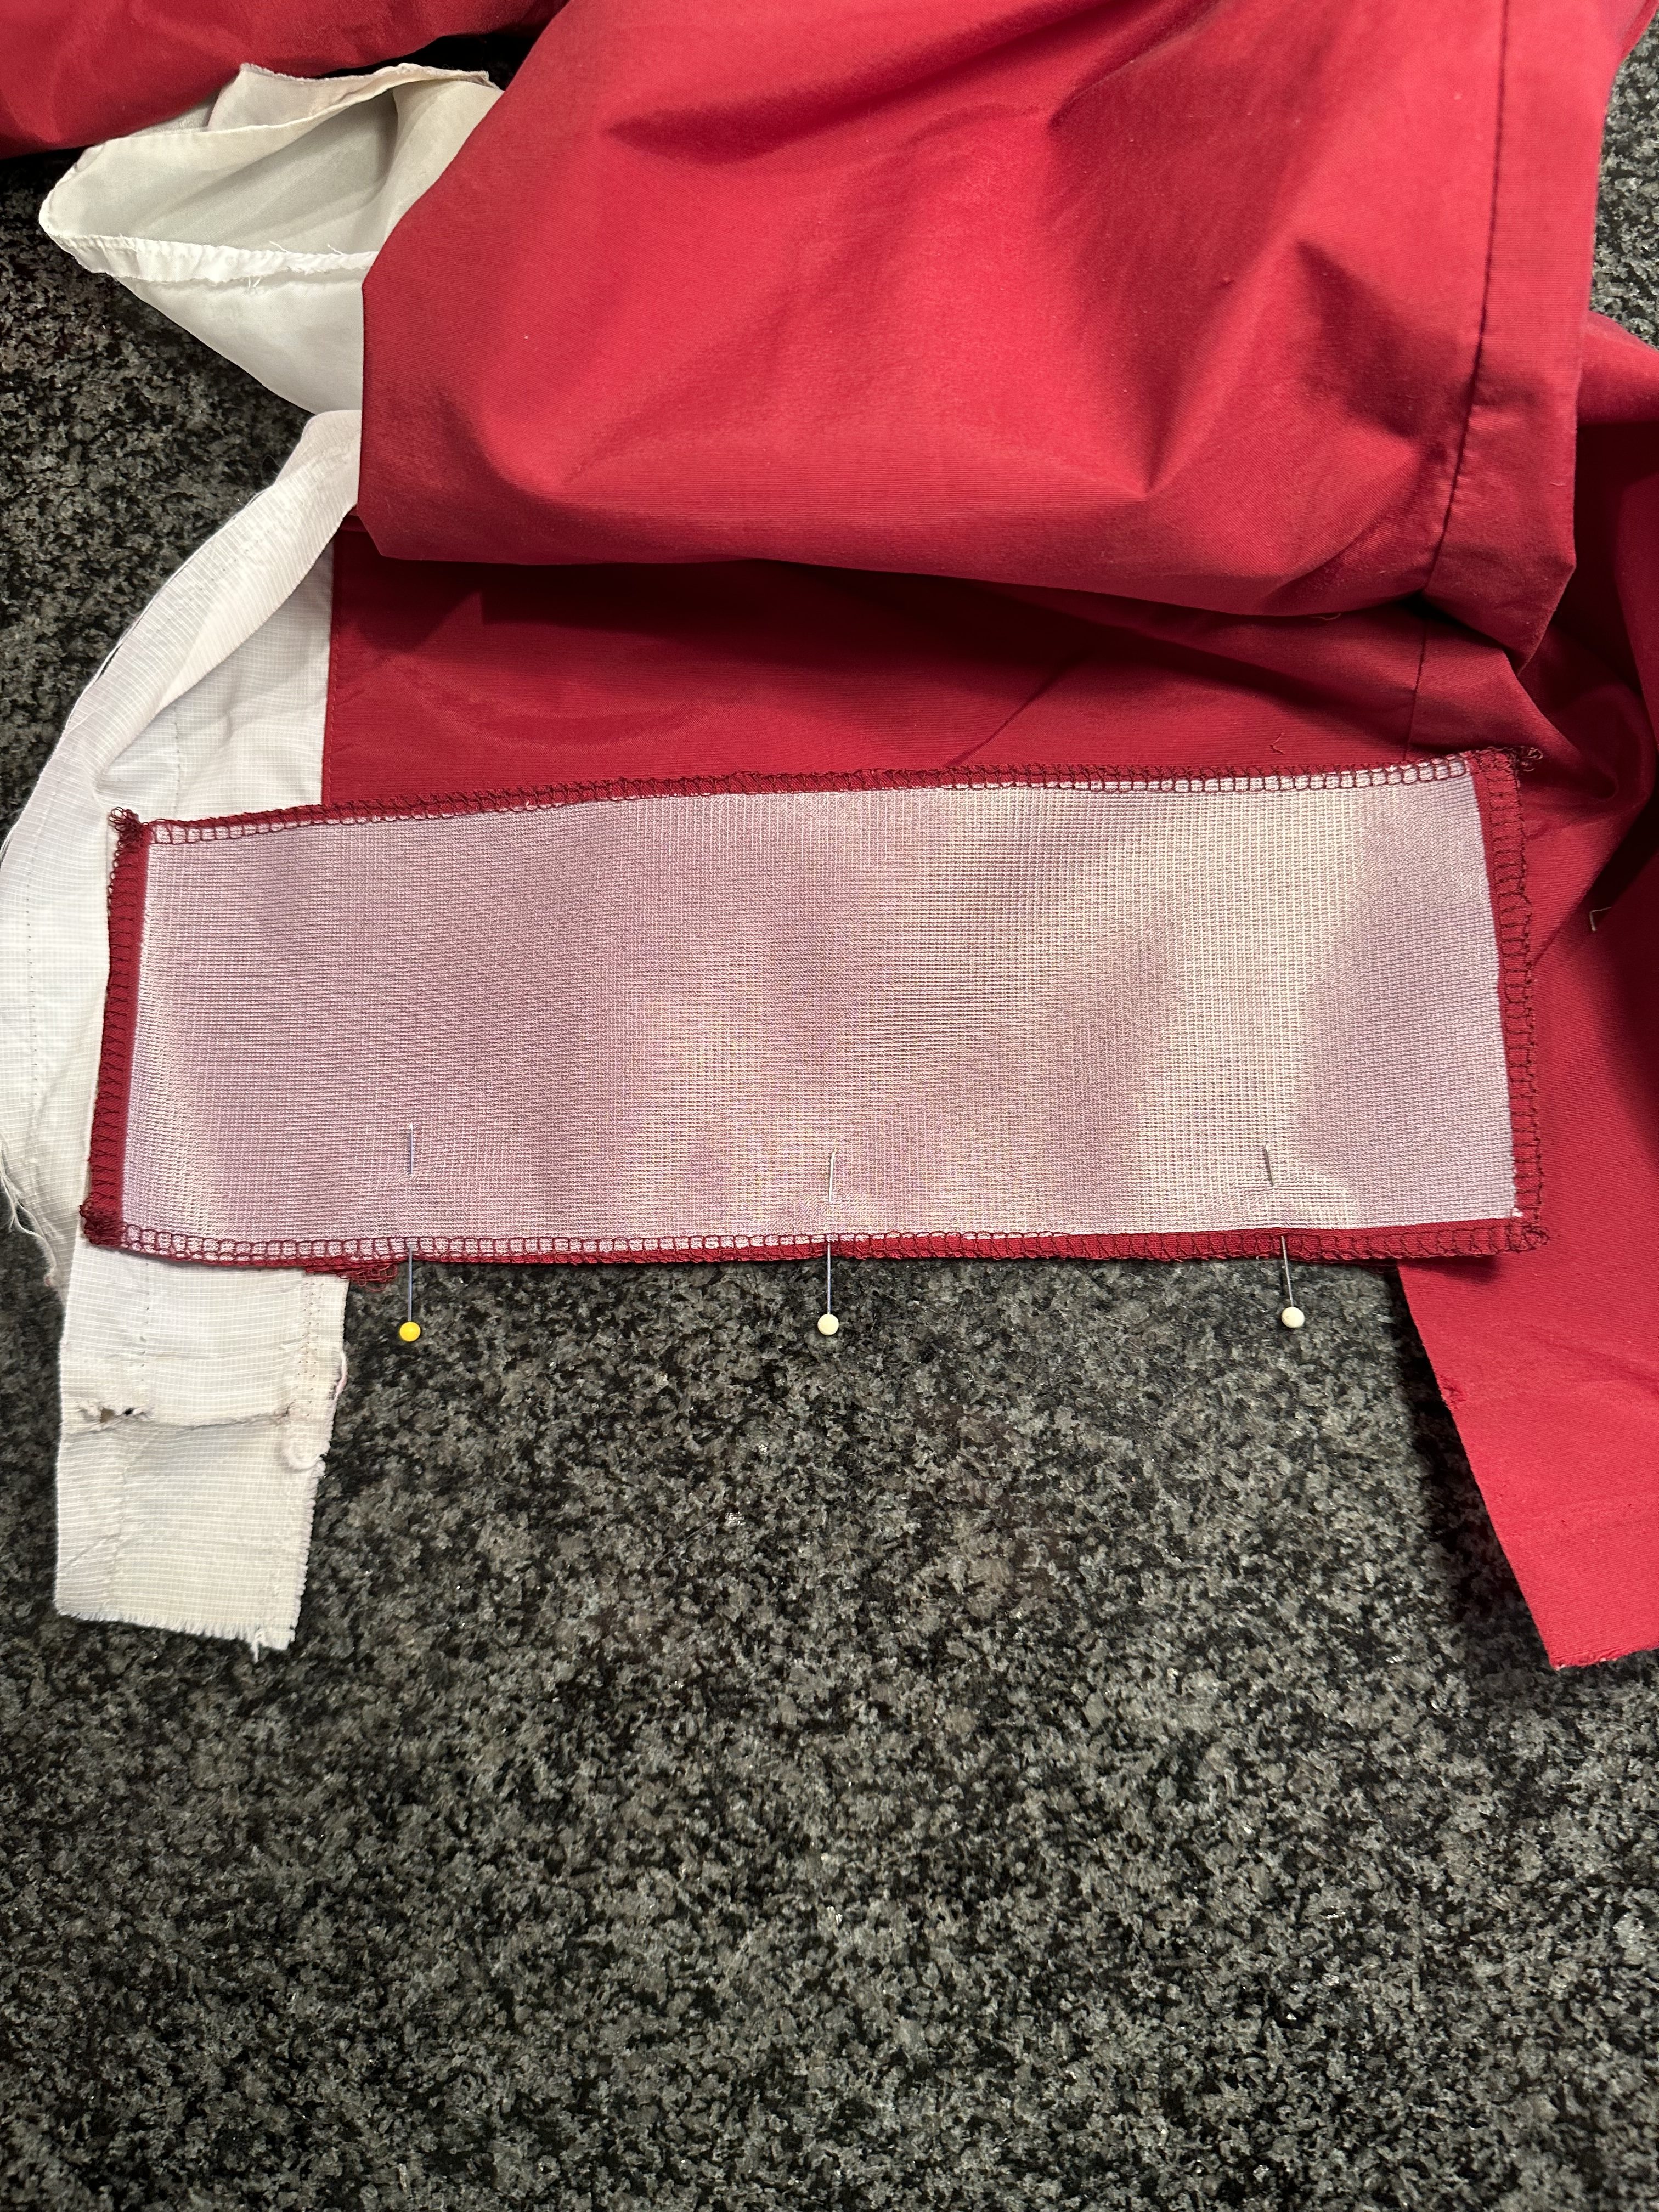
Make sure the side seams are spread out flat when you sew and stitch across that straight edge. I’ll use a 1/4″ seam allowance here. The pins in the photo below point to show you where the side seams are spread out. Once you’ve stitched that straight seam, press the seam toward the pant leg.

Now fold down the pant leg down over the rectangle. (Because your rectangle was bigger than the pant leg, the side seams won’t match. The rectangle will stick out beyond the hem of the pants. You want the side seam of the pant to be parallel to the side edge of the rectangle).
Stitch straight down along the original seamline, using the original seamline as your guide. The stitching line should run vertically right between the pins in the photo below.

The seam is the one running down the middle of the following photo:

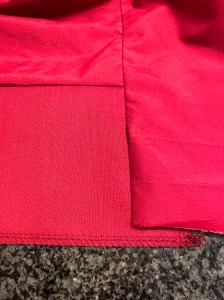
You can trim off that excess edge on the right side, if you want to.
Now turn the pant leg to the right side. Press the area flat as shown below. It doesn’t matter if the lowest piece of fabric sticks out or not. That is the rectangle that you made too big on purpose. You can trim it later if you’d like to.
Stitch the other side seam the same way. You can see the red thread stitches running vertically through the white fabric in the photo below. You can see where the stitches began because I did not cut the red thread yet.

Turn the side seam over and press it well.

Unfold the hem on the front of the pant now and you’ll see that the original hem is 1″ in depth to the first fold line.
When you fold it up again, (as you see in the photo below), you can see that the interfacing shows and we don’t want that for 2 reasons:
1. If we stitch on the original stitching line, the fold of the hem won’t be caught in the stitching and the hem will flop down.
2. It doesn’t look nice to have that interfacing showing!
YOUR pants hemline might line up just perfectly. It all depends on how much fabric you had to put in to cover the ripped edge of your pants.

I needed to pull out the top fold of this hem and make the hem at 1 1/2″ in depth, instead of 1″.
To do that, just pull out (and up) the amount of hem you need to cover the interfacing and press it again.
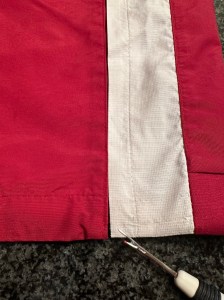
****Side note: If your pants have a zipper on one of the side seams at the bottom of the pant, be sure to match the bottom edges before you stitch down the hem. (On these pants, the opening is where the red meets the white, where the point of the seam ripper is pointing to).
Then, on the right side of the front of the pants, stitch along the original stitching line. This should hold the hem in place.
On the back of the pant, stitch in the “ditch” which is the place where the 2 fabrics meet. That way, your stitches will be hidden in the crease or “ditch”.
In the photo below, the back of the hem is on the left side of the side seam, and the front hem is on the right. You can see 2 different lines of horizontal stitching. The back is “higher” because of the rectangle I added.

To further explain this….When you look at the wrong side of the pants hem (in the photo below), you can see that the red “upper” hemlines don’t line up at the side seam, and that’s ok because the lower edges of the pant are a straight line, basically. (There is a little spot where I had to tightly zig zag over a hole to keep it from getting bigger, but the rest of the hemline is straight.)
You can see that these pants have a white lining inside.
****If your pants have lining and the bottom edge of the lining is ripped, do the same technique and add in a rectangle of fabric to fix the lining, just like you did to the outer fabric. My added white lining rectangle is found on the right side of the pants in the photo below:

In the next photo below, you can see the entire inside leg and how I pieced in red fabric and white fabric to achieve a new hem for these pants.
Again, the bottom edge of the pants are one continuous line and that’s what we care about and that’s what people will see.

When I flip the pants to the right side, the hem looks much better than it did when we started!

And we have doubled the life of these athletic pants!
You’ve just learned how to repair a pair of pants with a torn hem. This method can be used to fix anything that is torn whether it is a garment or something around your home. If it is something that the dog chewed up, check out Mending What the Dog Chewed Up, Part 1 and Mending What the Dog Chewed Up, Part 2!
Give this technique a try and send me pictures of your finished pants. I’d love to see and hear about your experience. I’ll post it to my Instagram, if you’d like, so you can inspire other sewists to give it a try!
Now, go enjoy hanging out in your “new” pants!
