Once in awhile, a dress comes along that is too long in the bodice length and it is just plain uncomfortable to wear. It feels big and baggy and droopy. In this alteration, I needed to raise the waistline in order to make the dress fit better.
(There were some other alterations that needed to be done on this dress, but I will link other posts for those below. If this is not the exact alteration you need to perform, please read anyway as it should be helpful in altering any dress where you don’t want to, or can’t remove the zipper. In fact, it might be really helpful to read the entire post before you begin doing the alteration.)
Right now, let’s learn how to alter a dress without taking out the zipper to solve this dilemma.
This dilemma can happen with any type of dress that has a horizontal waistline seam.
Dresses that have the horizontal seam just under the bustline are said to have an empire waist. This was very fashionable in the early and late 1800’s. It was also in fashion in the 1960’s. I remember wearing dresses that had an empire waist. In fact, I actually made a floor length dress with an empire waist. The fabric had a white background with countless smiley faces in bright colors printed all over it. To this day, I still remember how much that fabric made me smile!
Let’s say you or your customer buys a dress off the rack and it is just what you or they want, but the horizontal seam is just too low. That can mean that it falls just under the bust or it could fall below the waist or even below the hip too low. Wherever it is, it feels like it needs to be raised.
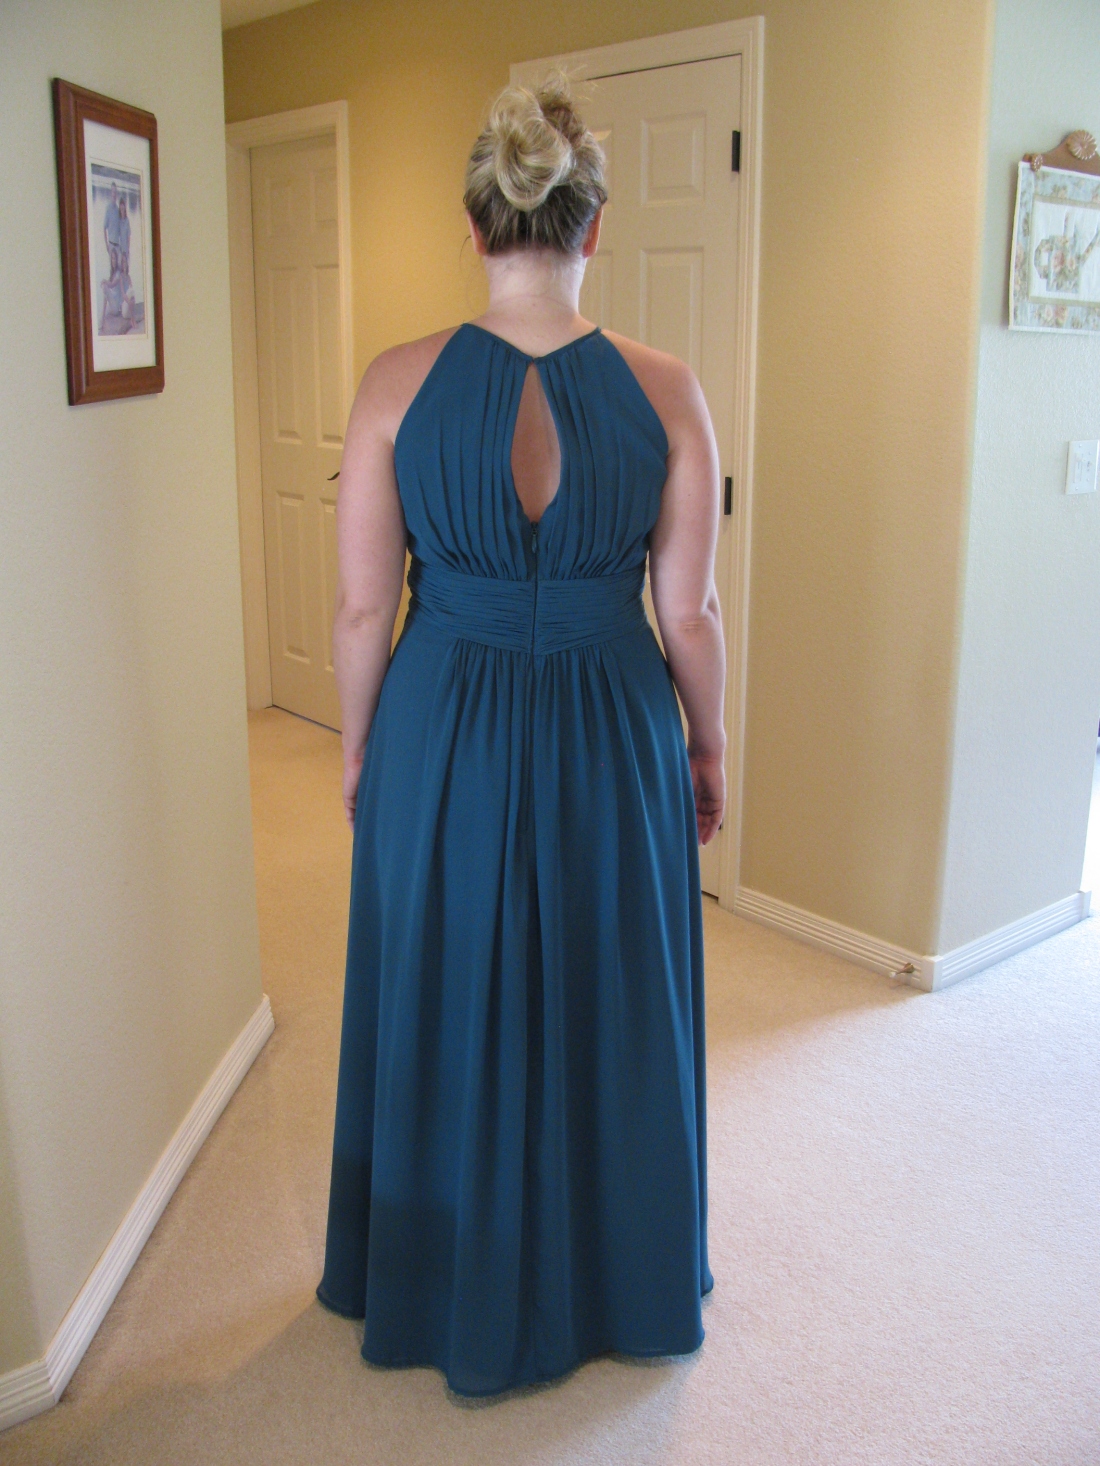
Let’s look at one such dress. This is a bridesmaid dress.
(As I mentioned, I had to do other alterations on this dress, including taking in the side seams and bust. So, the pinned sides that you see in the photo are not part of this post. Here is How To Take in the Bust on a Dress or Top. I also hemmed the dress and I have written 3 posts on sewing hems in formal wear: Rolled Hems, Rolled Hems..Another Method, and How To Sew a Partial Hem, if you don’t need to hem the entire dress. There are also many other posts on hemming in general.
At first glance, this dress looks like it fits pretty well in the bodice, but it was too low for this gal’s liking.

First, we figured out how much she wanted to raise the waist line. She figured an inch would make the dress feel much better. It’s always good to pin up or pinch up the amount in question and see if the customer likes the amount you’ve taken up. This is true for any alteration. Pin as much as you need to help them make an informed decision.
This dress had a back zipper that was sewn into 5 layers of fabric, and two of those layers were gathered. Your dress may not have that many layers that feed into the zipper. But this one was intricate. The vertical fabric was three layers and the horizontal gathered waistline area was two layers thick. This dress also had an underlining fabric:
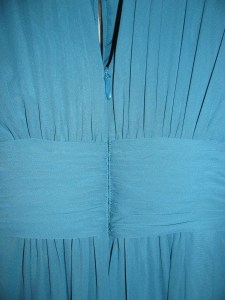
This meant (for me) that it was too many layers to remove the zipper and try to stitch it back in well. There’s almost no way I could get all 6 layers to look this good and matched up perfectly again.
If you are only working with one or two layers, you can take the zipper out, do the alteration and put the zipper back in and it wouldn’t take long at all.
Or, you can take the zipper partially out, (either above the horizontal seam or below it), do the alteration, and sew the zipper back in.
In my case, since it was too much work to take the zipper out, I am going to show you how to take up the waistline without moving the zipper!
This will be a two part alteration, but one that is not difficult.
To begin the alteration, I turned the dress inside out between the first and second layer.
There were 4 pieces of boning and two bra cups that needed to be removed to make the job easier.
When doing this alteration yourself, be sure and mark the bra cups and the boning in such a way that you get each piece back in correctly…the correct end up and all pieces facing the same way they faced when you took them out. Pay attention to how they are sewn in so that you can attach them the same way after you make the alteration.
If you’ve never done an alteration that involves boning, you’ll want to read this post on How to Fix Boning Issues. It will explain this in an easy to follow manner.

Once I removed the cups and boning, I began to mark the interlining of the bodice one inch higher than the original seamline. Mark dots with a pencil or a chalk marker at the measurement you need on your dress as shown in the photo below.
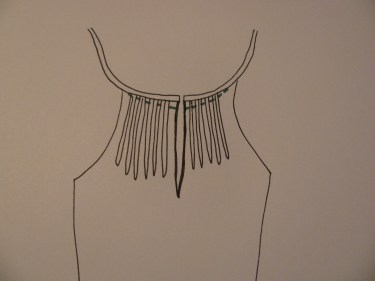
Since you will not be taking apart the zipper area, taper your one inch line gradually between the zipper area and the side seam. I start tapering that line about three inches out from the zipper:

Here is what it should look like based on the diagram below. The dotted line represents the new waistline:
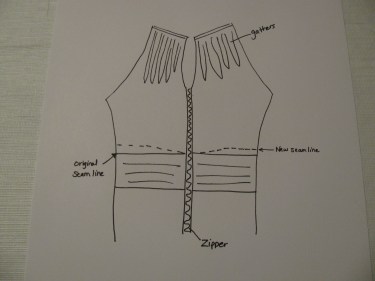
You’re going to make that new seam line taper more smoothly than my diagram, but this drawing was to give you the concept. We will deal with the zipper area soon.
Once you have the new seam line marked, begin taking out the original seam line starting about an inch or two away from the zipper, using a seam ripper. Don’t take out stitches that are too close to the zipper because it will be too difficult to stitch that close to the zipper when you finish the alteration. Backstitch the area on both sides of the zipper so the seam does not come undone while you are working on it.
Pin the lower section of the dress up to match the new seam line by lining up the lower section’s stitching line with the new seamline you’ve drawn. Stitch, using the original stitching line of the skirt as your guide.
Trim away the excess fabric to reduce bulk.
Stitch the boning and bra cups back into the dress and make sure the boning lays correctly against the dress.
Having done that part of the alteration, we need to address the center back of the dress. Remember, since the center back was not altered because of the zipper, it will hang a little longer and we don’t want that.
Let’s fix that problem now.
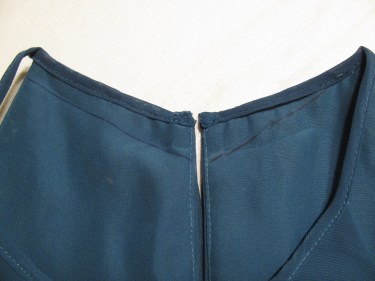
We are going to turn the dress right side out so you can see where the next step of the alteration takes place. It will occur at the center back neck area of the dress.
This dress has a slit at the center back, meaning there is a right back and a left back. (If the back piece of your dress is one piece (with no zipper), the alteration concept is the same. You will alter the center back area as a whole.)

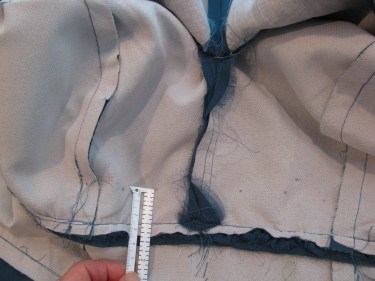
Here is a closer look at one of the side backs of this dress:

If you need to have the customer try the dress on again at this point, do so. If not, just pin up the excess fabric at the center back and taper out to the sides as needed for your customer. Both sides of the dress may not look the same. That is the case with this dress.
I took a seam gauge and measured both sides of the pinned up fabric for an accurate measurement. Where this pin is located, I will take up 1/2″ plus 1/2″ for a total of 1″. (The seam gauge shows 1/2″ and then there’s an additional 1/2″ on the back side of the pinned up area, that’s why we are taking up 1″).

This diagram will show the concept:
Transfer the new seamline onto the inside of the dress:
Once you get the new seam line marked, stitch along the dotted line that you made with the markings. (Be careful not to stitch on the trim edge. The trim is the extra piece of fabric that goes along the top edge of the neckline. It might look similar to bias tape. Some dresses won’t have this. They may have facing instead. In that case, shorten the facing in the exact same way as you shorten the neck edge.)
Next, carefully, take out the stitches on the trim piece of the neckline as shown below. If you don’t have to remove the whole edge, don’t! The less sewing you need to do after the alteration, the better.
(You may have to take off hook and eyes as well.)
Trim the edge close to the new stitching line so you don’t have alot of bulk when putting the trim back on (or if you have facing, it’s going to lie down better if the bulk of the fabric is cut off. Don’t get too close to the stitching however!)

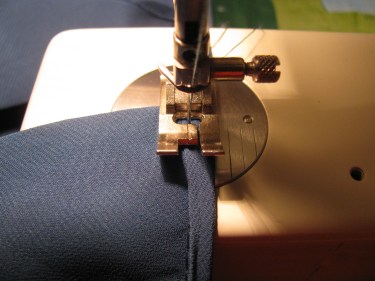
Next, stitch the trim piece to the new stitching line:

Next, attach the remaining trim by hand or machine. Put on any hook and eyes if necessary.
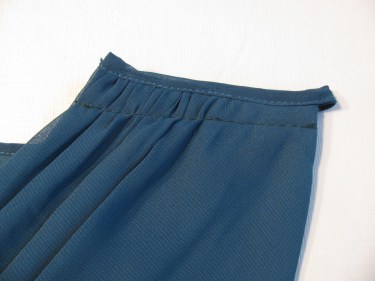
You can now see that the bodice fits more snugly than in the original photo at the beginning of this post. (I don’t like how the cup fits on the right side of the dress, so I’ll want to re-sew that in so it lays better.)

And here’s how the back looks. (The side seam alteration was also done so that you can see how the dress looks completely finished):

Now, you might be asking the question…”What if my dress has a zipper that starts at the top of the dress and reaches to below the waist. How do I do that alteration?”
The answer is that you might need to take out part of the zipper (from the neck to the waist) to make the waist alteration. If you do that, now your zipper will be too long when you go to sew it back in. Just shorten the zipper at the neck area (but don’t cut it off until you’ve sewn it back in. Be sure to put in “stays” at the top so your zipper tab won’t come off. To do that, just stitch a bar tack using your sewing machine and stitch across the area above the zipper teeth at the top.
If you have any questions, please email me at “The SewingGarden@gmail.com.
You can see how easy it is to complete an alteration without taking the zipper out. I will always leave a zipper in, if there is another way to accomplish the alteration!! I hope this gives you confidence to try this on your customer’s dress!

Love your instructions and love your work!
Aww, thank you, Tanya! I really appreciate your kind words and I’m glad you love what you see!
Great job!
Thanks so much, Debora. I really appreciate your feedback!
In ready made menswear pants I usually take out extra fabric from the back panel crotch area and then taper down to thigh area (12″). I’ve never had any problem from my clients. I did alterations for 31 years in a menswear store. Maybe I might give this method a try.
Readers: This is Linda. I tired to get this comment moved over to the post on How To Take in the Crotch Seam on Pants, but I am not able to move it there. If you’d like to read the post, click on this link…https://thesewinggarden.com/2012/07/07/how-to-take-in-the-crotch-seam-on-pants/
Wow, 31 years in menswear, that is something to be very proud of! I think this alteration would be so much easier on men’s pants than women’s because of the way men’s are constructed. Thank
you for sharing this with us. I would like to give it a try!
I have been doing alterations for 40 plus years here and there 🙂 I opened my business in 2006. Your information/instructions are VERY good 🙂 I ALWAYS give my bridesmaids/prom/brides/etc the OPTION for alterations. Sometimes the sides/waist/etc can cost up to $100 for a bridesmaid or prom. MUCH higher for a bridal gown. That is the charge for THOSE items alone…. HEMS might be an additional $100 for a bridesmaid gown. They USUALLY decide to be HAPPY with the bodice fit-AS IS-unless it is REALLY LARGE. We can put some bra cups in there for $20 and it FITS good enough for a wedding 🙂 YES-MENSWEAR is MUCH easier to alter than general street clothing. HAPPILY 🙂 🙂 I am SEW busy with bridal and formal wear these days I am doing NOTHING but those items until I retire in 8-10 years 🙂 I LOVE my job 🙂
Thank you for your kind comments! That is a big goal for me…to provide great instructions and information to all who visit this site. I’m glad to hear how much you love your job! It is a very rewarding career! Keep up the great work!
When you’re making the last adjustment to the back bodice and you’ve stitched the new stitching line along the back neck, right before you remove the trim and sew it back down, do you cut the extra fabric away? O fold it down? Or am I missing something altogether?
That’s a good question. I forgot to write that in. Yes, you will need to trim away the excess fabric so that the trim will fit back onto the neckline. Or if you have facing, trim it close to the stitching (maybe leave 1/4″) so that the facing will lie down when you’re finished. I like to understitch my facings wherever I can to help it lie down easier. Thank you for bringing it to my attention. I went back and added this information to the post. I hope it helps!
Thank you so much! (•‿•)
You’re very welcome!
more like engineering than art. well done.
Wow, I really appreciate this comment. I think it’s my favorite one ever. I wish my dad were still alive to share it with him. Thank you so much!