
Pillowcases make great gifts for any and all occasions, even as gifts for yourself!
Whether you’re just beginning on your sewing journey, or you’ve been sewing a long time, making your own pillowcases is so much fun and so easy! You can whip one up in less than 20 minutes!
You can find fabric selections for Valentine’s Day, Easter, Fourth of July, Halloween, Thanksgiving and Christmas or a birthday.
No matter what the occasion, I want to teach you how to make easy pillowcases with a French seam. (If you click on that link to the French seams post, it will also teach you how to alter a garment that has French seams in it, so don’t miss that post!)
Don’t be intimidated by making your pillowcase with a French seam, even if this is your first project, because it is a super easy process! I love adding French seams whenever possible because it gives the item a professional look and it keep the seam from fraying wash after wash.
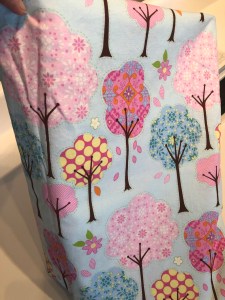
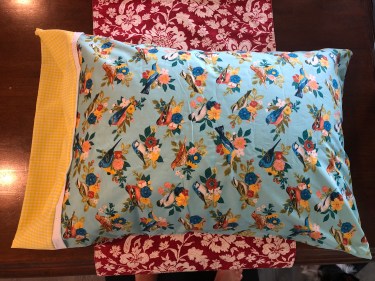
Today, I wanted to share with you a pair of pillowcases that I made recently for two special little girls. I love to use 100% cotton from quilt stores. The quality is much higher than fabric from the big box fabric stores and that means they will last alot longer through many washes!
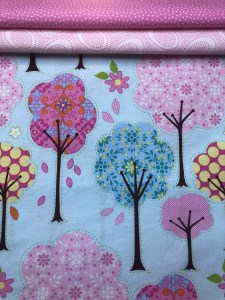
What you want to do is to find the fabric that you want to use for the main section of the pillowcase. With this process, I like to use three coordinating fabrics, so it’s easy to do if you find a main fabric that has lots of color and pattern. That makes choosing the coordinating fabrics much easier.
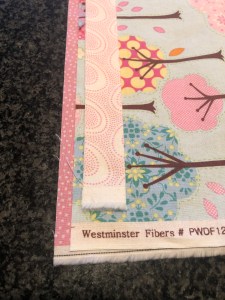
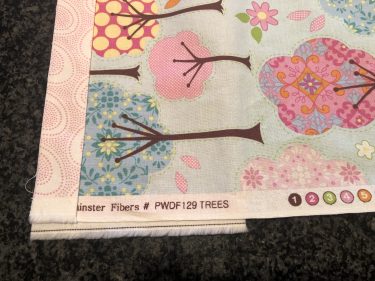
In this case, these 2 little girls live on a homestead surrounded by trees, so I thought this tree fabric was perfect!
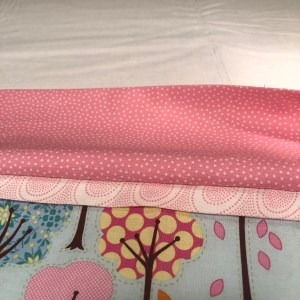
Next, find the 2 other fabrics that coordinate with the first fabric. In this case, I found 2 pink fabrics where one fabric has a tiny pattern on it and the other is sort of a contrasting fabric with a larger print:
For a standard size pillowcase, you will need to buy:
3/4 yard for the main fabric (I like to cut the length at 28″ for the main piece if possible)
1/4 yard for the cuff fabric (the darker pink fabric with the dots in my case)
2″ for the trim fabric (the light pink paisley in my case)
For a Queen size pillowcase, you’ll need 1 yard of fabric cut to 30″ length. For a King size, buy 1 yard of fabric and cut it to 36″ length. (The cuff and trim pieces stay the same measurements as the standard pillowcase.)
Please read through the instructions all the way before beginning to sew. You’ll see that the instructions are detailed especially for beginners, but easy to follow.
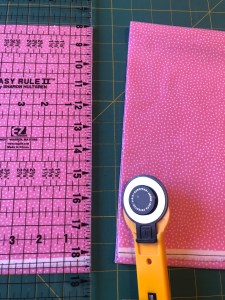
I like to wash, dry and press the fabrics before I begin cutting. That way, if the fabrics shrink, they shrink before you make the pillowcase, not afterwards, which would leave it puckering.
Once, the fabric is ready, I trim off the uneven, frayed edges with my rotary cutter and mat, or you can certainly use scissors.
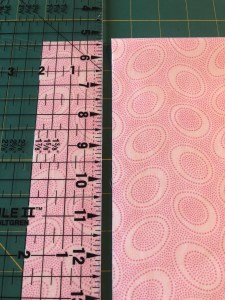
Next, you will trim your main fabric to a length of 28″, if possible. If you only have 27″, that is fine. Your width is the width of the fabric which is about 44″ wide. You’ll leave the width alone.

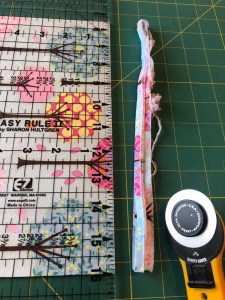
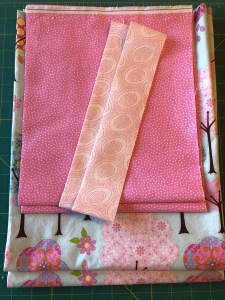
Next, I cut the trim piece 2″ x the width of the fabric and set it aside.
Next, cut the cuff piece 9″ x width of fabric and set it aside.
Since I was making two pillowcases at one time, this is what my cut pieces look like:
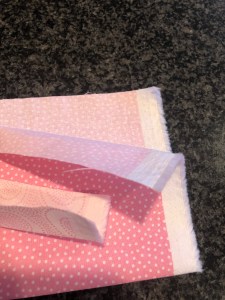
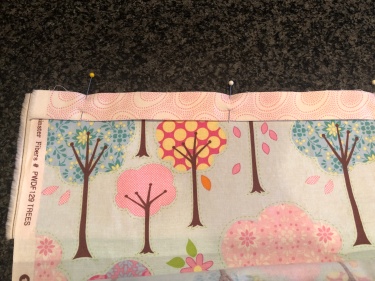
Next, take your 9″ cuff piece and your 2″ trim piece and press both of them in half along the length of the fabric, WRONG sides together so that the best side of the fabric is showing on the outside:
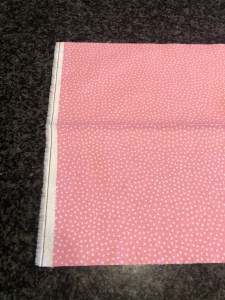
Now, you’re going to layer the three fabrics on a table. Begin by unfolding the 9″ cuff piece and lay it with the right side facing up as you see in the photo below. You don’t see the long edge, but its the long edge you are going to be working with:
Next, lay the main fabric right side up on top of the cuff piece. If you have a one way fabric like mine, just be sure it’s lying in the correct direction on the cuff piece.
Then, lay the folded trim piece (keep it folded!) on top of that. You’ll notice that the widths of the fabric are probably different, and don’t line up exactly, causing uneven edges and that’s ok. We will take care of that discrepancy in a later step.
Next, make sure all the edges are lined up on the trim edge (the vertical edge in the photo below)
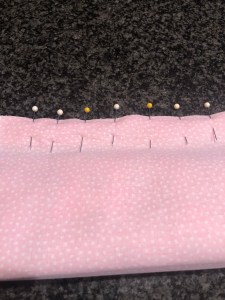
With all three layers matched up, and in front of you like the photo below, begin rolling up the bottom edge of the main fabric. Pin the edge in a few spots to hold it together.
With the layers pinned and facing you as in the photo below, begin rolling up the main fabric as shown:

Keep rolling up the main fabric until you can see the cuff fabric as shown below:

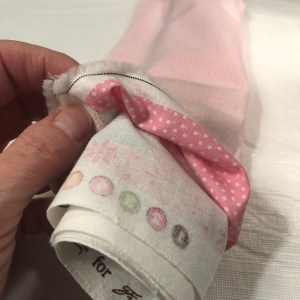
Now, bring the cuff fabric up and over the roll to meet the edges of the other fabric edges:

Remove your previous pins and now pin through all layers:

I like to put alot of pins in to hold it together securely.
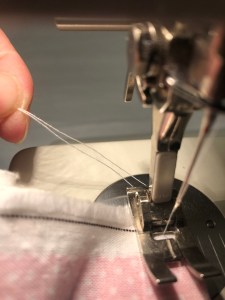
One of the sewing tips I shared in a recent interview with Lisa from Farmhouse on Boone on her Simple Farmhouse Life podcast is that when you start to sew a seam, always be sure to hold the 2 threads in your left hand while you stitch the first few stitches, then let go of the thread and continue sewing.
This keeps the thread from getting sucked down into the machine and jamming the bobbin. Most people stop sewing because they don’t know what causes this to happen. So just get in the habit of it and you’ll have great success!
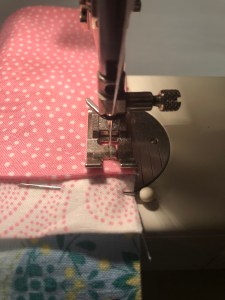
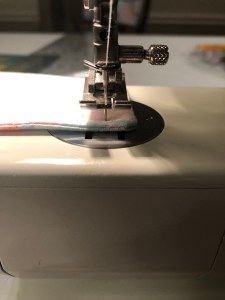
I like to line up the edge of the pillowcase fabrics with the edge of the presser foot as I sew, as seen below.
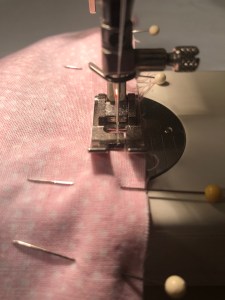
Your seam should have a 1/4″ seam allowance:

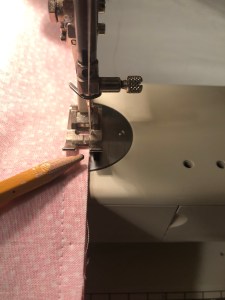
Next, you can zig zag the edge of the fabric or use a serger, if you have one. This keeps the fabric from fraying as the pillowcase is worn and washed.
I like to line up the edge of the fabric to the inner side of the right “foot” of the presser foot, where the pencil is pointing. This helps your zig zag stitch to be even as you sew.
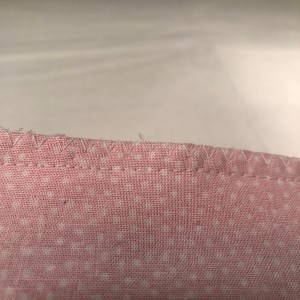
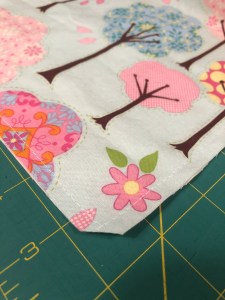
This is what your zig zagged edge should look like:
On my machine, I use a wide zig zag stitch. Your machine should have a zig zag stitch. Refer to your owner’s manual, if you’re not sure how to access it.
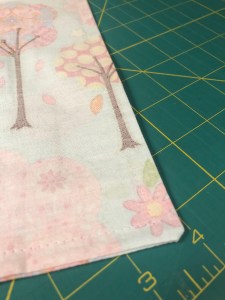
Now you’ll reach inside the tube and turn the pillowcase right side out:
This is what your pillowcase will look like. There will be raw edges of fabric exposed on the sides of the pillowcase, but the 3 fabrics should look like this at the top of the pillowcase:
Smooth out all the layers and press flat.

Press the back smooth as well:

Line up the edges of the sides of the pillowcase and trim off the uneven edges:
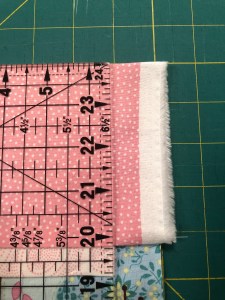
This is what your pillowcase should look like when it’s trimmed evenly:

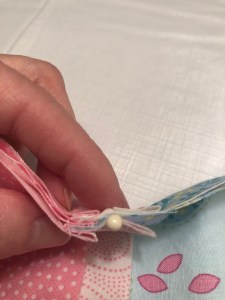
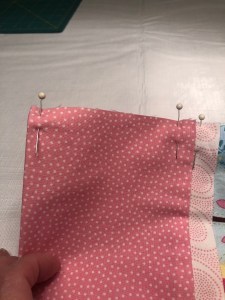
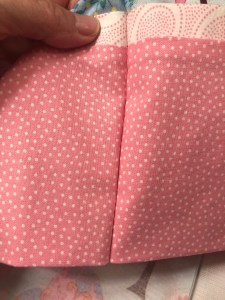
Next, you are going to fold the pillowcase WRONG sides together and match the top edges together and stick a pin in the seam like this:
Pin the edges together all the way down the side and bottom edge of the pillowcase:
Beginning at the top of the pillowcase, start sewing along the side edge, using the right edge of the presser foot lined up with the raw edges of the side of the pillowcase as your guide. You’ll be sewing a 1/4″ seam.
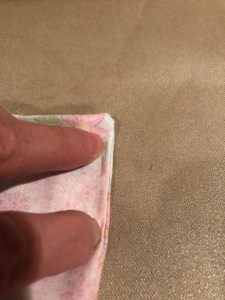
Trim the corner of the pillowcase without cutting the stitched seamline:
Trim the edge to 1/8″. I don’t measure this, I just cut the seam allowance in half. I use scissors here so I don’t make a mistake!

Turn the pillowcase inside out and finger press the edges so they stay down:
Next I stitch a 3/8″ seam. Remember to backstitch to hold the stitches in place and also hold those threads for the first few stitches. My machine has a 3/8″ guide. If yours doesn’t have one, put a piece of masking tape on the edge after you’ve measured and follow the tape to make a straight seam.

When you get to the edge of the pillowcase, leave your needle down in the fabric:

Lift your presser foot up…
Turn the pillowcase 90 degrees like this…

Continue sewing the rest of the pillowcase bottom to the edge and backstitch to hold the stitches in place.
Check to see that your folds line up in the seam. If they don’t take that area apart with a seam ripper and match it up and stitch the area again. You don’t need to rip out the whole pillowcase, just the area where the fabrics don’t line up.
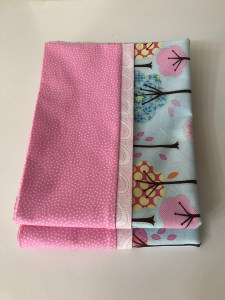
Now all that’s left to do is to press your pillowcase flat

and fold it up nicely, wrap it up and give as a gift!
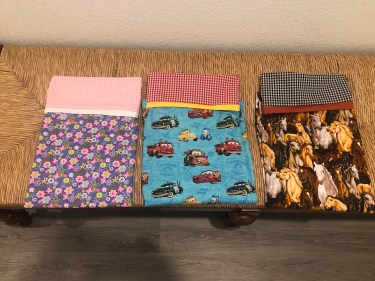
Update: June 10, 2023:
Inspired by the podcast with Simple Farmhouse Life and this blog post, ten year old, Kelcey, made four pillowcase for her niece and nephews and her mom sent me these photos! Didn’t she do a great job coordinating fabrics and sewing these?!! What a great accomplishment. I hope this encourages you to start sewing and may Kelcey enjoy many more sewing adventures her whole life long!!

Thank you, I’m ten and this was my first big sewing project. I think the directions were simple and easy to follow.
Oh, this is such a sweet comment! I’m so glad they helped you! I hope this encourages you to keep on sewing! Please send me a picture of your pillowcase, I’d love to see what you made. My email address is: TheSewingGarden@gmail.com