You’ve seen these blouses everywhere:
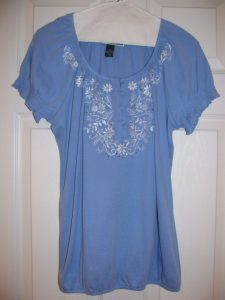
They’ve got elastic around the bottom edge of the top.
Many women don’t like how they look when they wear them because they look poufy and make their hips look too big. When they don’t fit well, they pass up the idea of buying them because they think it will be difficult to fix. But they aren’t difficult at all.
Let me show you how to alter a top with an elastic hem.
First, with your scissors, just trim off the elastic as close to the actual elastic as you can:

I use sharp small scissors to accomplish this task:

Next, turn the hem up the amount you’d like and press it with an iron.
I hand baste the hem as well so that the knit doesn’t slip around.
If you have a woven fabric, you should press the hem up as well.

In addition, if you are sewing on a woven cloth, be sure and finish the edge with a serger or a zig zag stitch first.
In fact, if you have a cover stitch capability on your overlocker (serger), you can use that technique easily and quickly.
But, I am going to show you how to get the same professional look with your sewing machine.
First, look for a spool of thread to match the fabric. It doesn’t have to match perfectly:

On this blouse, I will sew a double row of stitching on the hem.
That means, I need 2 spools of thread but if I don’t have two spools of matching thread, or they are very close in color, I will wind two bobbins from one spool of thread, because….

one bobbin will be used in the bobbin case and the other bobbin will be used as the second spool of thread.
Next, you’ll need a double stretch needle.
They look like this:

Put the spool of thread on the first spool pin and the newly wound bobbin on the second spool pin. (or use two different spools of thread if you have them).
To thread your machine with two threads, treat them as one thread and thread them through the thread guides according to your machine manual until you get to the needle area:
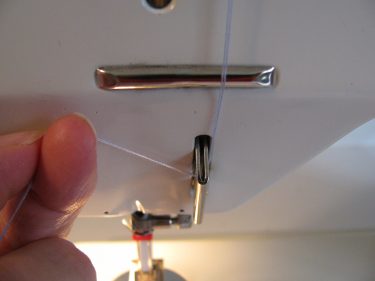
Then, thread one thread through each needle. One thread goes through the left needle and one thread goes through the right needle:
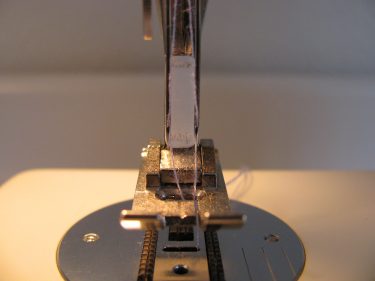
Stitch the hem, keeping the right side of the shirt facing up so you can watch to make sure you are stitching straight.
If you turn the hem over, you can see that the bottom threads form sort of a zig zag stitch. This keeps the edges from fraying and looks nice on the under side of the blouse.

As you can see, it doesn’t take long to convert your hem and it looks great!:


Great idea! Looks much better and I bet it looks nice on you.
Beth
Great tutorial – thanks!
You do nice tutorials, Linda.
I sometimes use wooly nylon in the bobbin, only because some of my ladies buy more fitted t-shirts and they like even more stretch in the hem.
Thanks for taking extra time to share this with everyone.
Judy
That’s a great idea, Judy. Thank you!
You are a sewing hero! Thanks so much! Perhaps we need to make you a cape!
That’s funny! I use that cape comment a lot myself!
Does the double-thread hemming technique work with any straight-stitch machine? If so, that’s fantastic! Is there any special approach to keeping the stretch? I see Judy uses “wooly nylon.” I’ve never heard of it.
Yes, it should work on any machine. I have not used the wooly thread, but it sounds like a great idea! Thanks for your kind comments.
You just have to be sure your machine and throat plate will accept the twin needles which are available with different distance between the needles,