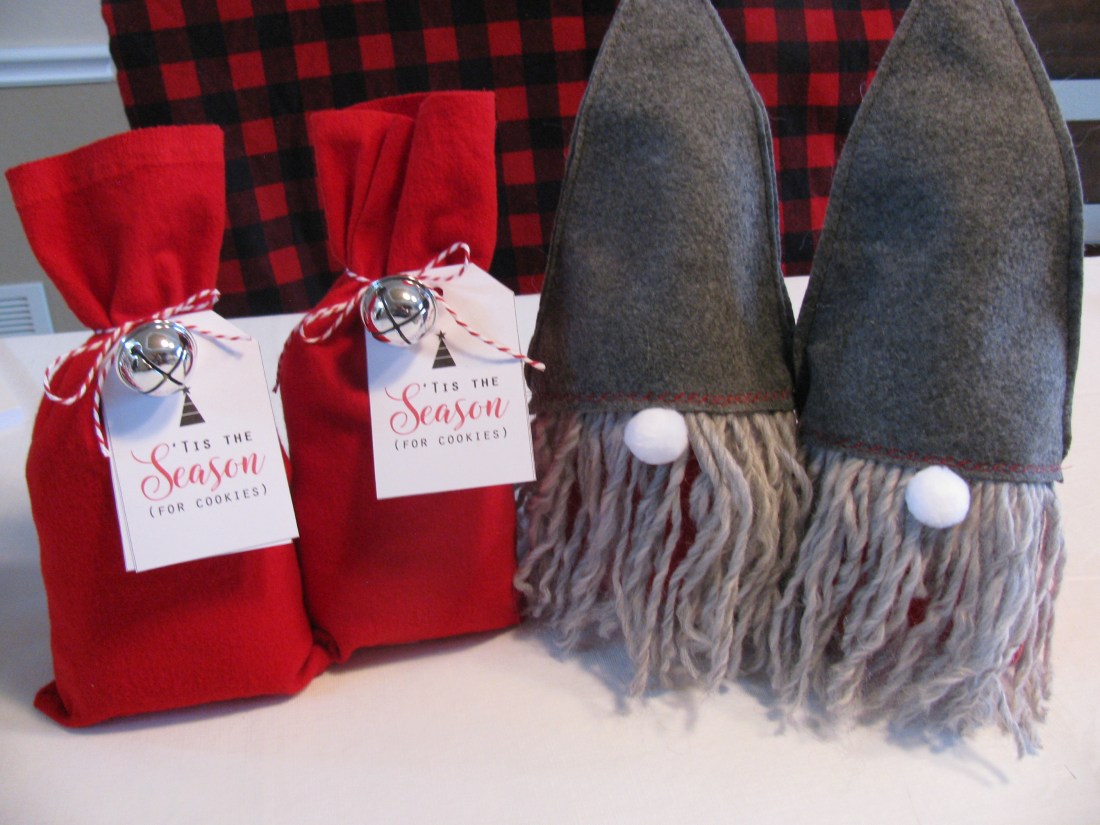
This is a cookie bag made two ways: a gnome and a simple decorated bag.
The instructions in this tutorial include all you need to know to make both bags as well as the recipe for the cookies that you will package inside.
I think you’re going to love what a quick Christmas gift idea this is!

Let’s make the gnome bag first. If you want the simple bag, follow the instructions all the way (until I begin discussing how to make the hat) and then skip to the last paragraph.
For the gnome bag, I had alot of red and grey felt in my stash, along with white pom poms for the noses. You could use any combination of fabrics and trims in your inventory or go buy some at your local fabric shop. I needed these in a hurry and didn’t have time to run to the store.
For each bag, you will need two 7″x 22″ rectangles of fabric. I used felt for all the bags and hats. (You can get 10 bags out of a yard of fabric, if it is 44″ wide.)
For each hat, you’ll need 2 pieces of fabric about 7″ x 12″. You can get about 6 hats out of 1/3 yard of fabric.
I didn’t have any beard fabric, so I used some grey yarn for the beard. When I say beard fabric, I am referring to some fake fur that looks like a beard. You’ll need about 30 – 5″ pieces.
I’ll explain the cutting instructions below, but I want to give you the cookie recipe so you can buy everything you need on one trip around town.
For the cookie recipe, you can use your own, or the one I have included below.
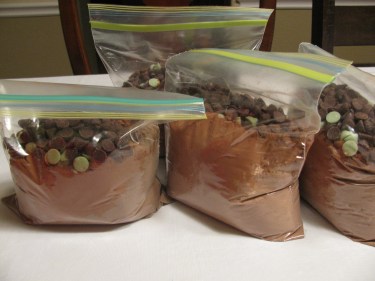
This is an easy recipe: 1 box Duncan Hines Devil’s Food Cake mix, 1/4 cup baking cocoa, 1/2 cup chocolate chips, 1/2 cup mint chocolate chips (Andes mints chopped up work well too.)
Put all the ingredients in a quart size ziploc and set aside.
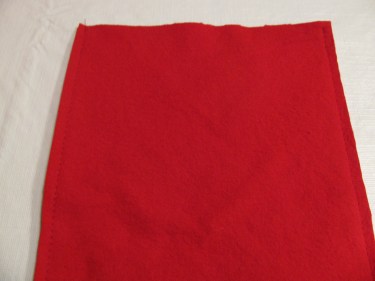
To begin making the bag, fold the 14″ x 22″ rectangle in half lengthwise. Stitch both sides of the long edges of the rectangle:
Now, measure the width of the body. In my case, once I stitched the bag on both sides, the bag was only 6″ wide:

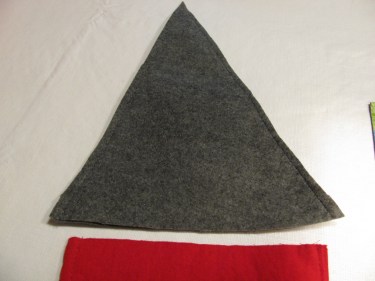
Cut your hat a little larger than the width measurement so that once you sew the hat, it will fit over the bag. I make mine about 12″ tall, but you can make yours any size you want.
Turn the bag right side out:

Grab the cookie bag that you put together above and, being careful not to puncture the bag, put it on its side and make it long and skinny like this:
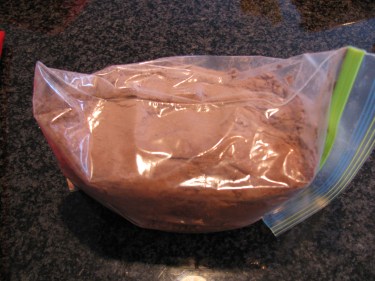
Put the ziploc inside your bag:

Print out the recipe on card stock if you have it. I went over to https://www.itsalwaysautumn.com/cookie-mix-gift-sack-easy-diy-christmas-gift-idea.html for this recipe and the printables.
Tie the printable onto the bag with any string or ribbon like this:

If you don’t want to make the gnome, skip down to the bottom of this post to get an idea on how to decorate your bag.
But, if you do want to make the gnome, you’ll need to do a few more things to the hat. I made my hat so that it can be taken off and used again. Once the recipient uses the cookie mix, they can fill a quart sized bag up with rice and put it back in and use the gnome for decoration next year at Christmastime!
You’ll need two hat shapes that are identical. As I mentioned, my hat rectangle was about 7″ x 12″. I didn’t use a pattern, I just eyeballed it based on the width measurement you took earlier and how tall you want the hat to be. Cut out the two hat shapes per bag.
Stitch the hat sides leaving the bottom edge open. (You do not have to stitch these right sides together if you are using felt since there is no right or wrong side to felt fabric.)
You can use an embroidery stitch along the bottom, if you want a decorative hat and if your machine has embroidery stitches. You can also hand embroider some stitches if you have some time on your hands. However, it is not necessary to do any stitching.
Next, I open up the inside of the hat and run a short line of hot glue along the edge of the hat. You can use fabric glue or Elmer’s school glue if you don’t have a hot glue gun. The glue will take longer to dry, so keep that in mind.

Place the tips of the cut pieces of yarn over the glue:
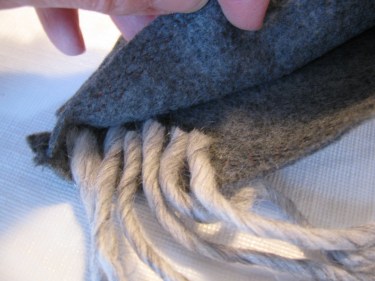
I glue a little bit at a time so that the hot glue doesn’t dry too quickly on me.
Keep gluing until you have filled up the front of the hat.
Once you have all the yarn pieces glued along the front inside edge of the hat, start taking each yarn piece and pull it apart in half lengthwise to make it more fluffy. You’re just pulling apart the ply. Be sure not to pull so hard that the yarn breaks off.

Of course, if you have fake fur for the beard, you won’t need to do this step. Just glue some fake fur to the front edge of the hat.
Next, Hot glue a pom pom or other nose feature just under the front hat edge. You can glue another one at the top of the hat as well.
If you’re choosing not to make the gnome, just put the cookie mix inside the bag and tie a jingle bell or a piece of evergreen or a pick or whatever you want onto the string and tie the string or ribbon in a bow, as shown in the photo below:
These make great gifts for neighbors, friends and family. I hope you have a blessed and wonderful Christmas this year!
Much love to you all!!

This is SO DARLING!
Thank you!