
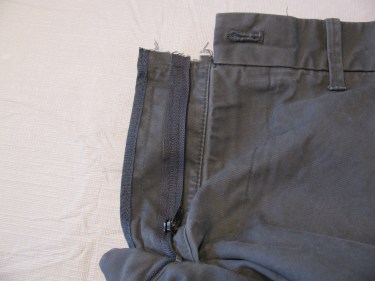
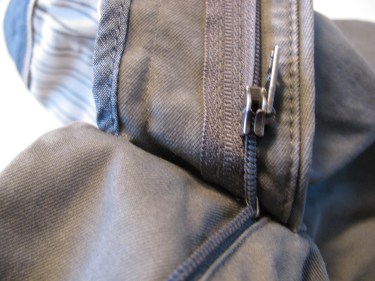
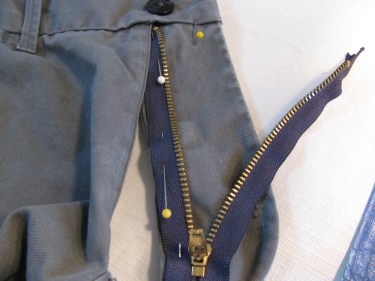
You know it’s time to replace a zipper when the teeth are missing or the zipper tab has pulled away from the teeth, like this one:
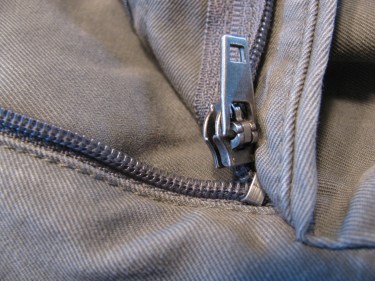
It’s almost impossible to put the tab back on the track.
(But if the slide has broken off and the zipper is still intact, you can always just replace the slide. You can find replacements at most large fabric stores or online.)
But if the zipper is truly broken, let’s look at how to replace a jean or pant zipper now.
This method works on jeans, slacks and skirts.
Here’s a post on how to replace a zipper in a jacket or coat, if you need that.
Before you begin, measure the length of the existing zipper.
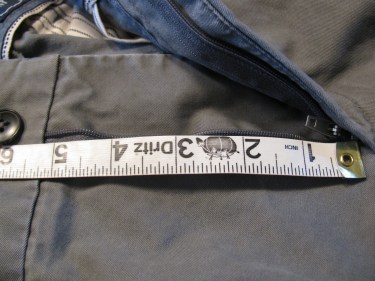
As you can see, the broken zipper measures about 5 1/4″, so I’ll need at least a 6 ” zipper for this pair of slacks. If your zipper is longer than that, go ahead and use it. Later, I will show you what to do with a zipper that is longer than what you need.
If you can, ask your customer to measure the zipper, buy the one they like and bring it with them to the first appointment. I don’t like to have inventory of these on hand because I never know what size or color the customer would like, or if their first choice is even available. It’s much easier and less stressful to have them buy the one they’d like. That saves you time and hassle and you’ll have the one they like.
The zipper color does not have to match the fabric since it won’t be seen, once the garment is worn.
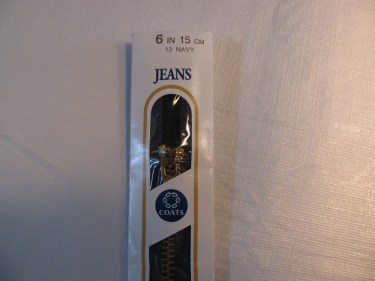
Once you have your zipper in hand, take it out of the package and set it aside.
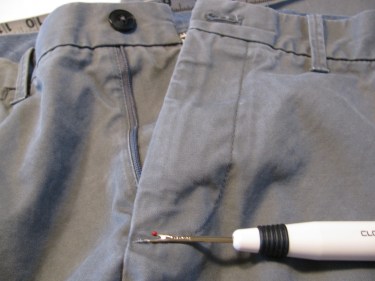
Start taking out the old zipper using a seam ripper., paying close attention to how it was installed.
You’ll want to make mental notes of each step so that you can insert the new zipper in the same way the old one was put in.
The technique I will show you works on 99% of the zippers I’ve installed, but sometimes, you have a pair of pants or jeans that was constructed a little differently.
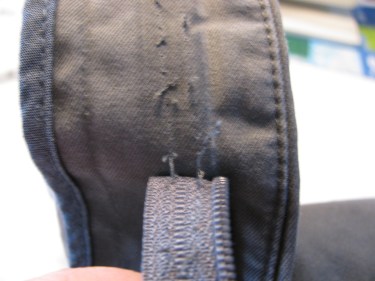
This area at the bottom of the zipper (where my seam ripper is pointing to) is usually sewn in with a tight zig zag stitch or bar tack stitch. Be careful when removing these stitches as they are sewn in very tightly:
Next, I take out the stitches at the waistband area as shown on the photo below.
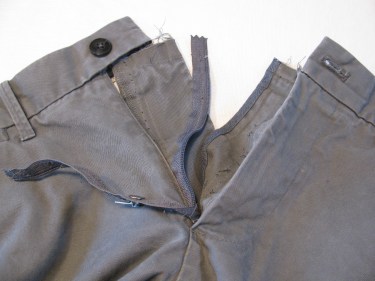
You can see that the top of the original zipper was cut off by the manufacturer:
Next, rip out the zipper where the pull tab is now in this photo:
Notice there is a double row of stitching here:
Once that one side is complete, work on the other side.
The photo below, shows how I’m almost finished ripping out both sides of the zipper:
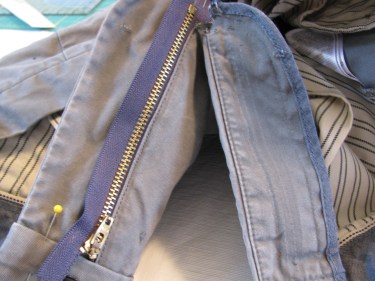
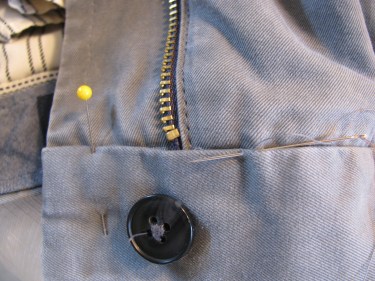
Once you have the old zipper removed from the pants, insert the new zipper and begin to pin the left side as shown below:
Make sure you tuck the top of the zipper between the waistband and the front of the slacks. If it is too long, you can cut it, leaving an inch or so above the top of the zipper teeth (just like the manufacturer’s zipper had). Notice that the zipper tab is facing up.
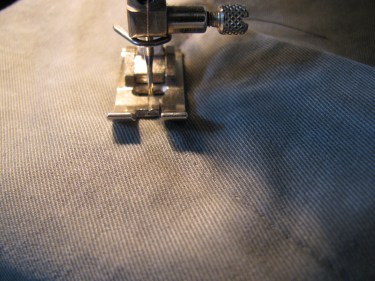
Next, I fit the front of the slacks over the pinning I just did, pulling out the pins as you sew. You can line up the zipper with the stitching holes left behind by the old zipper. Stitch right over the same holes where the original zipper was sewn. Use a denim or heavy duty needle, if you have one. Here’s a post about how to choose the right sewing machine needle for your project.
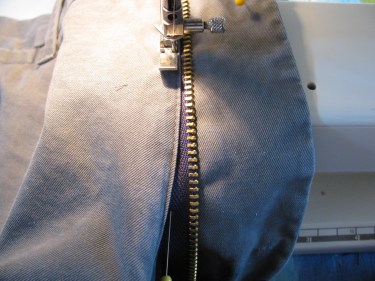
Continue stitching to the bottom of that section, pulling the top fabric so that it doesn’t catch in the zipper and is about 1/8″ from the zipper teeth as you sew. You’ll know when to stop at the end of the zipper.
Now turn the pants upside down like in the photo below. This just makes it easier to pin the next section.
Now, flip just the left side of the zipper tape over to the right side. Look at how I’ve got the zipper tab facing downwards now (as opposed to the photo above):
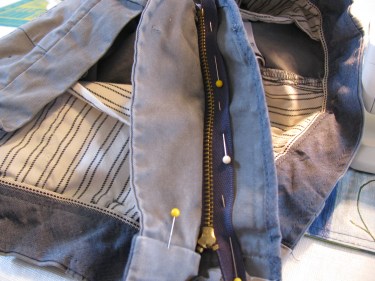
Line up the zipper tape with the old sewing holes on the right side and pin. Stitch it in place, sewing over the old holes, or if you can’t see those, stitch about 1/4″ away from the zipper teeth being careful to remove the pins, but don’t move the zipper tape as you sew.
On the outside (right side) of the pants, stitch along the curve edge. You should be able to see the original stitching line. Stop sewing after about 3″ and backstitch to lock in your stitches. See photo below.
If you were to stitch all the way up to the waistband, you would sew the pants shut and you wouldn’t be able to put the slacks on! So, just sew about three inches. When you took the old zipper out, you probably noticed how they were done that way originally.
Once you backstitch and trim off your threads, pull the pants away from your machine and fold under the right side of the zipper, so that the right side doesn’t get caught up in the remainder of your stitching and continue stitching up to the waistband. This keeps that “fly” piece out of the way.
I forgot to take a photo of this step, but you can look at the very last photo and see what the stitching line should look like. You’ll just continue sewing up that original stitching line.
At this point, your waistband is still loose and open on each side.
If you have jeans, you can topstitch the waistband on in a matter of seconds.
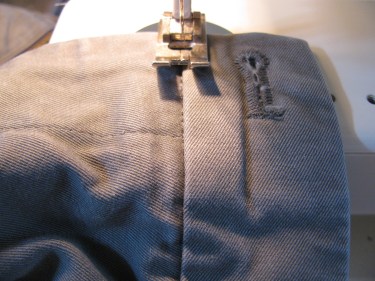
Notice that on these slacks, the waistband is not topstitched down. Some of you will want to topstitch it because it is fast to do so. If you do, however, you’ll have a partially topstitched waistband. You could topstitch all around the whole waistband if you like the look. Personally, I like to match whatever the original finish was on the garment. In this case, I hand stitch the opening:
Then I stitch in the “ditch” where the two fabrics meet, as in the photo below. I went ahead and stitched it so you can see the stitches out in front of the needle. Those stitches will basically be hidden. You won’t notice them if you stitch as shown below:
Do the same on both sides of the waistband.
Many times the button is loose even before you start working on the zipper. I like to tighten that up or resew it as a courtesy to the customer.
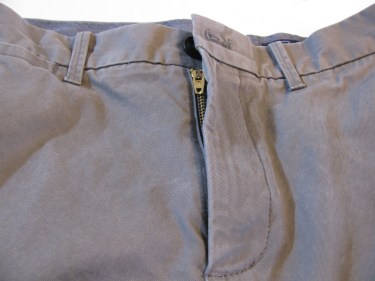
There you have it….a new zipper easily installed!

Thanks for your instructions. As usual, you offer every single detail that is needed to produce great results. And, I love listening to the inspirational songs on your site.
I believe that you are an Angel of God.
How much would you charge to do this?
If you type in “pricing” into the search box on my blog, it will show you several posts on the subject.
I have been able to save a lot of zippers by taking off the bottom stop, feeding the slider back onto the teeth, and replacing the bottom stop. A broken slider can be replaced with this method as well. If the problem is missing teeth, if they are very close to the top or bottom, you can move the top stop down or the bottom stop up. All types of zipper parts are available from Wawak.
Yes, and you can even just stitch a tight satin stitch across the bottom of the zipper if you can’t get the stop back on!