
Yes, there are many tutorials online that teach you how to sew a zipper into a pillow.
But this method is Different. Easier.
As I stitched up some pillows recently, I wondered if there was already a post out there with these instructions. To my amazement, there weren’t any. So I thought I’d share that with you today, along with some helpful tips that will save you time and trouble.
Read through the instructions first. This pillow comes together fast even though the instructions look long. I just like to include alot of details to make sure you understand every step of the process.
First, choose your fabric. Buy enough fabric to cover the front and back of each pillow you are making.
If you are making a pillow cover that is 16″ square, then one half of a yard of fabric should be plenty, unless you think the fabric will shrink when you wash and dry it. And please be sure and wash and dry the fabric before you cut it Be sure to pay attention to the washing instructions on the bolt of fabric before you purchase it.
We are basically going to cut out 2 squares of fabric (one square for the front of the pillow and one square for the back.) More tips about that later in the post.
Buy a zipper (regular or invisible). I buy a zipper at least two inches shorter than one side of the square of fabric.
For example, if I’m making a 16″ pillow, I use a 14″ zipper. I’ll explain why later in this post.
If you have to cut your zipper down, do so. Cut it from the bottom end of the zipper, not the top. Just make sure you stitch back and forth across the zipper teeth several times at the correct length so that your zipper tab doesn’t fall off while you’re constructing the pillow!
I am using a regular zipper in this tutorial. This is so that, if you don’t have an invisible zipper foot, you can see how to insert the zipper with a regular foot.
Buy a pillow form for each pillow, make your own pillow form, or use one from a previously used pillow that is still in good shape.
Measure the pillow form.
Most tutorials will tell you to cut the fabric one inch larger (all the way around) than your pillow form.
I’m here to tell you that you’ll be sorry if you do.
The finished pillow will look too baggy.
Cut the fabric one inch smaller than the pillow form. You read that right… smaller!
For example, if your pillow form is 16″ square, cut your fabric 15″ square. If your form is 20″square, cut the fabric 19″ square.
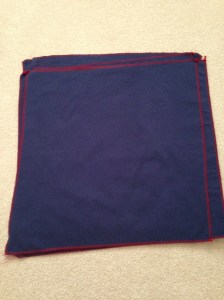
I usually like to finish the edges of the fabric with a serger or overlock machine, but you can use a zig zag stitch if you don’t have a serger.
Here I serged the edges in a contrasting thread color so you can see what it looks like to have a finished edge.
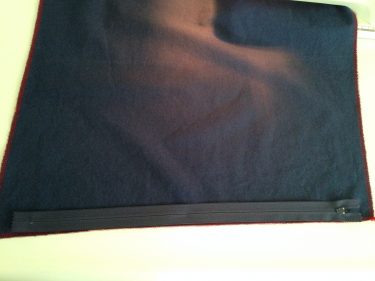
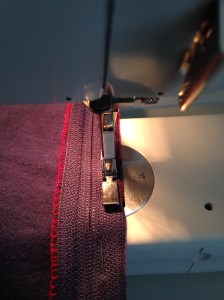
Next, place your zipper (invisible zipper or regular zipper) face down (right side of the zipper faces the right side of pillow fabric), centering it on one side of the fabric square. When I say to center it, I mean that if you’re using a 14″ zipper on a 16″ square of fabric, center it on that edge so that it is 1″ in from each end. (See photo below.)
Using a zipper foot, stitch 1/4″ away from the zipper teeth all along the zipper.
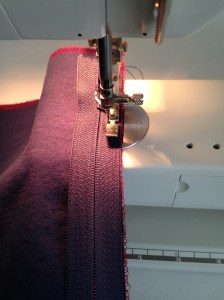
Make sure your needle is on the correct side of the zipper foot so that you don’t run over the zipper tab when you get to it.
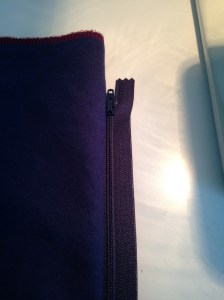
Next, pull the zipper out so it is facing up and away from the pillow fabric as shown below. You can press this with an iron if your fabric can take the heat of an iron.
Now, lay the other pillow fabric square on top of the original piece that you just sewed that zipper to, right sides together. Match the edges of the new square with the edge of the zipper tape that hasn’t been sewn yet. Pin it to hold it in place. See photo below:

Stitch 1/4″ away from the teeth, on the unsewn side, just like you did with the first piece of fabric.
Be sure to take out pins so you don’t sew over them.
Now, unzip the zipper part way. If you don’t, it will be tough to get it unzipped when you turn the pillow right side out.
Next, match the three remaining sides of the pillow , so that the edges line up. Pin the three sides together in place.
Next, line up the zipper edges.
You will basically stack the zipper tapes on top of each other and pin them together.
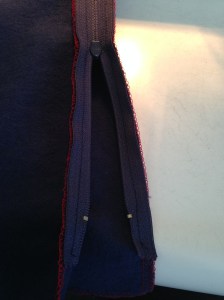
Start sewing about 1/2″ away from the zipper stitching toward the inside of the pillow.
Stitch around the 3 non-zipper sides and just around the zipper corner and stop a few stitches “after” the seam that you made when you stitched the zipper to the square of fabric and stop as indicated in the photo below. Do you see the two parallel lines of stitching in the photo? That’s what you’ll need to do.

I know it seems strange that your stitching doesn’t match up with where you stitched the zipper on, but this is why this method is so awesome…you don’t have to line up your stitching and you don’t have to worry about the zipper teeth or the tail of the zipper showing!!!
Now, reach in and turn the pillow right side out and look at the zipper!
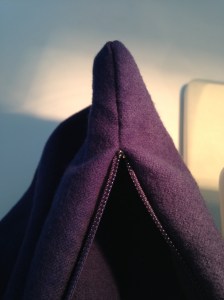
Isn’t that awesome?!! It looks great, doesn’t it?
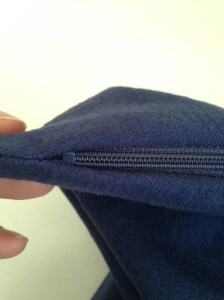
Here is the view with the zipper closed:
I made three of these pillows recently, and this is how they turned out:
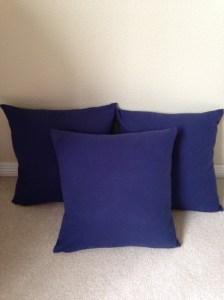
See how nice and full they look? That’s because we cut the fabric out 1″ smaller than the pillow form.
And you don’t see the zippers on the bottom!
See how fast that was?! You just made professional looking pillows in no time at all!

Thanks so much. Yes, your method looks Different and Better. I can’t wait to try it. You always manage to find the most practical and simple ways to sew perfectly.
Aw, thank you, Brunella. I appreciate your kind words. I hope you find it helpful.
Great method! My mother used to do this when making pillows…and upholstery…but I failed to pay attention (no surprise there – just regret). Now I have detailed instructions! Thank you!
This is exactly what I was looking for in making pillows! Your suggestions are great! The pillows I am making are going to be a big hit! Thank you SO MUCH!!!!!
Debbie, so glad this was helpful and timely for you. Let me know how they turn out!
Awesome! I have always been afraid of zippers and never wanted to attempt a zipper pillow. Now I will!!
Yay!
Glad it’s not just me that makes the cover of a pillow one inch smaller than the pillow form (here in Manchester, England, we call it a cushion and a cushion pad.) When you’ve done it this way, it looks so great you won’t go back to the alternative. 😃
Thank you, Elizabeth. I was wondering if I was the only one who felt this way!
I love how we speak the same language in both of our countries, but have different words for items! I love your country. So beautiful!
I wish you could make a small video on How to do this. I have a hard time learning by just reading instructions and I’d love to fully comprehend your method 🙏🏽
I’ve been asked to do videos for many years and the editing process has me stumped. But, I will see if I can learn how and hopefully post it on my Youtube channel. I’ll write a blog post when that happens. Thanks for asking!