
Ok, I know this isn’t an alteration, but I just have to tell you about these blankets that I make for every baby shower that I go to! I love to add a homemade touch to the registry items that are asked for.
I know the new thinking surrounding baby blankets. Many new moms don’t think they are safe to put in the crib with their baby. However, there are so many other great uses for them. They can cover their baby’s stroller and car seat with them. They can put them flat on the floor for the infant to lay on. They are a good protector for any floor they have when they travel or go somewhere on a play date. Then, when the child is old enough, they can snuggle with them when they fall asleep on the couch or in their big beds.
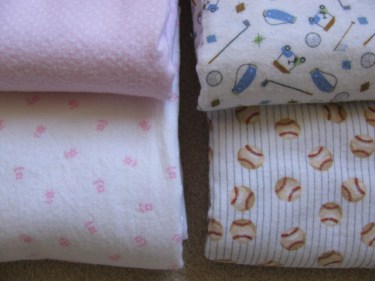
Baby blankets…let’s make some!
They are so simple and fast, you can whip up two or three in an hour.
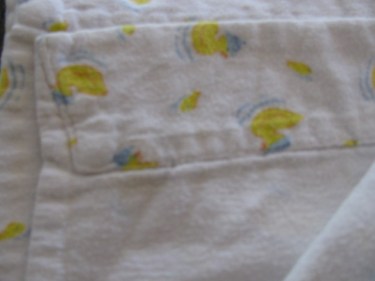
I first got the idea when my mother-in-law came to the hospital after the birth of our first daughter, 24 years ago, with this blanket:

Aren’t the ducks cute?
We all thought I was having a boy, hence the blue and yellow.
I absolutely loved the blanket and knew that I had to make some for everyone I knew!
But, see how she went to all the trouble of turning down the edge of the blanket and hemming it?
I figured out a much easier way to make them.
I can’t tell you how many people still come up to me today and tell me how wonderful the blankets were and how their kids dragged them around until they fell apart.
That’s a sign of a good gift.
I know what you’re thinking…you’re thinking you can just go out and buy some just like these, right?
Wrong!
These are way better.
Everything is better: the thickness, weight, pliability, durability and softness.
You couldn’t ask for more.
So, let’s take a closer look at the process and some tips along the way.
I love to make them out of flannel, but you could make them out of all sorts of other cottons and linens. I’ve even made them out of Minky and other soft fabrics.
I wait until there’s a really great sale on flannel and I buy a bunch of it.
I select some fabric suitable for boys, and some for girls.
I buy 2 1/2 yards for each blanket.
The flannel is usually 45″ wide, so I purchase 1 1/4 yards (or 45″) for each side of the blanket, because I like them to be a square shape when they are finished.
Don’t worry if your measurements are not a perfect square.
Go with what you have. In other words, if the fabric you chose is only 42″ wide, cut your length 42″ long. This will give you the same amount in both directions to include the seam allowances.
A square shape makes them easier to fold and these dimensions are a perfect size for baby.
First, prewash and dry your fabric because flannel is usually made of 100% cotton and it almost always shrinks some.
Next, take that 2 1/2 yard piece and cut it in half across the width. Now, you have two pieces that should measure the same. In this case, both pieces are 45″ wide and 45″ long.

Then, open up the 2 pieces of fabric and lay them right sides together on top of each other like this:
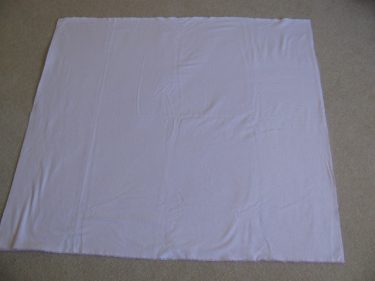
Smooth out the fabric.
Trim the edges where they don’t line up well.
Stick at least a few pins in on every side of the fabric.
You may want to put more pins in than that, but I figure you need a few so that when you lift it up off the ground or table, it doesn’t shift on you.

Always put those pins in perpendicular to the edge, that way they’ll be easier to remove as you sew along. And you’ll be less likely to jam your needle if you forget to remove one.
(Most of you already know that, but I do have many readers who are just learning to sew.)
Don’t start stitching at a corner, start sewing on some area along a side. It is much easier to turn the fabric later if your opening is not right on a corner.

It doesn’t matter what amount of seam allowance you use, but I would suggest at least 3/8″ or wider.
Sew around all the edges, pivoting at the corners, and leave about 8 inches open on one side. I will explain how to pivot below.

Trim the corners so that you’ll have less bulk in that area when you turn the blanket right side out.
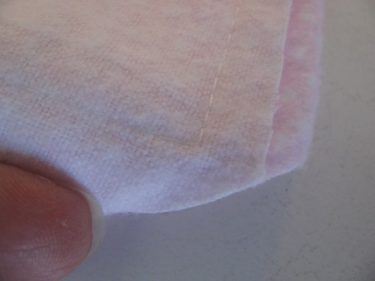
Press the seam allowances back at the opening like this:

Press both sides of the opening:

I press these edges now because it will be easier than pressing them in a later step.
Next, take an item you have around the house, like this small screwdriver….
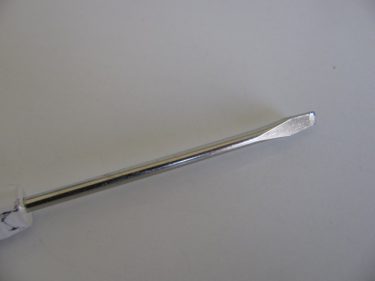
and stick it inside the blanket and use it to pop out the corners of the blanket:

Turn the blanket right side out and press the edges nicely:

Next, topstitch around the edges of the blanket.
Whatever seam allowance you used, make sure your topstitching is done using a narrower seam allowance so that when you go over the 8″ opening, the machine stitching will close it in and you won’t have to hand stitch anywhere.
In other words, if you used a 1/2″ seam allowance on the blanket, topstitch 3/8″ away from the edge.
Again, begin topstitching in the middle of a side, not at a corner because it looks nicer to not have the thread tails at a corner.

Now, let me show you how to pivot.
When you get to a corner, be sure and stop before you get to it.
If you are topstitching a half inch from the edge, then stop a half inch from the upcoming edge.
Keep the needle down in the fabric:

Lift the presser foot and turn the fabric 90 degrees toward the next side you want to topstitch.
Put the presser foot down and continue sewing.

When you’re all finished, backstitch at the end of the topstitching.
Your corners should look like this:

Your blanket is finished. You might need to press it if it got wrinkled in the process.
That’s it! That’s all there is to it!
Whip up several this afternoon and keep some on hand:
You’ll make baby and Mama so happy.

Love this Mommy! I went back and read it and will try to copy it once I get my sewing machine Tuesday! I’m glad I have enough time to wait for a flannel sale though!
P.S. – I didn’t know that EVERYONE thought I was a boy… man, did I have y’all fooled!
Well, you know with all my brothers and dad’s brothers, we didn’t think a girl had a chance in this family!!! Glad God had a different plan!
Can’t wait to see how your blanket turns out. 🙂
I love these! My Grandmother made one for me 25 years ago too! She added a beautiful little crochet edge to finish it off…I still have mine. So special!
What a sweet treasure for you! And a crocheted edge…wow! How did she get the crochet hook through the material? Or did she make the trim and then attach it somehow? Is she still alive?
My sister in law does this. She takes square flannel to some kind of alterations or quilting place and they have this machine (I think?) that punches perfect tiny holes all along the edge of the blanket. She crochets the edge with embroidery floss and a tiny hook. If you want more info, email me. I’ll ask her.
Hi Beth,
I’ve seen those edges and always wondered how they were put in. Yes, please ask her what the machine is that does that and if it’s possible to buy one for personal use.
Thanks so much!
Linda
From Beth on Sept. 21, 2010:
Ok, my SIL said it’s called hemstitching & she takes her blankets to Gardners quilt & sew in Ogden UT. They have a machine & I think they charge $20 for a blanket roughly 4′ x 4′. A little googling told me you can buy a super expensive old machine or use a wing needle? Good luck & have fun!
From Linda on Sept. 21, 2010:
Those are good things to know. I’ll probably try the wing needle first. Thanks!
Wouldn’t these be fun to make out of Christmas flannel or any other holiday flannel. I was going to send off quite a bit of flannel fabric to Goodwill, now I will have to reconsider.
Yes, you could make them bigger for the older kids and adults and snuggle with them during the winter!
What I have done since I got my serger 20 years ago is thread cotton crochet thread (usually white or a varigated color) loosely in the top looper and serge the edges together with a long, wide decorative stitch. To help the cotton flow smoothly, unroll LOTS of in and wind onto an empty cone — just be sure to rewind more before you run out. It is also best to serge slower than usual to keep the cotton from snarling.
That sounds really cute. Do you have a picture of one that you have done this way? I’d love to add it to the post so others can see it.
This is nice. You are correct in that the “home-made” ones are so much nicer. (I’m “mature” and found one that was mine when I was a baby still in good shape!). My mother taught me another way to make them. She just used a single piece (not doubled) and put in a rolled hem, (although I suppose you could use the same process in the doubled ones). She then used a very small crochet hook and made a chain stitch poking a hole in the fabric to secue. After the first chain of 4 or 5 stitches, then going back through the same “hole” make several double or triple crochets, then several chain stitches, and repeat. The result is a nice shell like border that is very sturdy. Like I said, the little holes do not seem to make the blanket less strong or wear out sooner. Hope you can understand what I was trying to say.
Hi Gayle,
I was on vacation the last four days, so I am slow in responding. I am so happy to get your instructions for the crocheting of the edge of baby blankets. I’va always wondered how it was done. They are adorable that way and I am glad to hear they are sturdy too. Thank you for the nice tip!
Hi Linda, I was wondering if you had a certain way to shorten lined shoulder straps on a formal dress. Im always afraid to CUT off the extra in most alterations for fear of mis calculating,and this type of shoulder strap is no different for me. I need your confidence.
Conni
I just found your blog today, and I have been looking through all your posts and picking up a lot of good tips. I wanted to suggest something if you want to crochet an edging onto fabric. Instead of trying to poke holes in the fabric with a crochet hook, just sew a “blanket stitch” all around the edge and then crochet into that. It’s much easier.
I love that idea! Thank you!
Linda