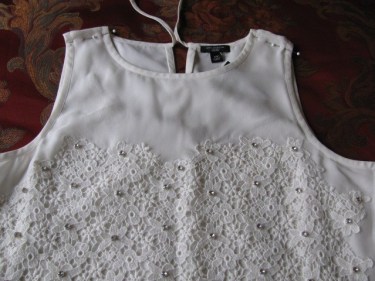
You may have a garment that you need to alter but it has bias binding (or edging) along the armhole and/or neckline edge.
The binding is a separate, narrow, bias strip of fabric that is sewn on to the garment.
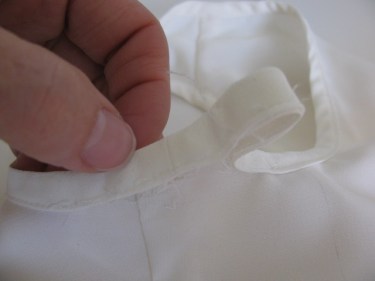
Here is an example of what binding looks like:
Many customers ask me to make this alteration by just pinching the blouse in and sewing right across the binding.
You can certainly do it that way and that’s totally fine if your customer wants that and isn’t concerned with how the alteration looks.
But doing an alteration that way usually results in a thick and cumbersome seam when there is binding involved. You have to sew over two of those thick seams to get the alteration done.
Instead, I’d like to show you how to alter a dress or top with binding that I think looks a bit more professional.
I first like to take the garment and binding apart and resew them so that the garment looks the same after the alteration as it did before the alteration.
This customer needed the shoulder seams taken up and the side seams taken in.
(You may recognize this blouse from the post I wrote on French Seams.
Instead of writing a second post on French Seams, I went back yesterday and added to that post.
So, if you missed it, you’ll want to go back and read How To Alter French Seams again.)
This customer decided she didn’t want French Seams put back in.
Instead, she wanted me to serge the edges.
So, that is what I did.
Let’s walk through the alteration process.
First, I began by taking out the stitches at the shoulder area.
Since I had to take up the shoulder seams 1/2″, I ripped out about an inch of the binding from the shoulder seam towards the front of the top.
This top is made of a beautiful chiffon fabric.
Whenever I am working with chiffon, I like to do the seam ripping from the wrong side of the garment because it is delicate and I have to be careful not to snag any threads while ripping out the seam.
You’ll realize that the binding will be larger in circumference than the neck edge once the alteration is done, so you’ll have to alter the binding as well as the garment.
The same will be true of the armhole edge once the shoulder seam and the side seams are taken in.
I’ll show you how to alter the armhole in the next step after we finish this neck edge.
Back to the neck edge:
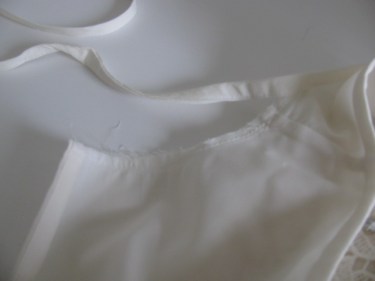
I took off the entire binding on the back neckline . (The other option would be to put a seam in the binding at the shoulder seam spot.)
I don’t want to do that because it will add more bulk to that area and it’s difficult to work with binding in a small area like that.
With this blouse, the neck binding extends beyond the back opening edge of the blouse to make ties, so it’s much easier to take out the binding in this case than to make a seam in the binding anyway.
This is what it should look like once you’ve removed the binding:
You also need to remove the binding where the shoulder seam meets the armhole.
Take it out from the shoulder seam to the side seam.
I took mine out down the back of the blouse. That way, if I make any mistakes, it’s less noticeable on the back than it would be on the front:
You will take the binding out all the way to the side seam because that is where a seam already exists.
Now, alter the shoulder seam itself.
In this case, I just stitched the front and back sides of the blouse right sides together and left the seam allowance alone.

It wasn’t too bulky and I thought it would look better than cutting off the excess and serging the edge.
Next, fold the binding along its original fold lines and just sew the binding back on to the neck edge following the same exact stitching lines that the manufacturer used originally.
That way, it will look professional, like you never did the alteration:

Now, let’s alter that side seam.
This blouse had 2 layers.
The outer layer was the chiffon and the under layer was lining made of polyester.
The manufacturer had sewn these two layers together at the underam area.
So, just take out the stitching and separate the 2 layers:

Now, alter each layer separately.
You can see the outer layer chiffon fabric on the left and the lining on the right in the photo below.
I took in 1/2″ on the lining side and 1/2″ on the chiffon side to make the alteration to the side seams:

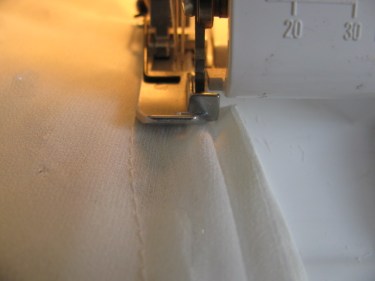
The next step is to finish the edge of each of the seams.
You could finish them with French seams as they originally had, but here, again, the customer opted for a serged seam finish.
As you see in the photo below, I used a serger to cut off the seam allowances and finish them:
Now, do you see the original seam in the binding (just to the right of my thumb in the photo below)?:
Take it apart at the seam.
(If there is plenty of extra fabric, then just cut it apart at the seam.):

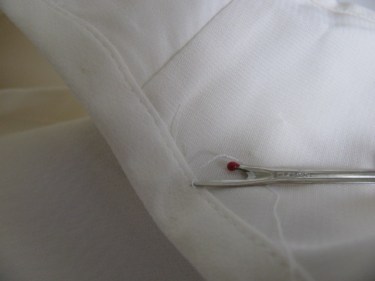
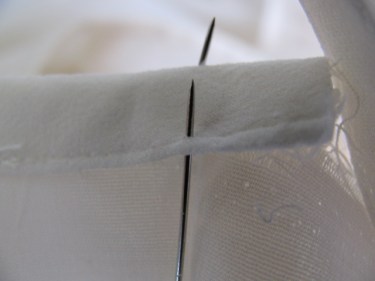
Next, I mark where the new seam should go by using pins.
You could use a washable marker if you prefer.
To mark it, I put the pin in the binding at the point where the side seam matches it:

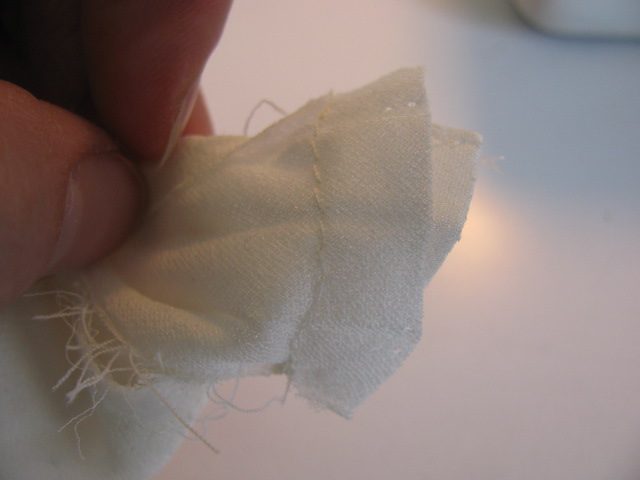
I put a pin on both sides of each binding strip:
Then, I match the pins and the strips right sides together and stitch across the binding strip creating the new seam:
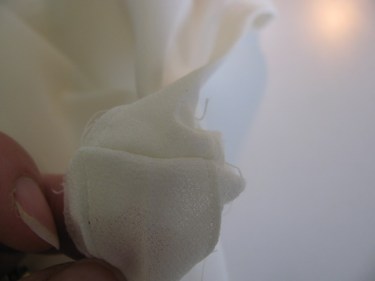
Open that seam out and make sure the fold lines of the binding strip match up.
If they don’t, resew the seam until they do.
This is important so that the binding will lie flat.
Trim the seam if you need to in order to reduce bulk.
Line the binding back up with the garment and sew along the original seam line:

This is what the new seam line should look like:

I think you’ll find that this method works well on all sorts of items: tote bags, T-shirts, vests, dresses, purses, etc.
I’d love to hear what you use this application for.

THANK YOU!!!!!! You are an absolute lifesaver!!! I was recently asked to “HEM” a few bridesmaid’s gowns for a good friend’s daughter’s wedding. Then, welllllllll, could I possibly take them in, in a few spots??, could I let a few out??……..I had already committed and wasn’t too worried, but I wanted to insure everything looked professional. I found your site while looking for advice to bustle and take up the bride’s gown (which has a bubble hem, and those sweet jeweled “poufs”(?-those tacked up areas all around the gown-re-Alfred Angelo -#758)). Your instructions are clear and well thought out. I am now confident that I can do these “little” alterations for the girls and not have their gowns look “home sewed”. I look forward to reading the rest of your entries and will certainly send pics once all gowns are completed.
Thank you again and have a great day….
Margi
Well, Margi, you made my day!
Thanks so much for your sweet comments. I look forward to seeing those photos! Have fun and let me know if you have any questions.
Linda
I’ve got a dress with binding on the neck, and I need to take up the shoulders. I was hoping there was a way to do it neatly without taking out the binding…..but you’re advice rescued my from trying to wing it and ruining a beatiful dress!! Dissapointed that there’s no easy way out, but looking forward to my next sewing project :0)
So glad the post helped you. Lots of times there is an easier way, but it won’t look very good. I like to do things so that they look as nice after the alteration as before.