There are several ways to mark a pair of pants in order to hem them.
I have used the same method for years.
It is so easy that your kids, husband, neighbor, or friend could do it easily.
And so can you!
First, I make sure the customer has on a pair of shoes that they will wear with the pants.
Or at least a pair with the same heel height as they usually wear. This could mean flats.
Then, I have them stand on the wood floor facing a full length mirror. For awhile, I had them stand on my coffee table, which saves your back from leaning over to the floor! Only use your coffee table if it is sturdy enough to hold the person!
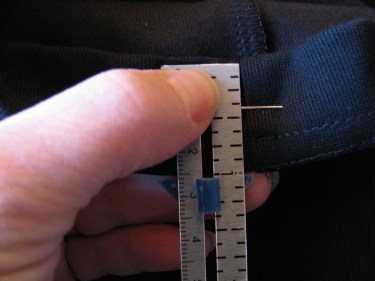
Then I grab a seam gauge like this one:

It is a handy tool for this assignment.
I ask the customer how high off the ground they’d like their pants to be.
If they don’t know, I start by folding the bottom edge of the pants up 1/2″ off the ground, using the seam gauge as my guide.
Then I have the customer look and see if they like it at that point.
This customer wanted hers higher than that, so I folded them up 3/4″ from the ground and put a pin in there. (In the photo below, I pushed the blue slide up out of the way so you can see the fold of the pants better. Sorry, but I took this picture with the camera on the floor and didn’t look through the viewfinder first. It’s a little distorted and I didn’t look at the photo until after she left.)
But, you get the idea, don’t you?

You can see in the photo below that I have turned the hem over to look at the wrong side of it:
The seam gauge shows that I had turned the hem up one inch.
(Let’s recap: The pants are 3/4″ up off the ground and the pants are folded up 1″ from the original hemline. That is why you have the two different measurements, in case you were wondering).
Next, I put three more pins into each pant leg (one at each side seam and one in the center front of the pant on each leg).
So, at each of the three points, I will fold the pants up one inch and put a pin in to secure it.
You should have a total of four pins per pant leg:
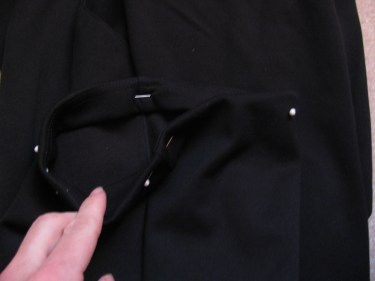
I let my customer look at the pants now that the 4 pins are in each leg and they let me know if they like the length.
If so, we’re finished and I go on to hemming them.
If not, I raise or lower the foldline according to what they want and then change the other three pins accordingly.
This may seem like a long process, but it only takes a minute or two.
Here’s a post on How To Mark Your Hem…Another Method.
Once you have marked the hemline, you’ll want to sew the hem. To do so, you’ll want to read my posts on:
How To Hem Jeans Using The Original Hem
Hem Your Jeans the Professional Way
How To Hem Without Puckers for Flared or Tapered Pants
There are several other posts on specific hemming solutions, so click on “Alterations” above and then click on “Hemming”.

Hi Linda,
Thanks for the tip. I need that stool! I already have hem marker. This is a great tool especially for hemming skirts because it allows you to mark the hem perpendicular to the floor.
Again, thanks.