So many of you have wondered how to hem your jeans by using the original rolled hem.
I had never done this before as I hadn’t personally had any customers ask for it.
Until now.
My own daughter asked me to hem hers that way.
So, who better to try a new technique on than my own offspring?
Based on her recommendations, which corresponded to some of your instructions, I hemmed her jeans in no time.
I’ve always written posts based on alterations I have done before.
Some of them I’ve done hundreds of times.
But, this is the first post where I am a rookie.
(Update Here is a photo of my daughter’s jeans using two different techniques:

The technique for the leg on the right (Technique #1) is described below.
If you like the looks of the pant leg on the left, you’ll find the instructions here. They are written by one of my first followers and I like it best.
But, if you like the looks of the right leg, stay right here.
There’s also a third technique which I will link to at the bottom of this post as well and that is for hemming the jeans when you don’t care about the original hem and you want it done fast!
As a side note, you most likely will be sewing over thick seams on your jeans. My suggestion is that you use a Jean-a-ma-jig. It makes all the difference. Read about it here and come on back here to learn the techniques of How to Hem Jeans Using the Original hem!
Technique #1
The basic idea is that I am going to cut off the old hem and re-stitch it farther up the pant leg.
The new seam I make will next to the stitching on the original rolled hem.
Let’s take a look at this technique step by step.
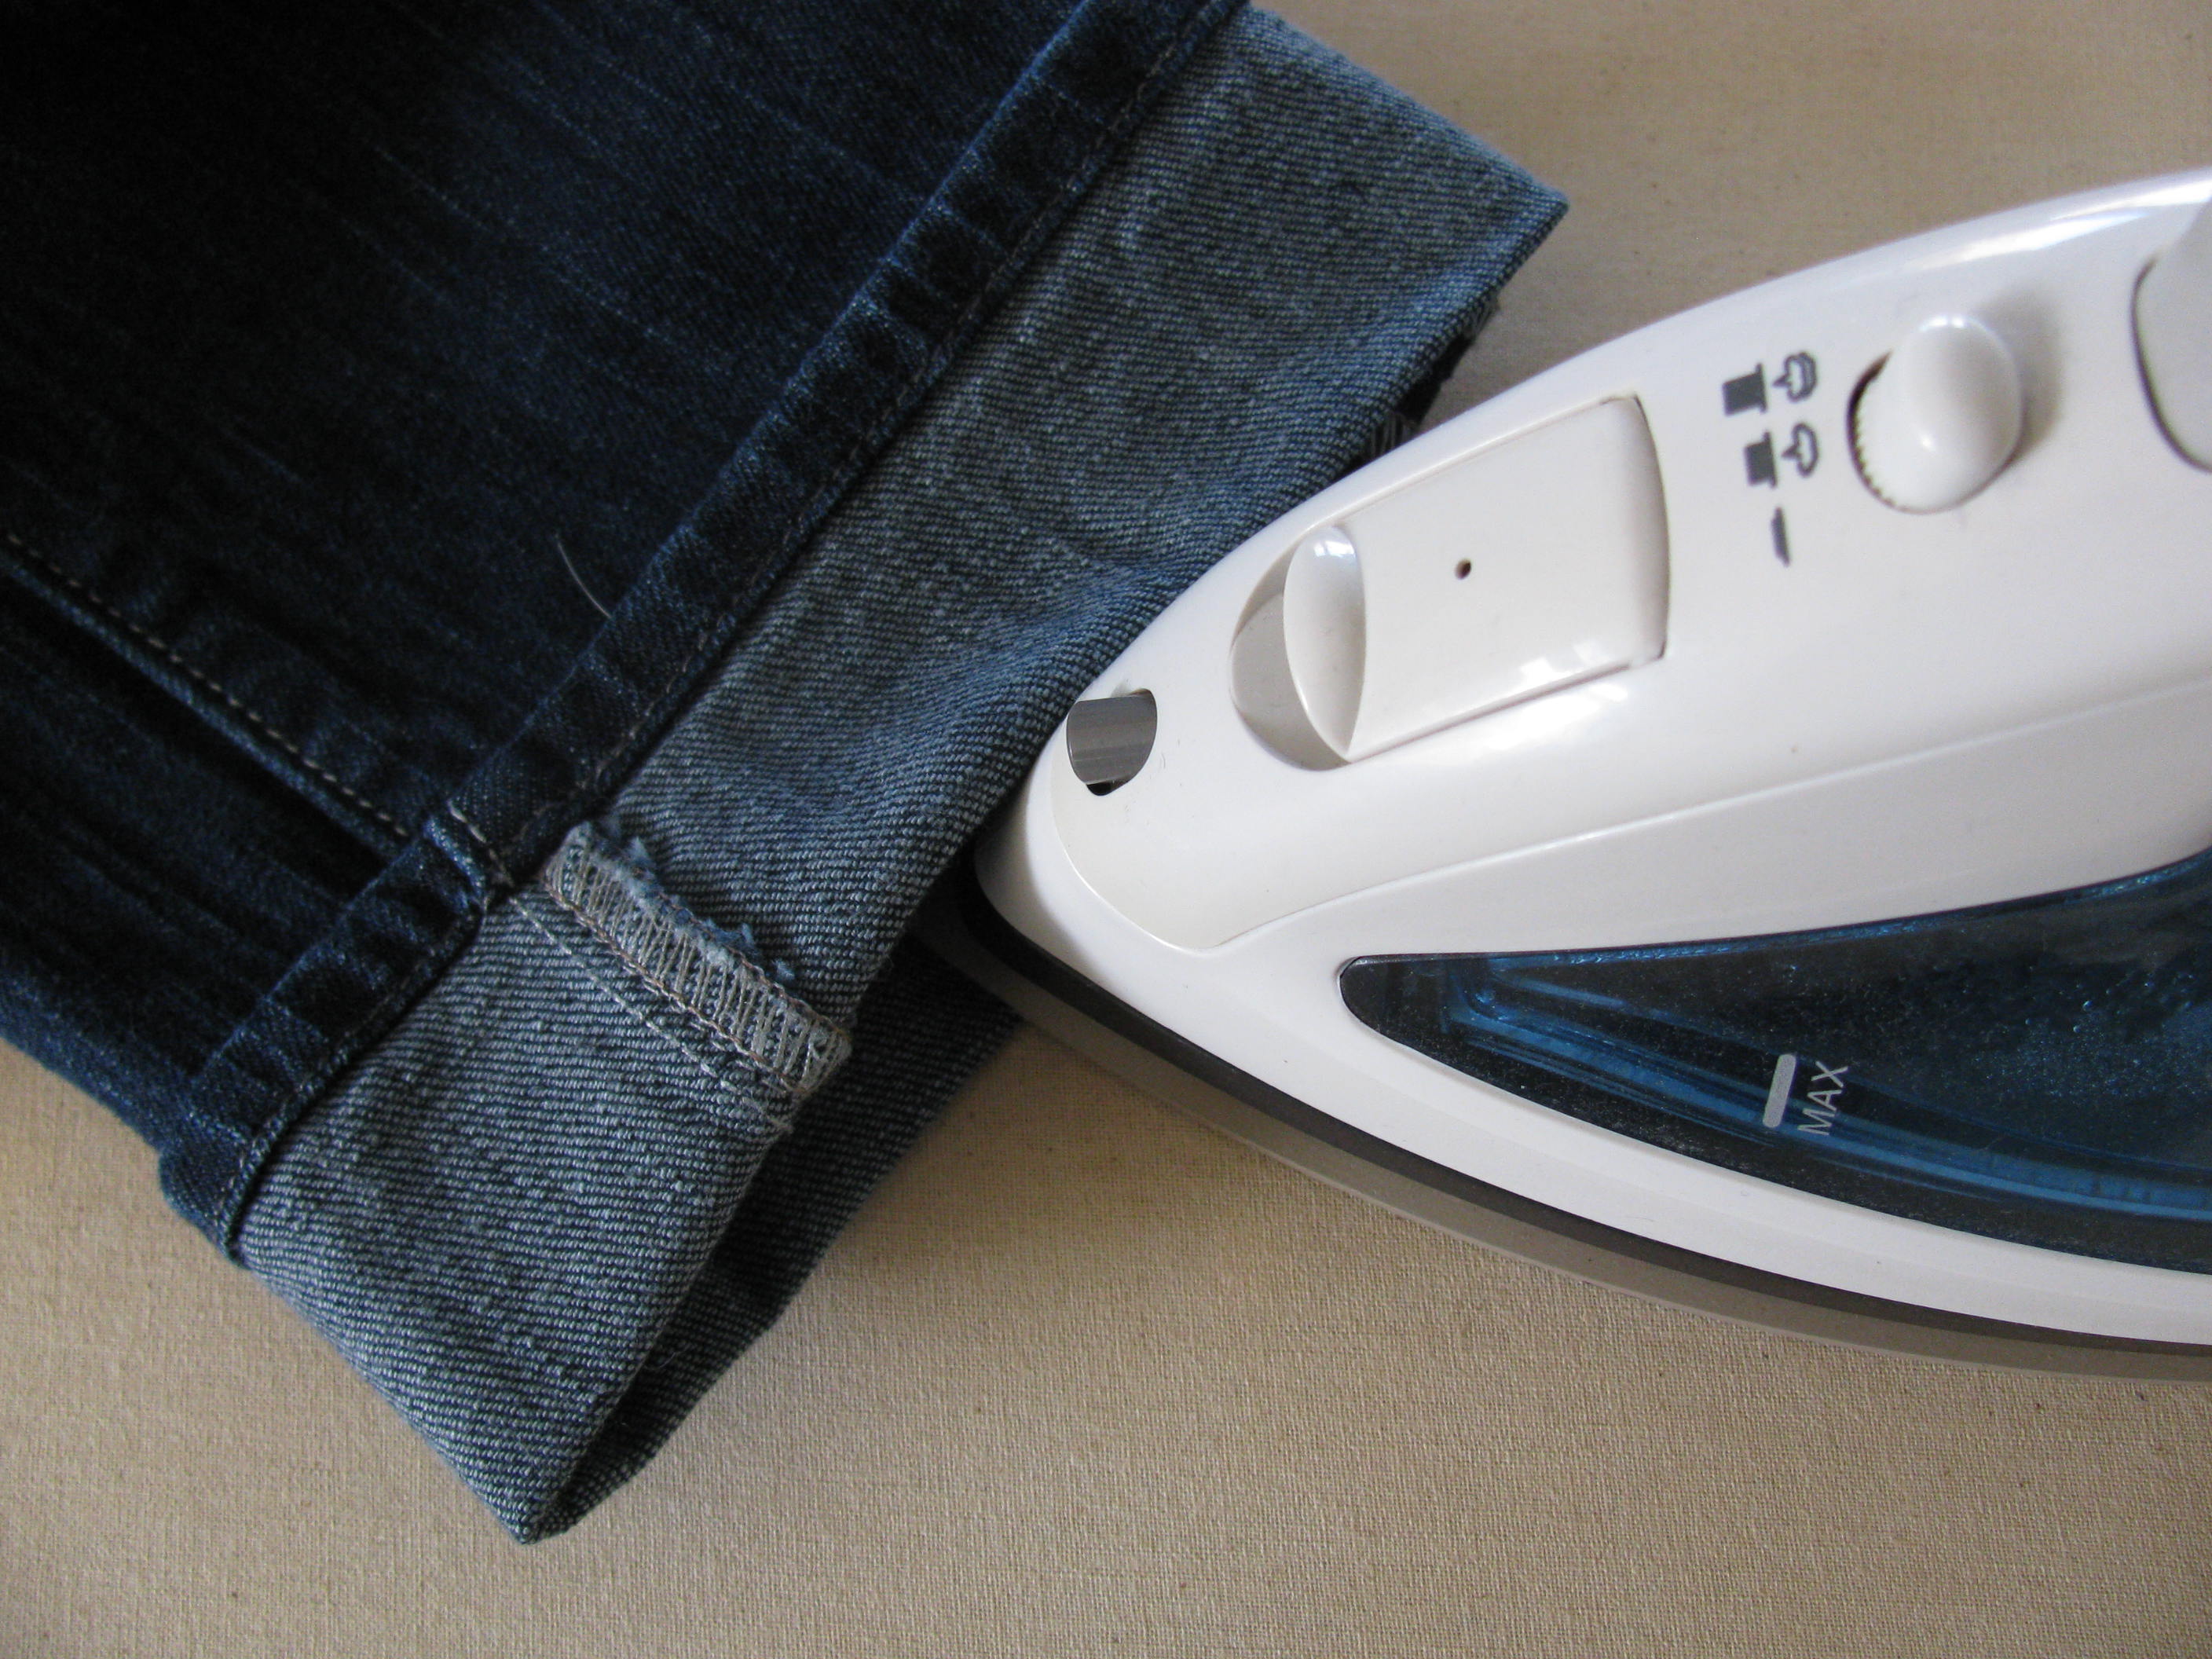
First, I had my daughter try on the jeans.
I folded up the jeans and pinned the denim where she wanted the bottom edge of the hem to be:

Next, I pressed that bottom edge with an iron:
(Yes, you could turn the hem to the inside and press it the other way, but this edge isn’t going to show later, so I eliminated a step by just pressing it as is.)
This pressed edge will be our guide to show us where to stitch the new seamline for the hem.
The next step is to trim off the original hem edge.
I don’t want to cut right next to the rolled hem edge because that wouldn’t give me any seam allowance and I’d have to sew over the big hump of fabric at the hem.
I decided that one inch allowance gave me enough “insurance” and gave the hem enough extra fabric so that the hem doesn’t roll to the outside while wearing the jeans.
So, I cut the jeans like this:
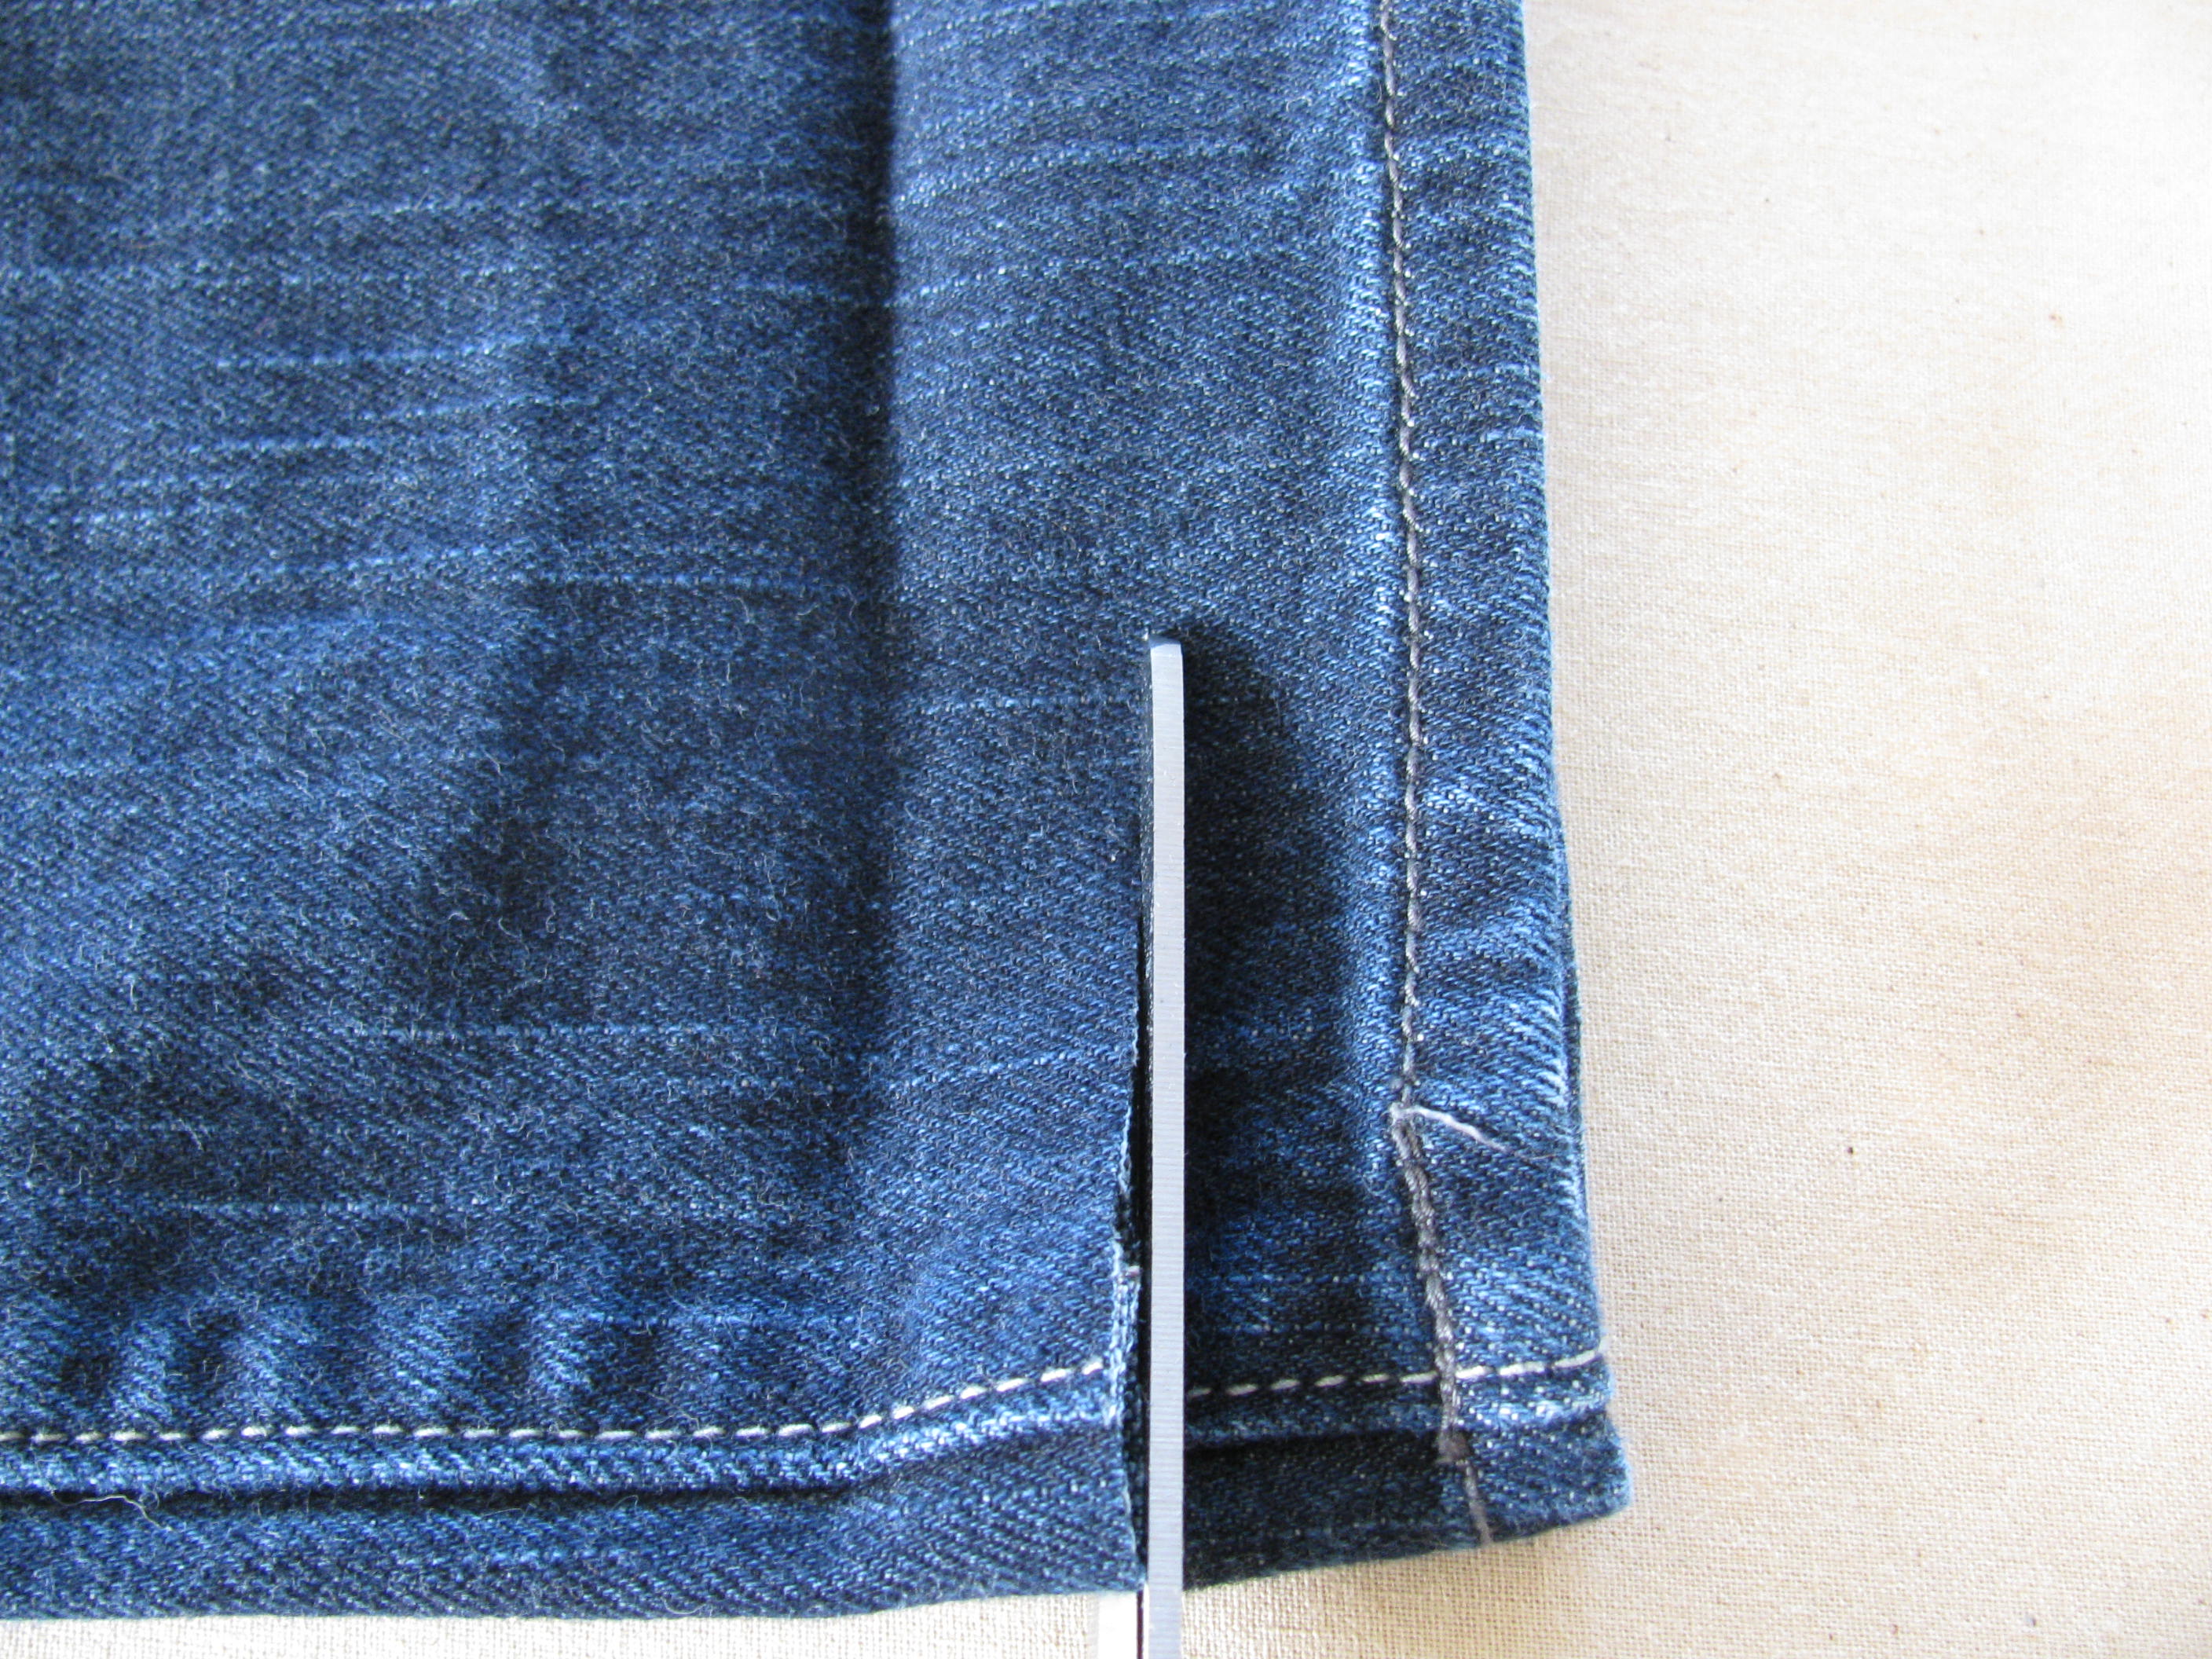
Do you see the extra fabric I have to the right of the scissors?
I cut it far enough away that I can make a seam allowance.
That’s the amount that is crucial to the success of this hem. Make sure you give yourself enough denim.
As I mentioned, I gave it an inch.
This is what it should look like, completely cut away from the jeans:
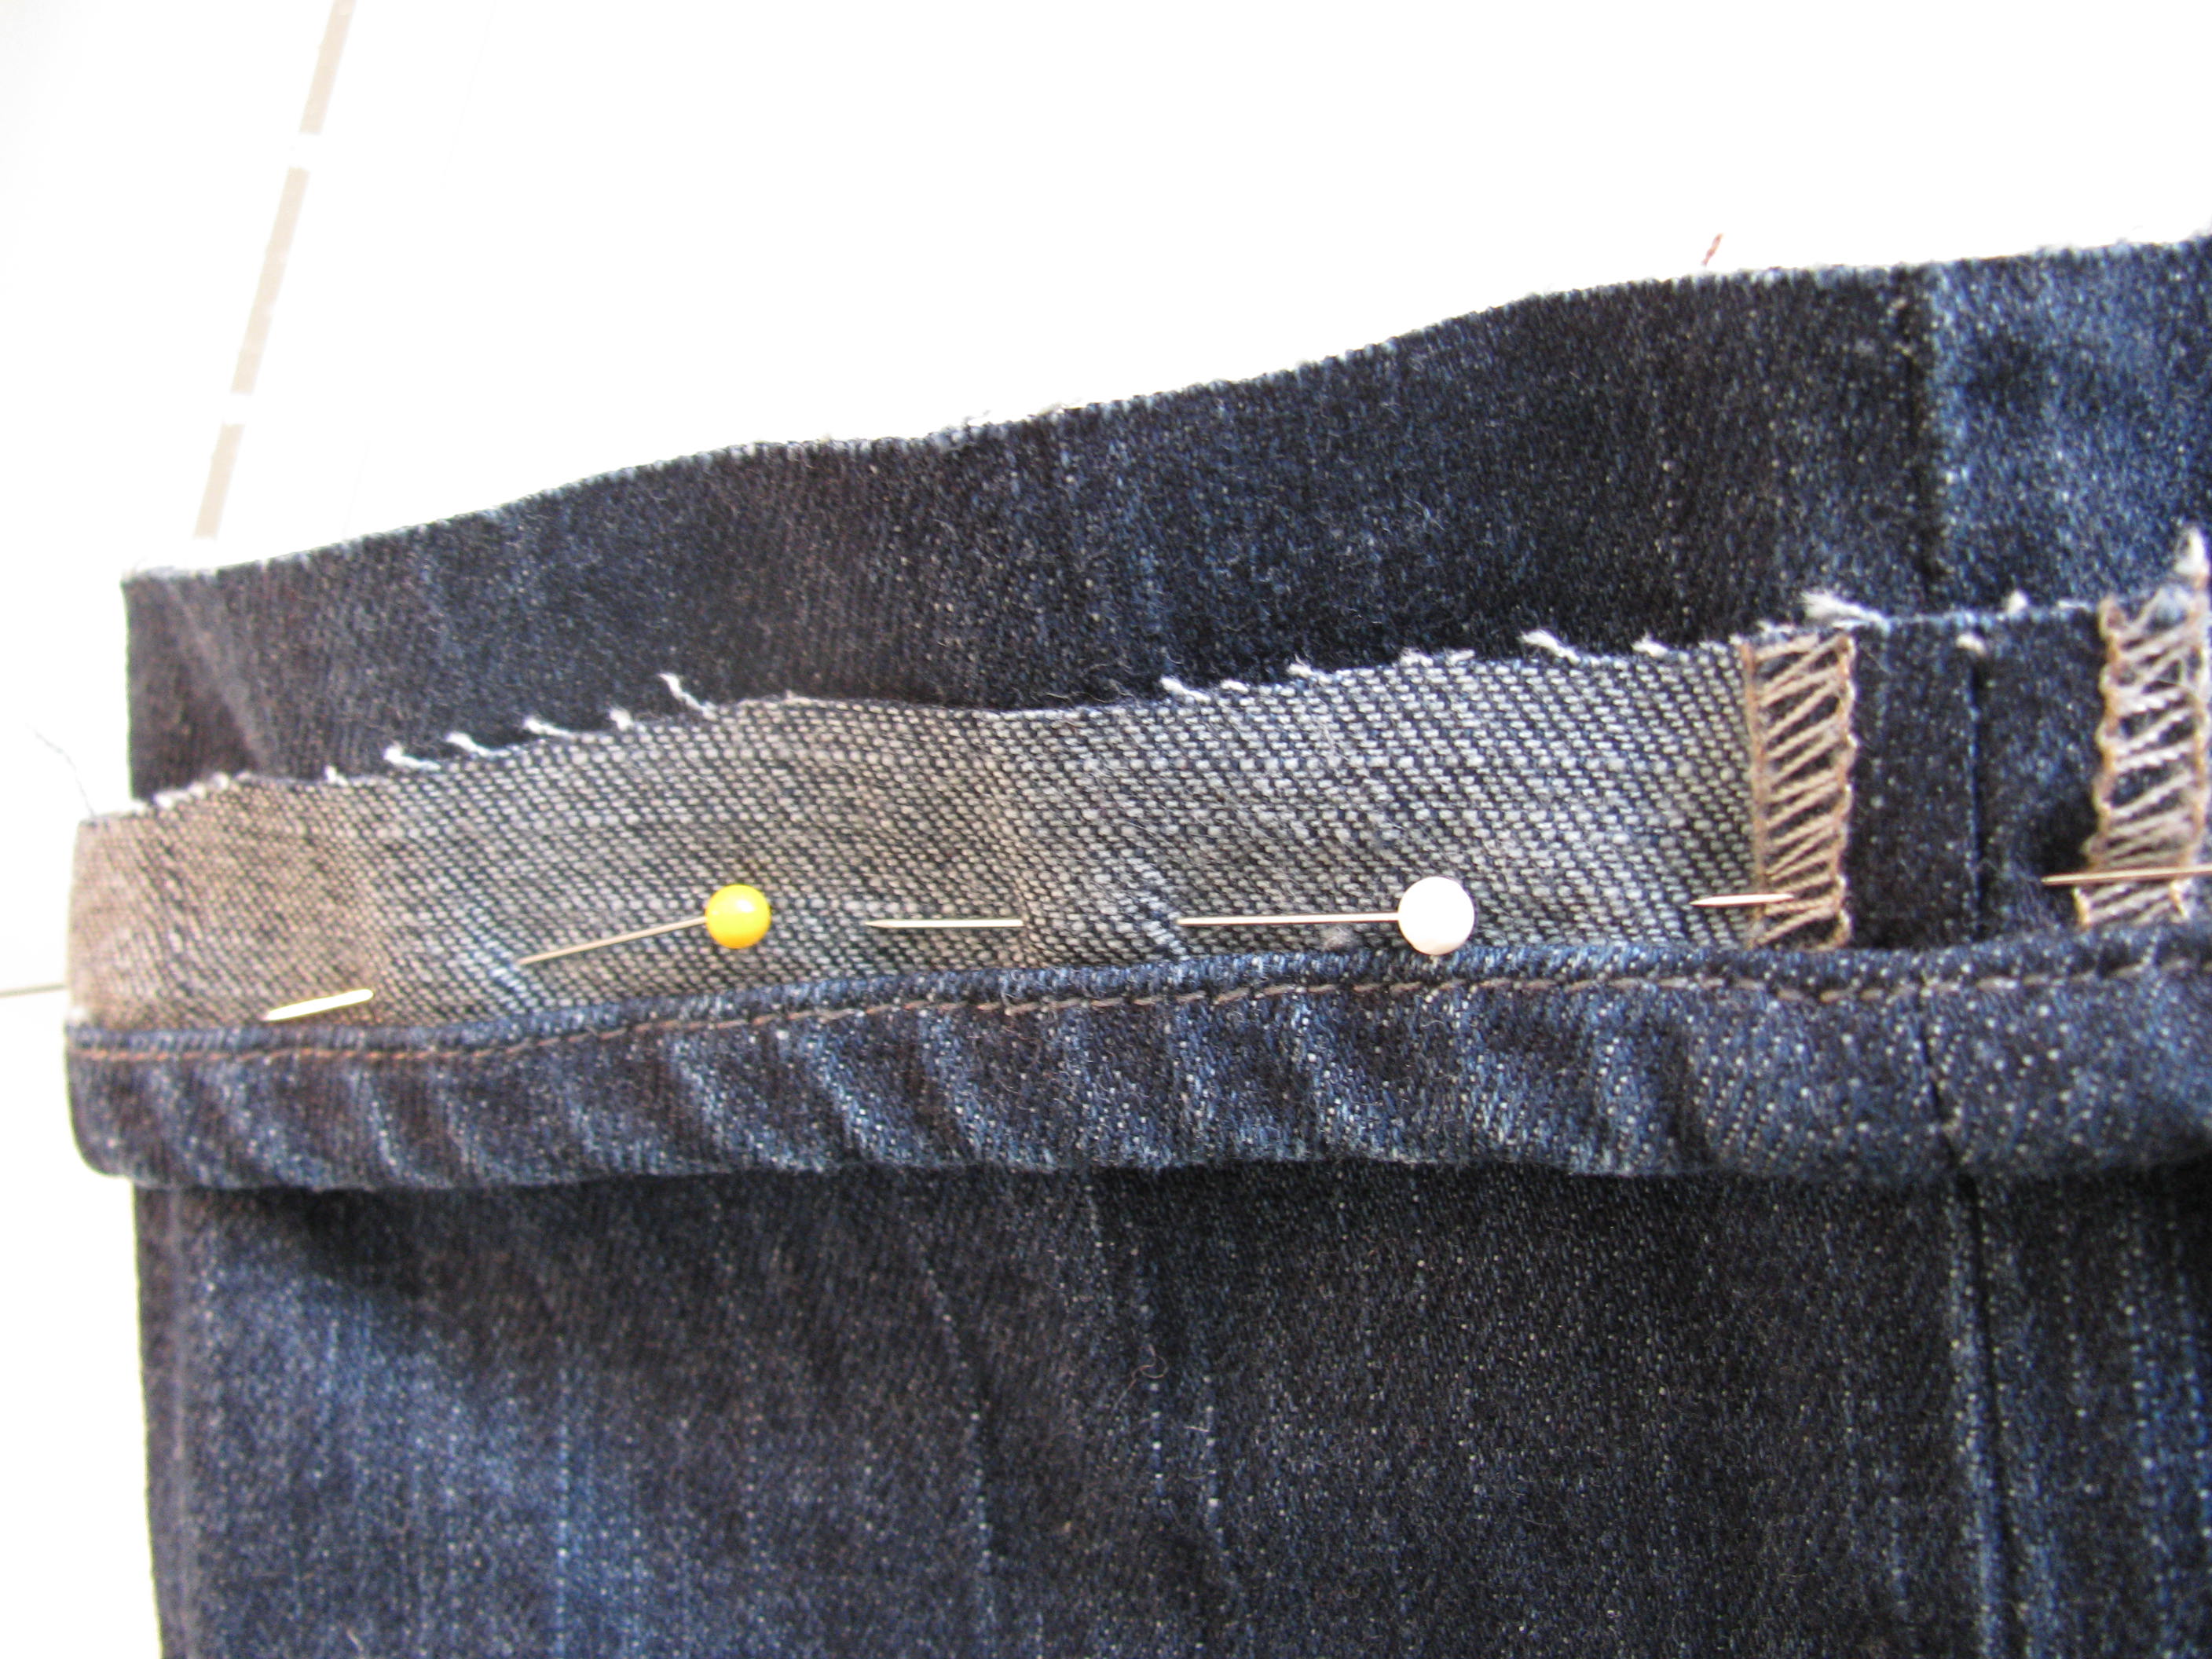
Next, you’re going to match this “circle of denim” right sides together to the pant leg.
Match up the side seams.
then, pull the “circle” down the leg (up the leg?) like this and pin below that pressed fold:
Now, we’re going to make sure it is in the right spot.
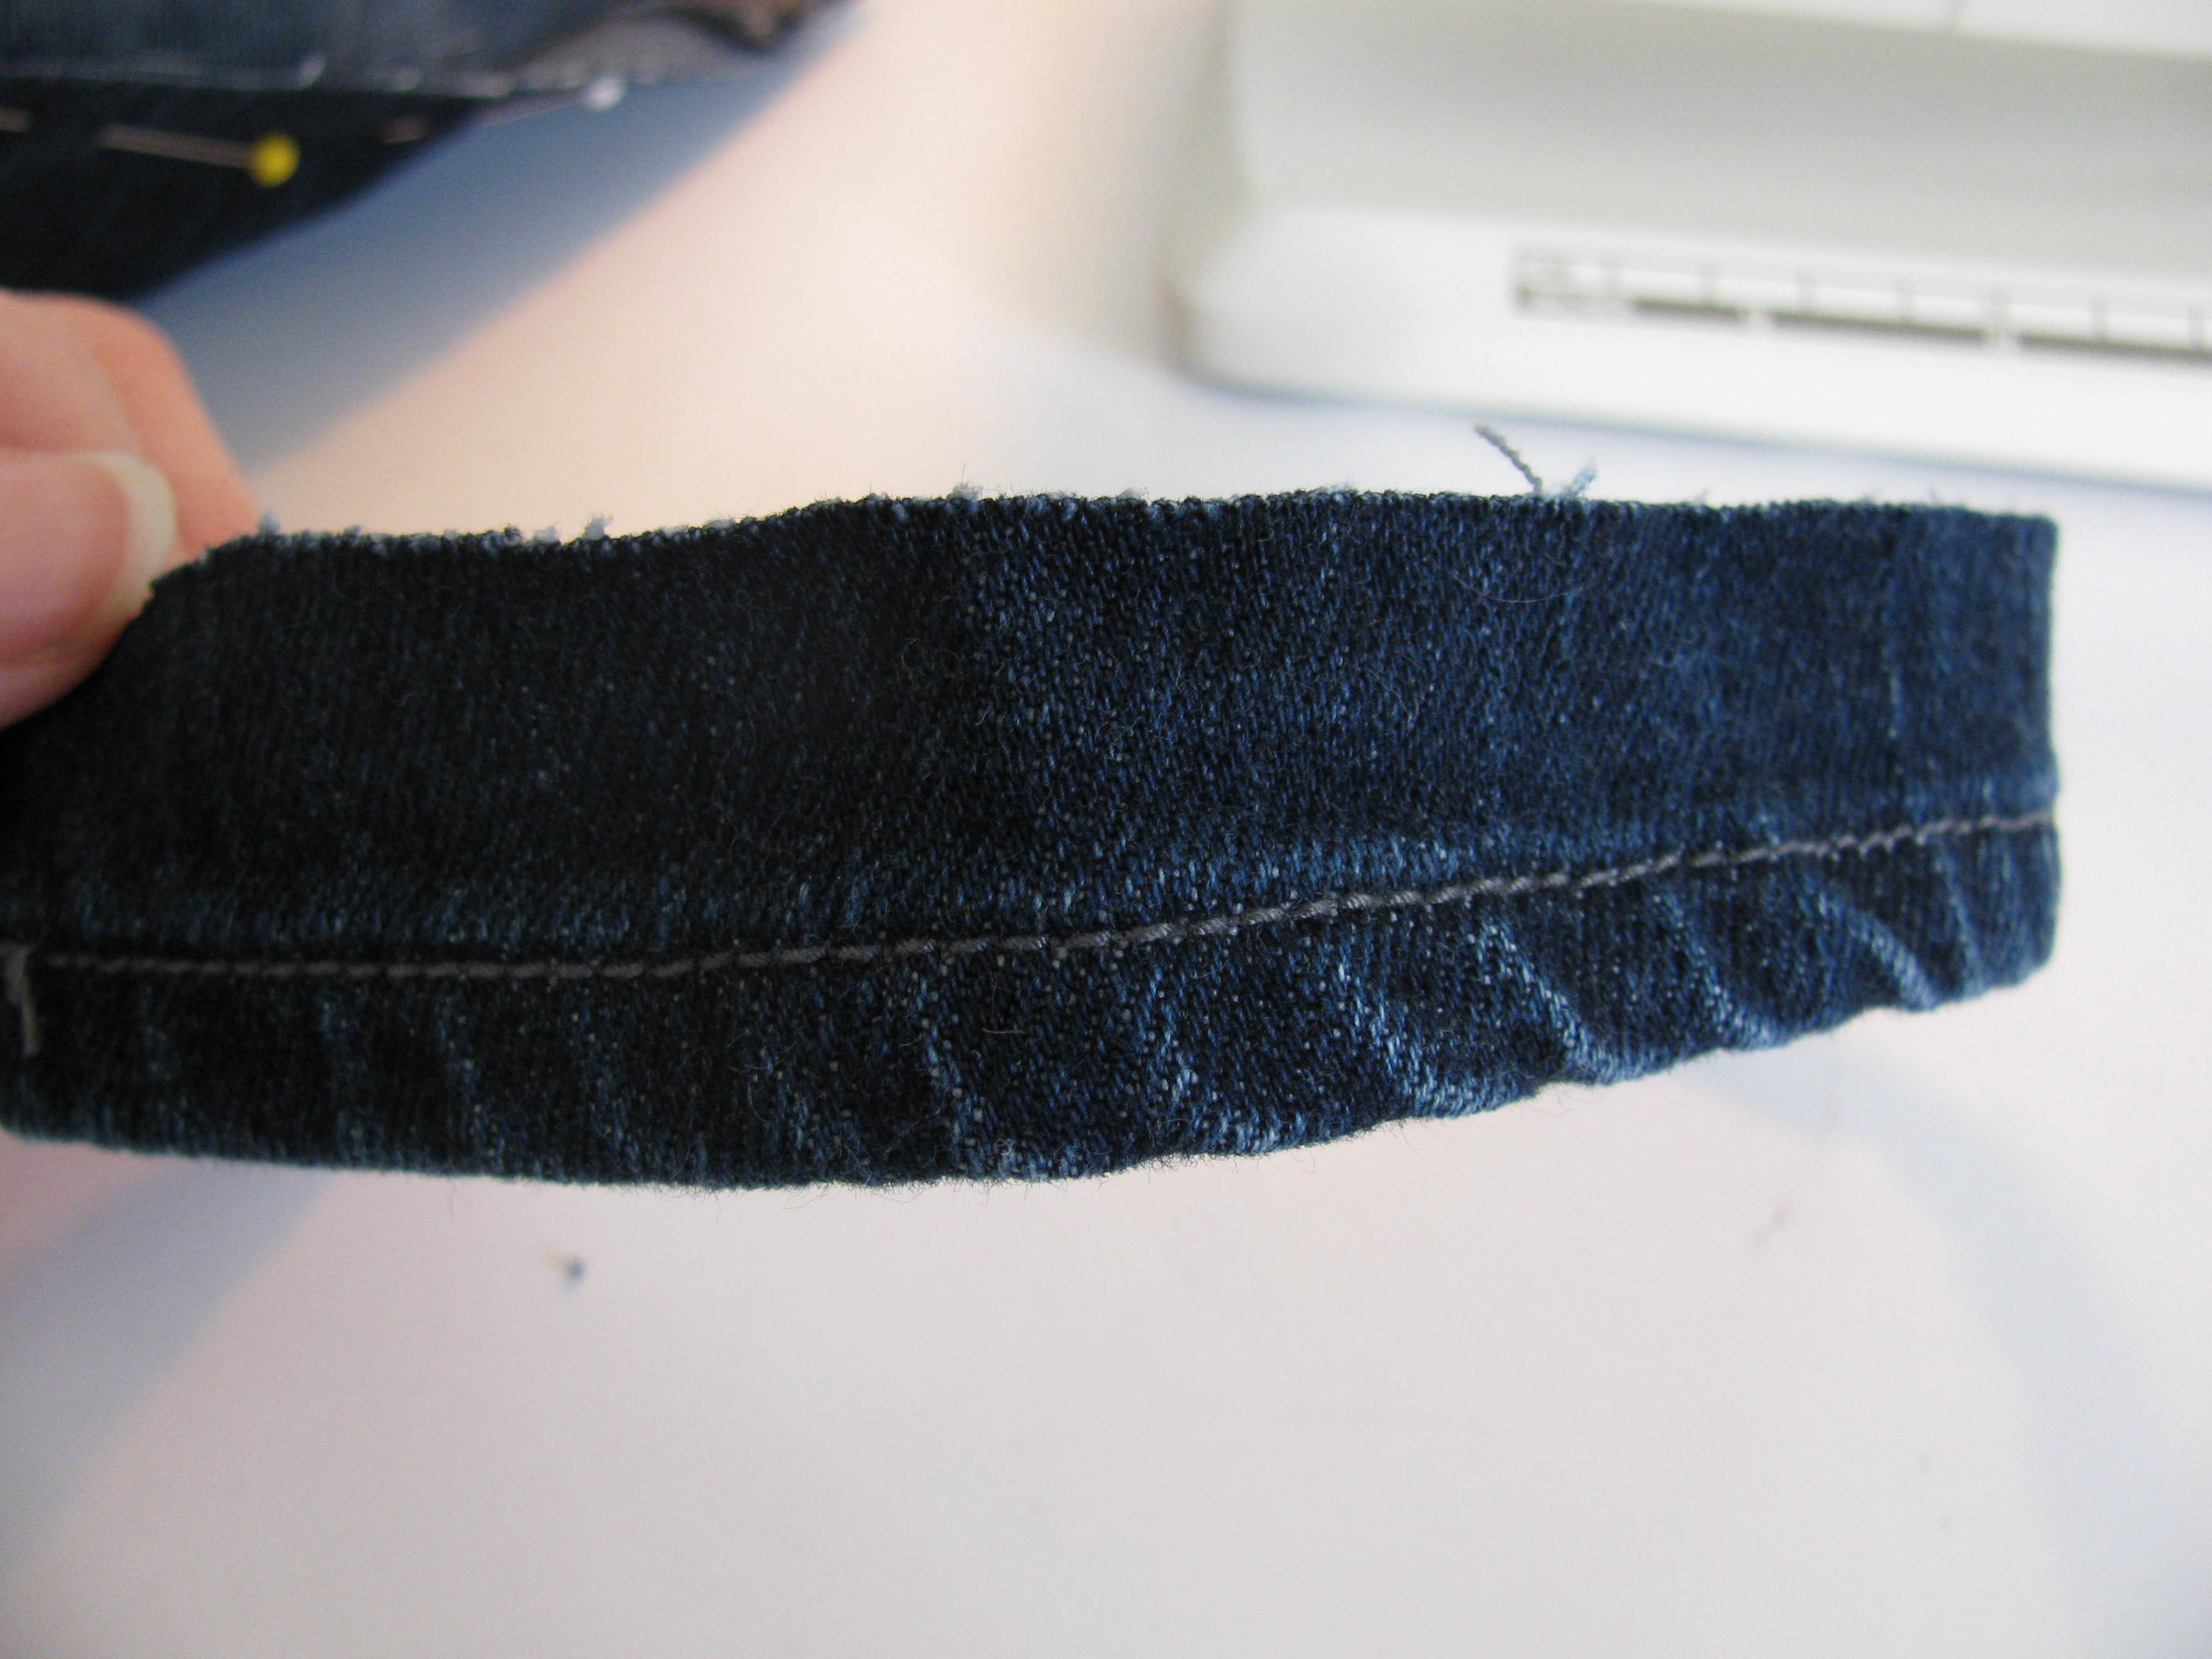
Fold up that original rolled hem and peek under the cut edge to make sure the rolled hem edge lines up with the fold that you pressed earlier like this:
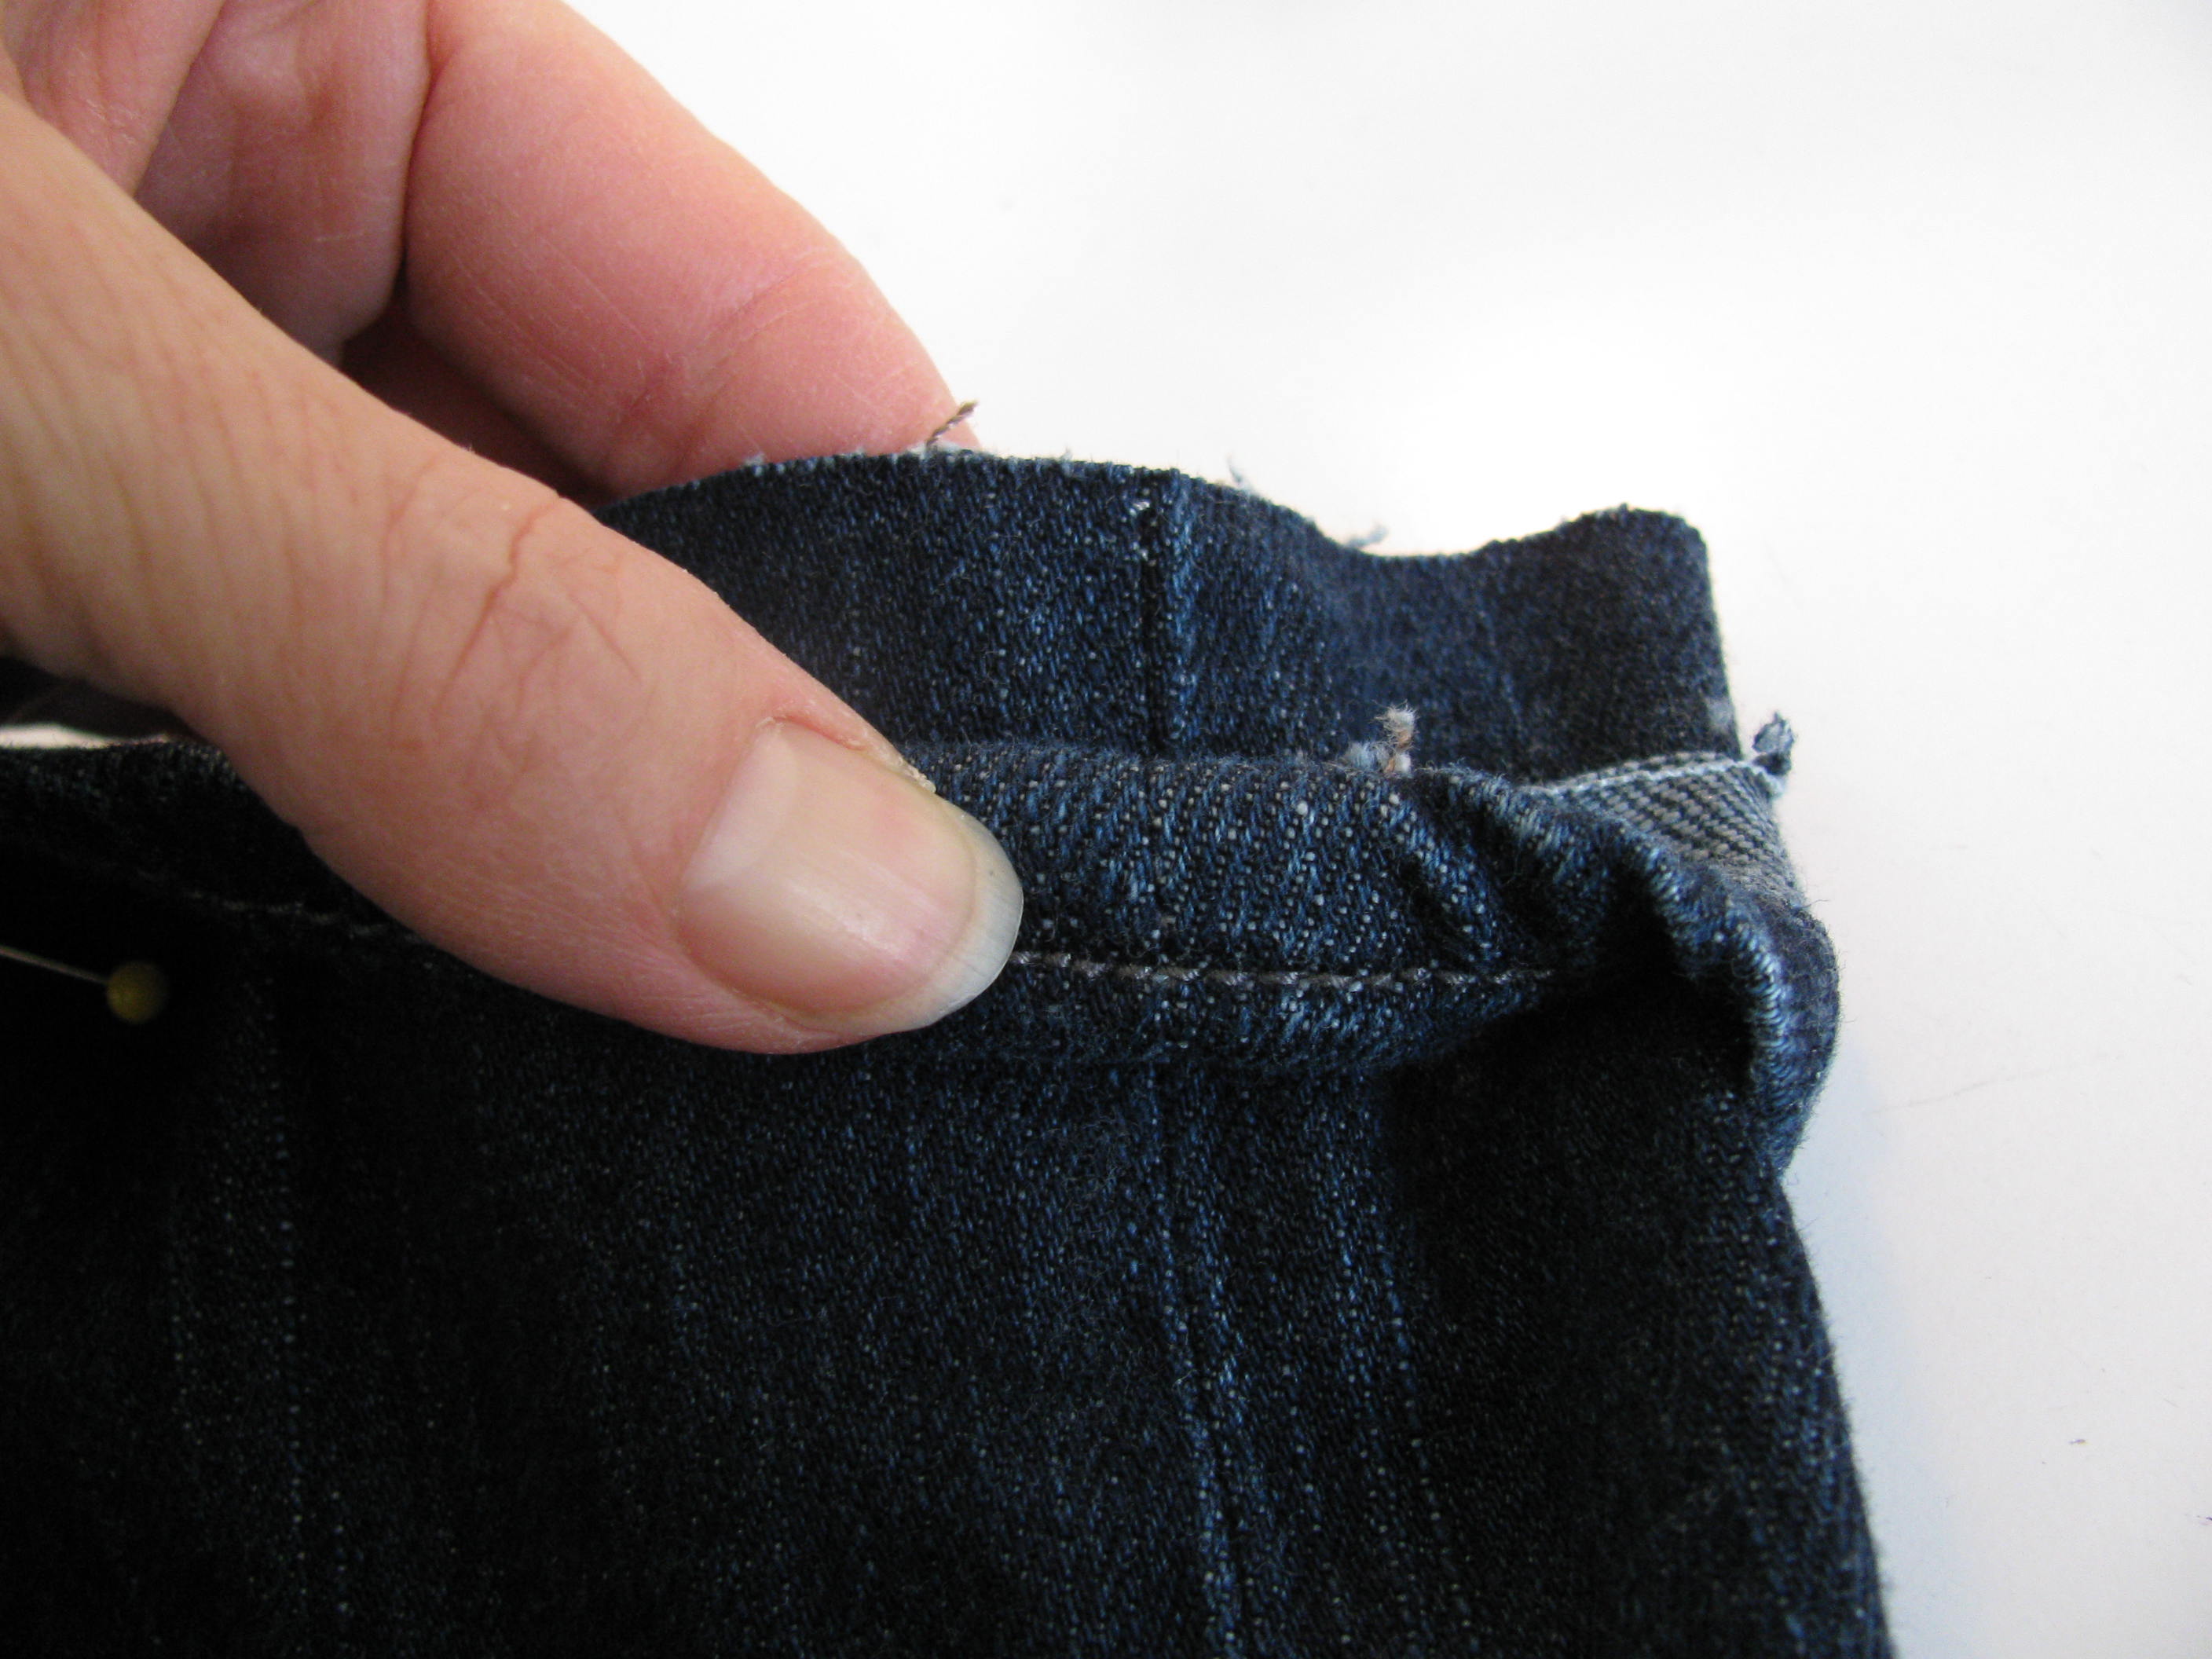
Looking at the above photo, the pressed folded edge is lined up with the rolled hem edge. You just can’t see it because the rolled hem is covering it up.
But, it’s there, under my thumbnail.
Everything from the top of my thumb down, will be what the jeans will look like when we’re finished.
Is this making sense?
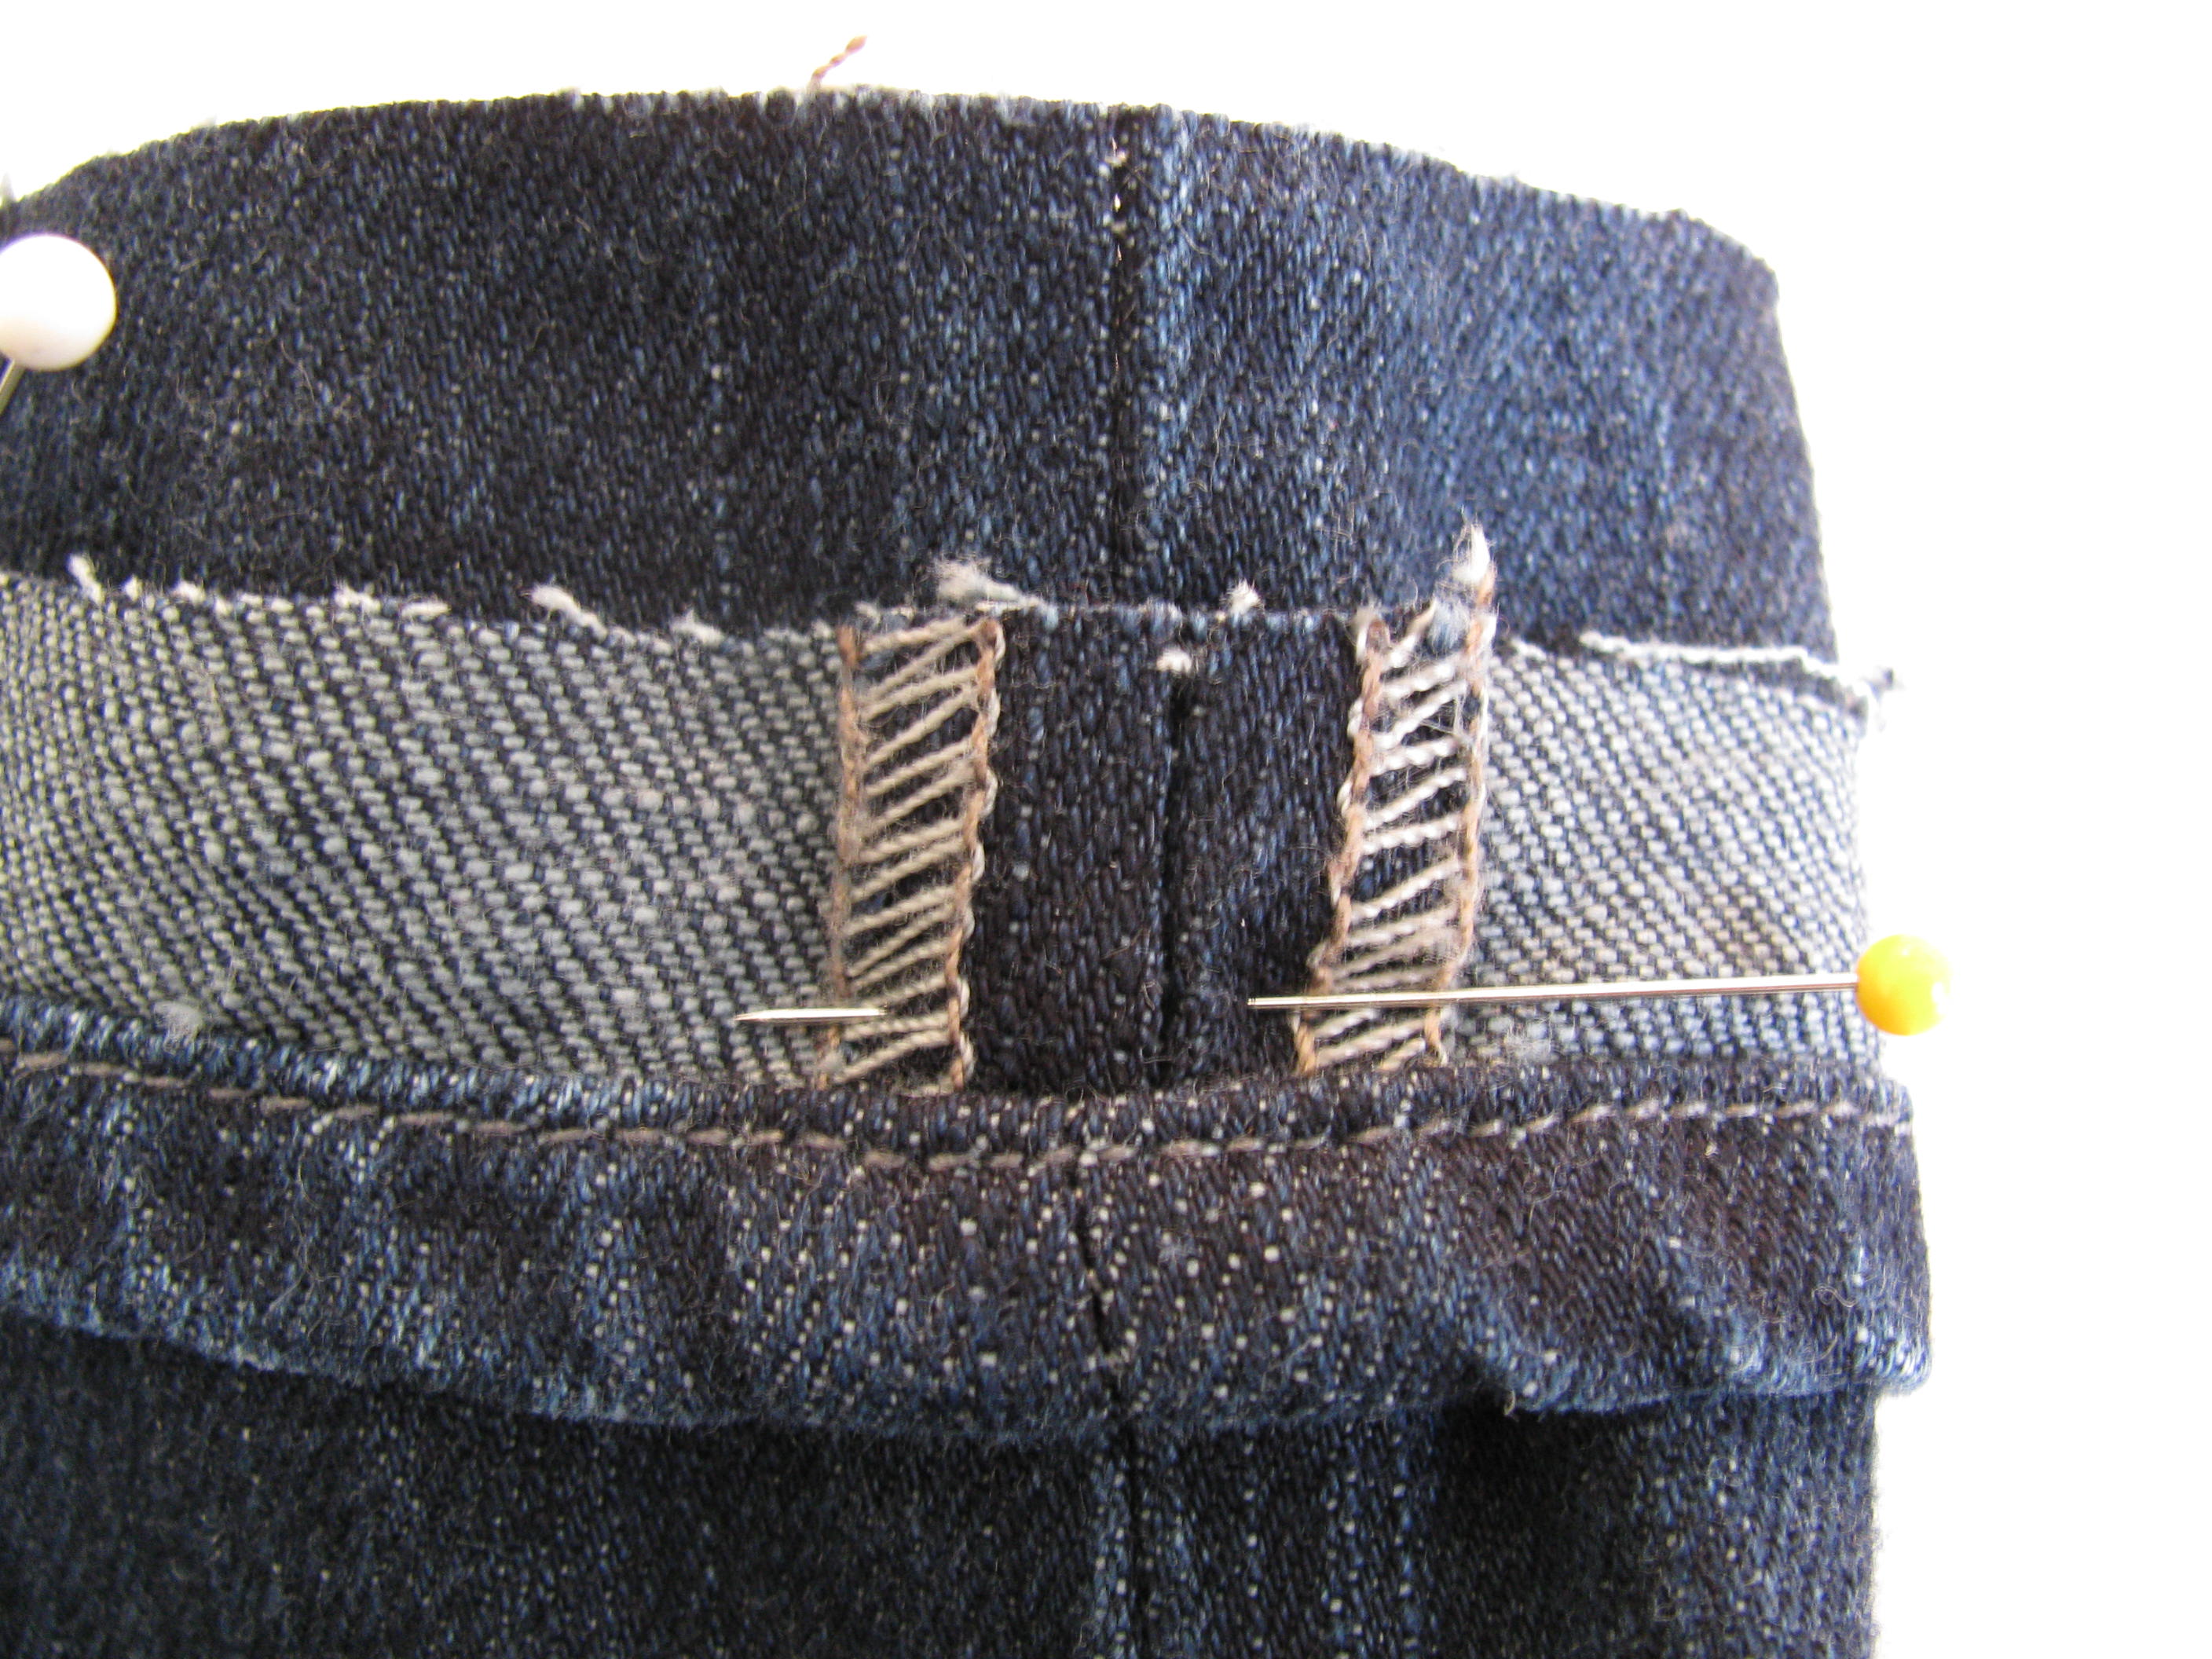
Ok, holding that rolled hem edge very carefully, so that nothing slips, unfold that rolled hem edge and put a pin in that spot like this:
You’re now going to sew right next to the rolled hem edge like this:
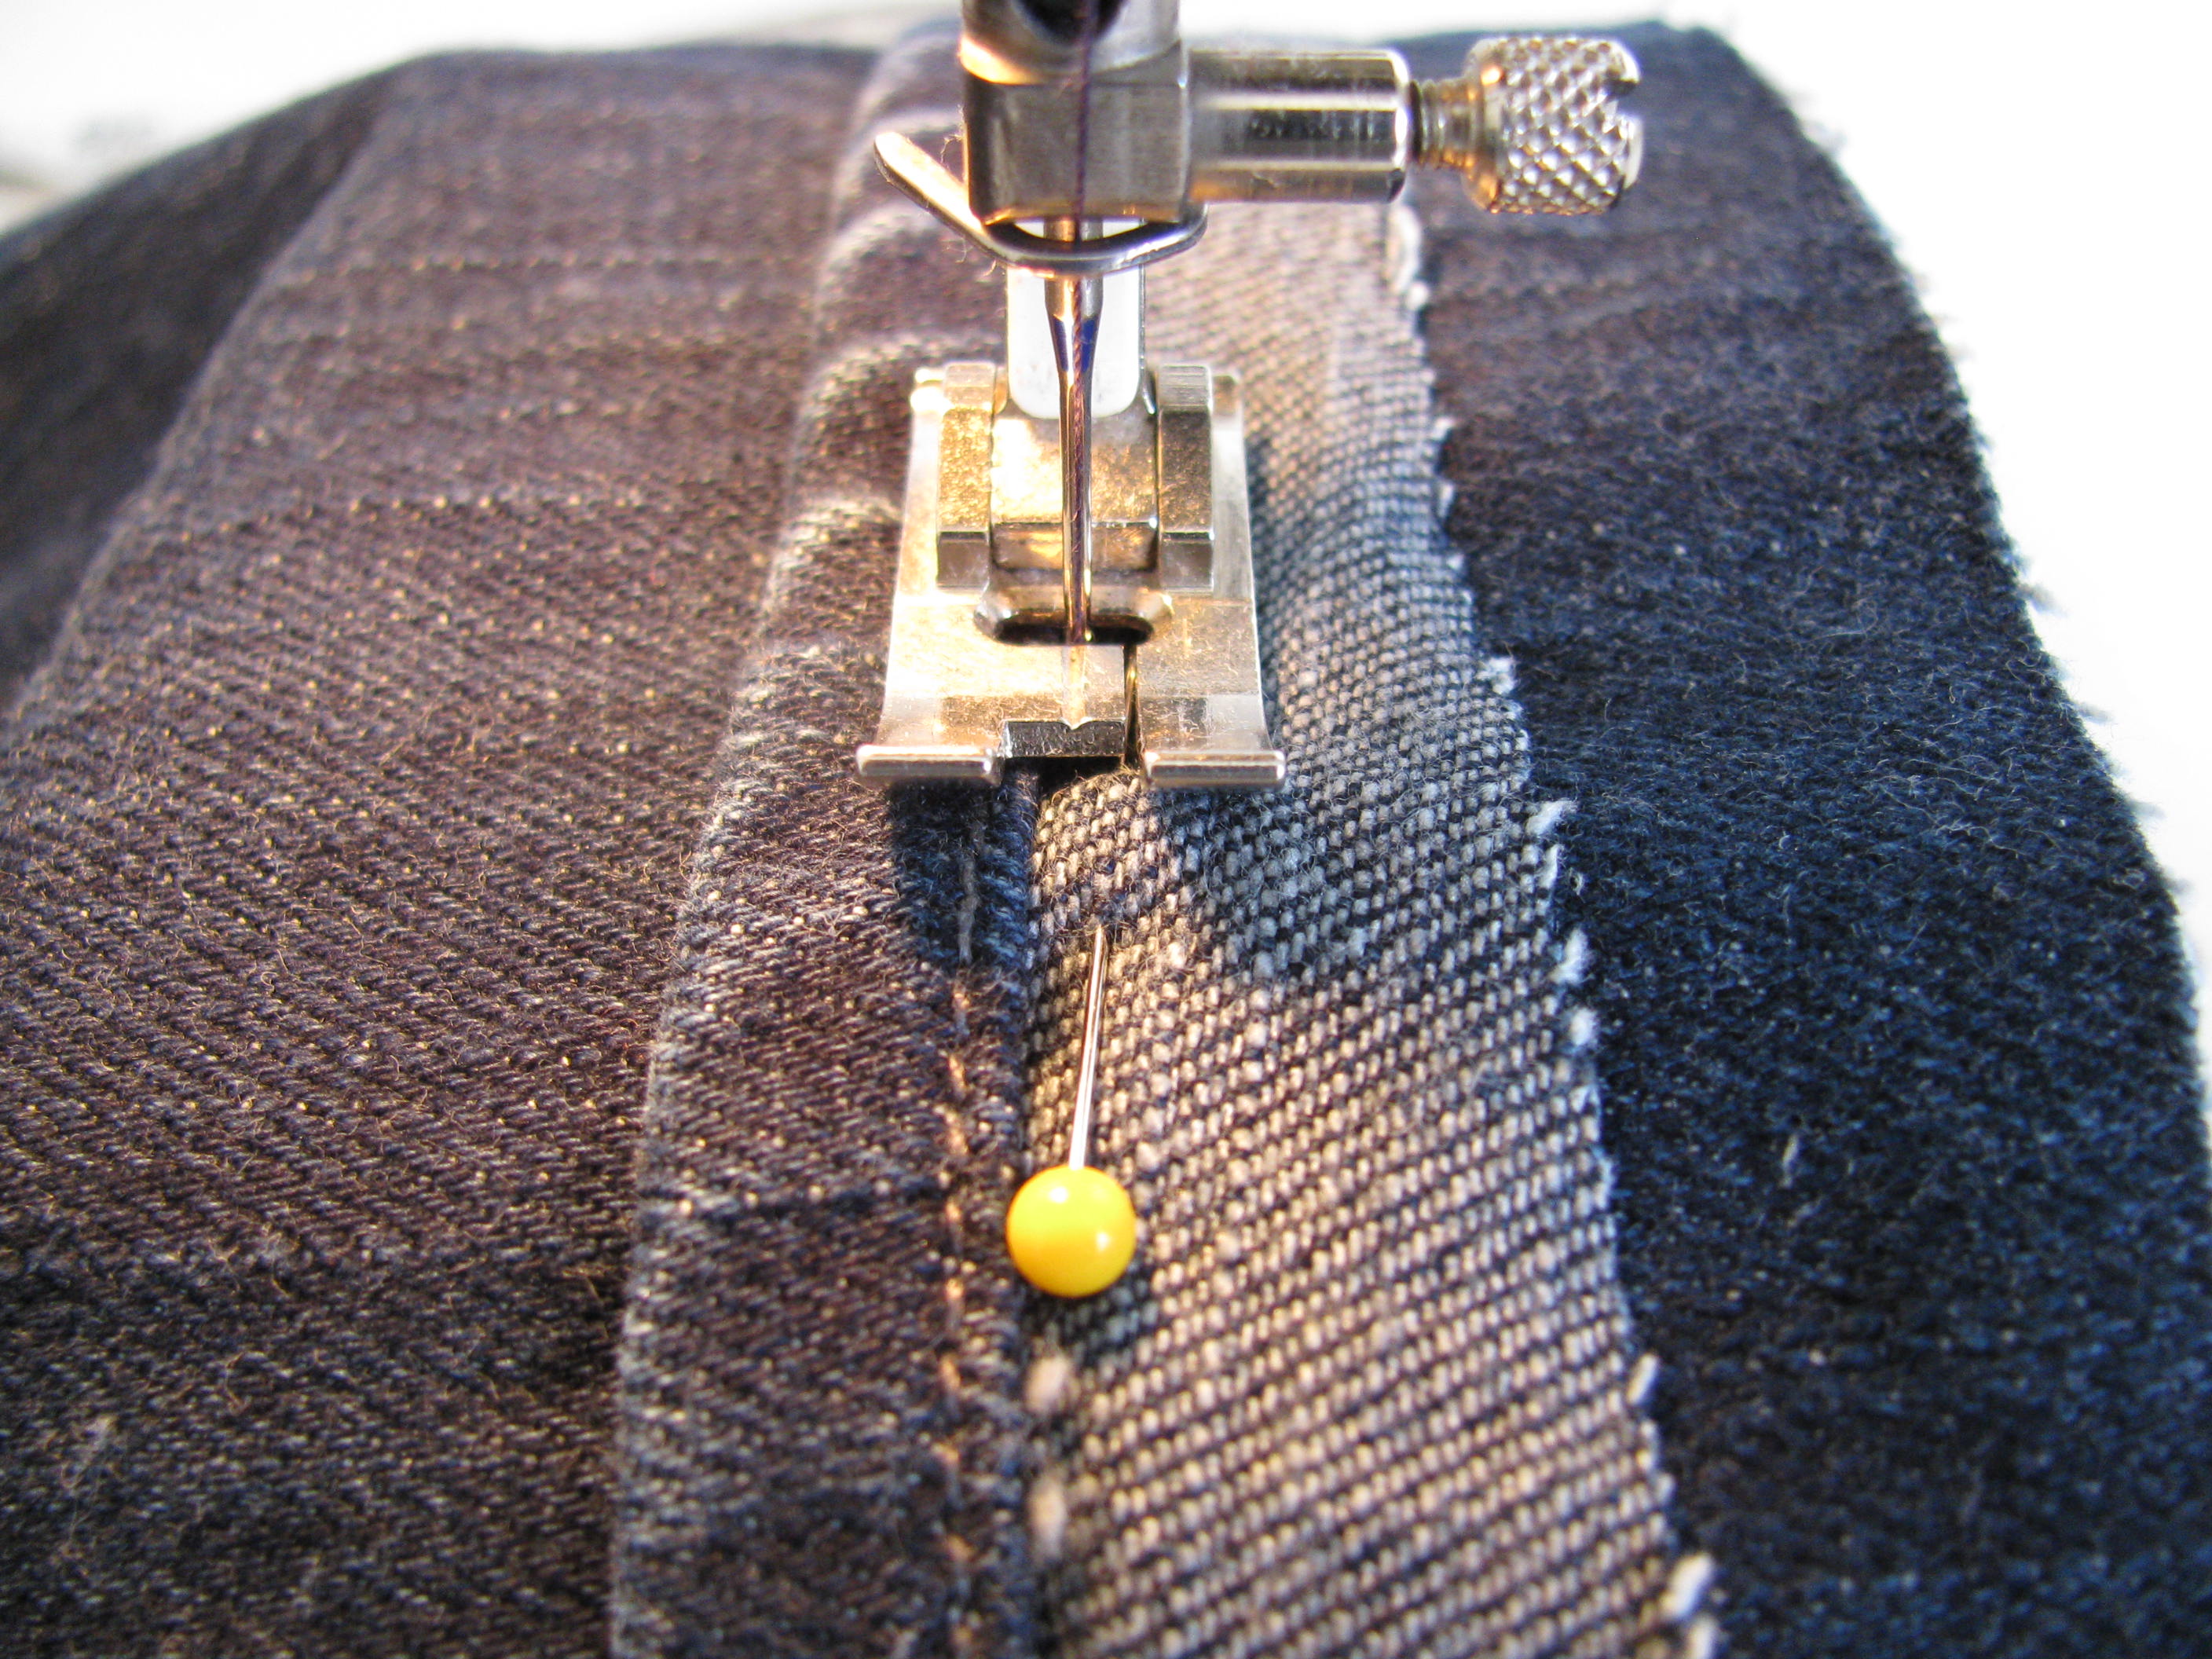
Just make sure you don’t sew over any pins.
Take them out before that happens!
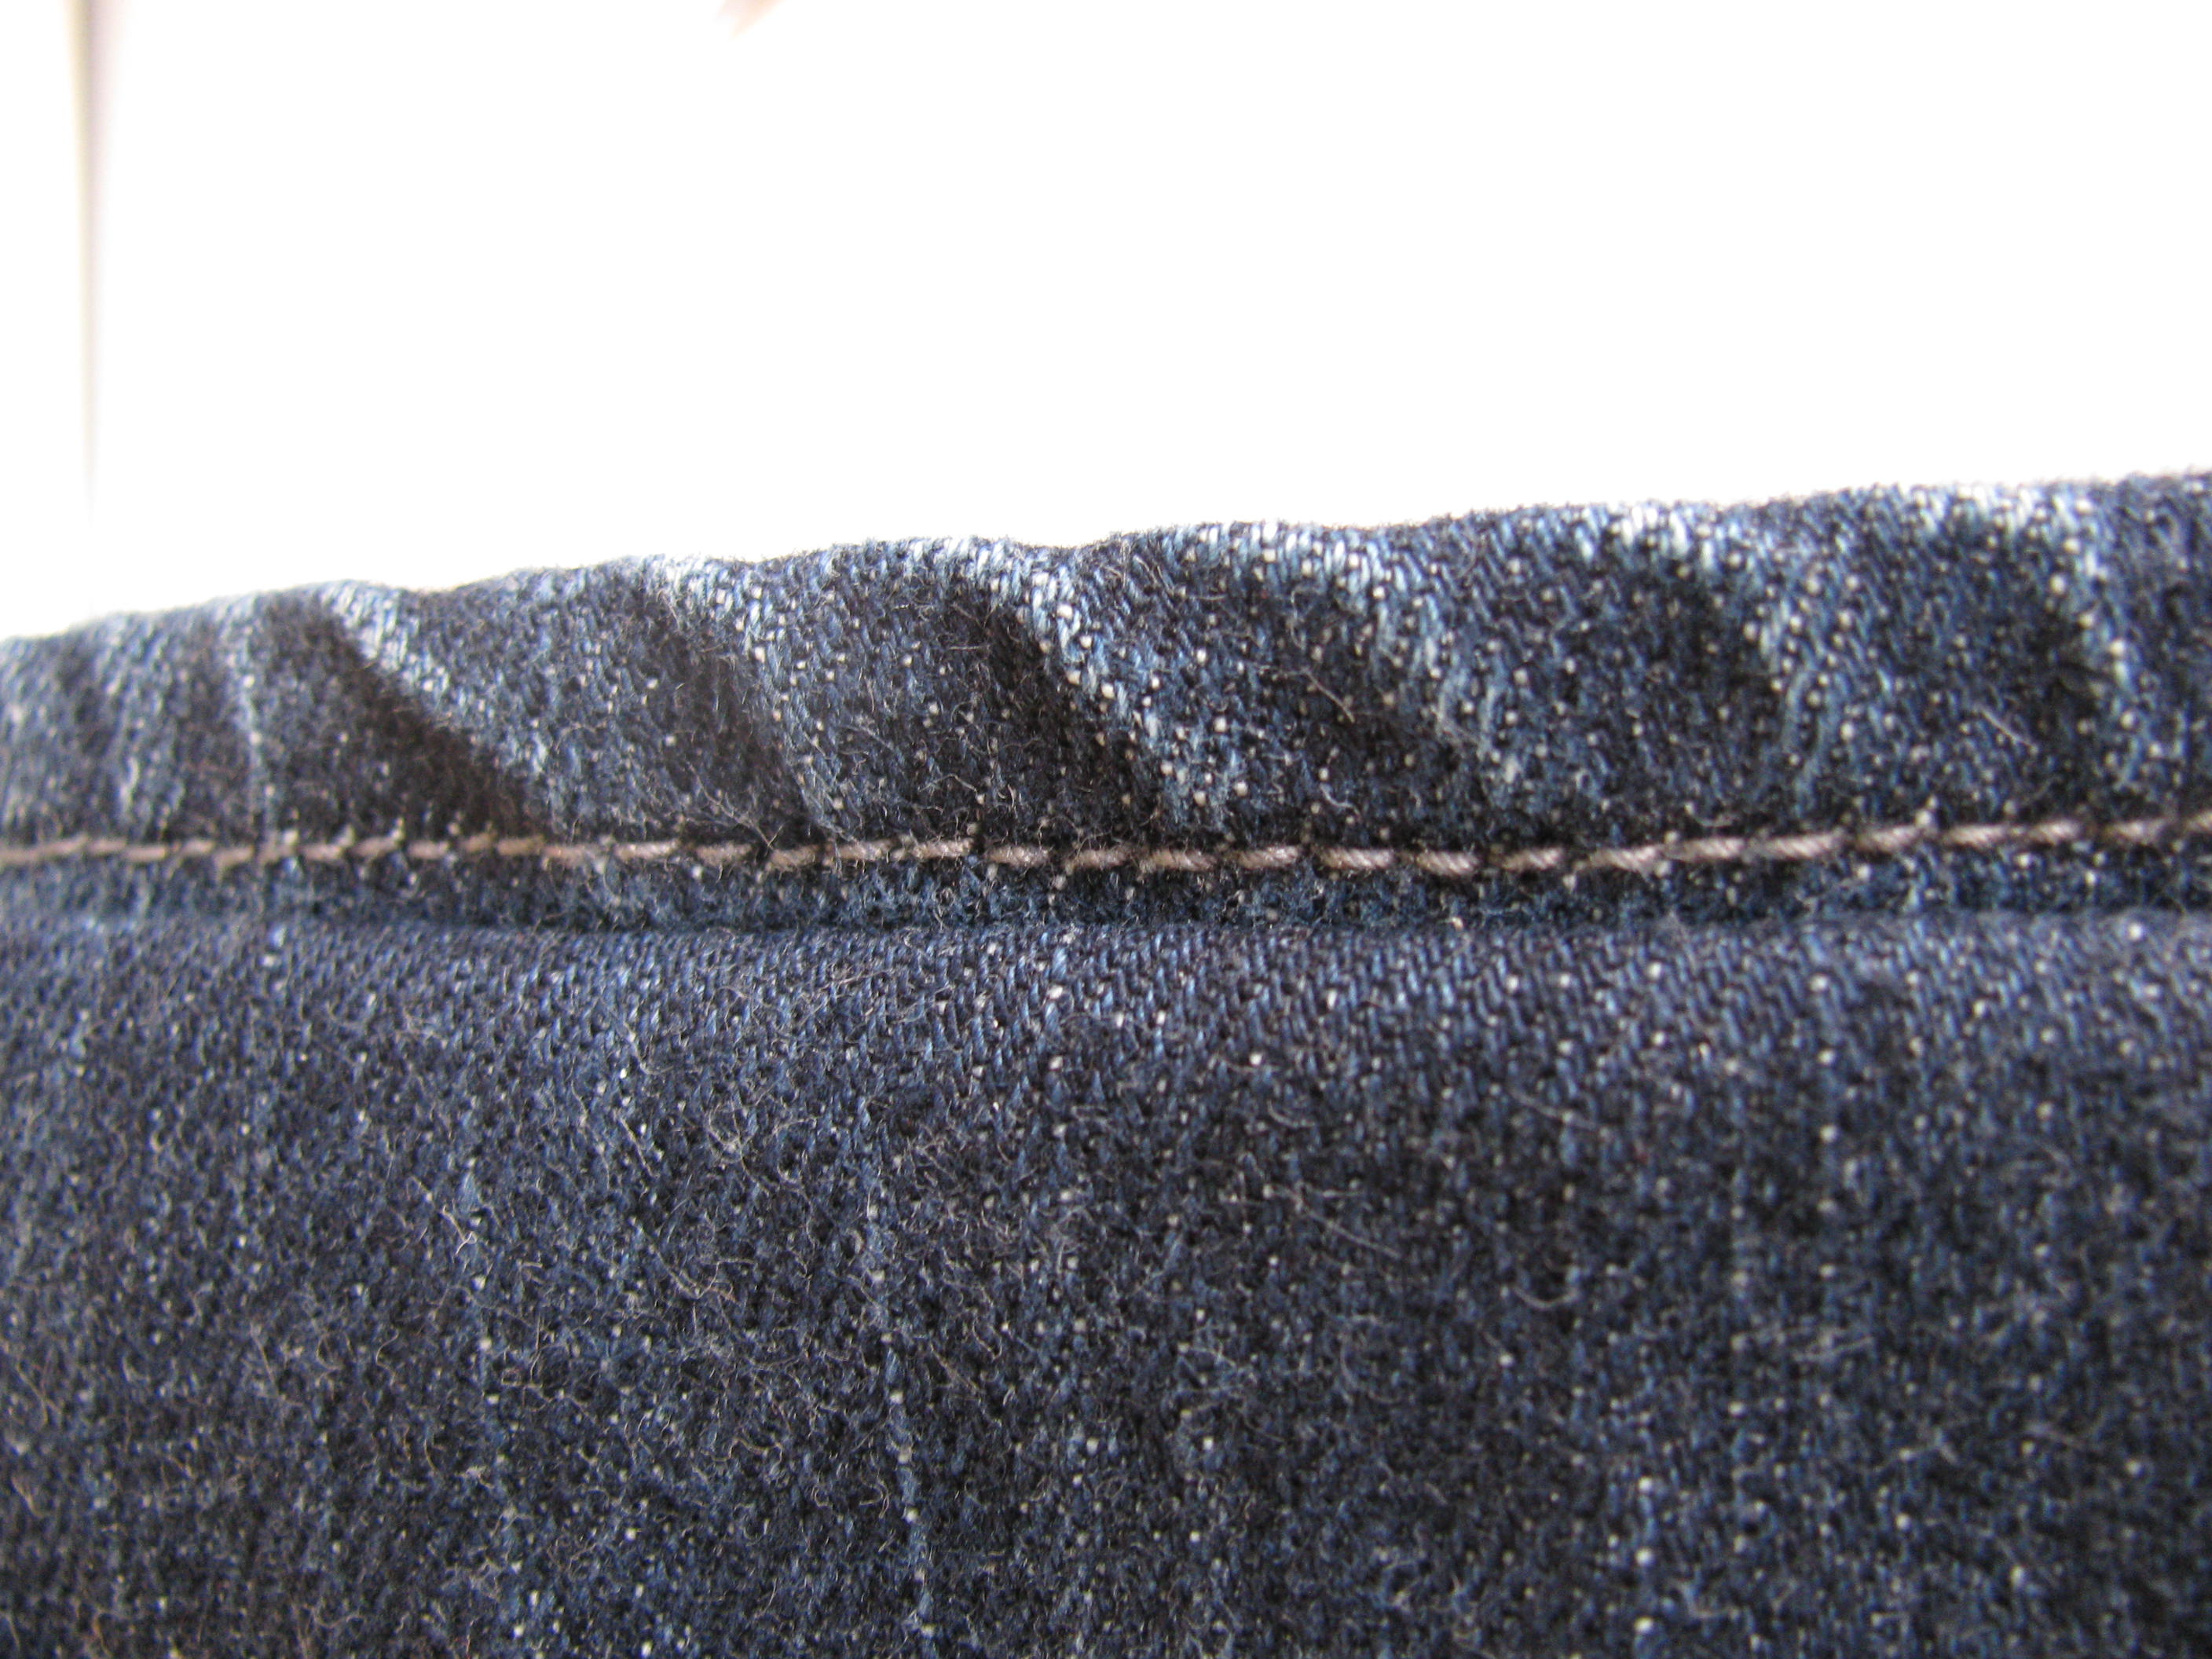
Now, fold the raw edges under to the inside of the jeans.
From the right side of the jeans, the new hem should look like this:
This is what it looks like if you peek inside the jeans:
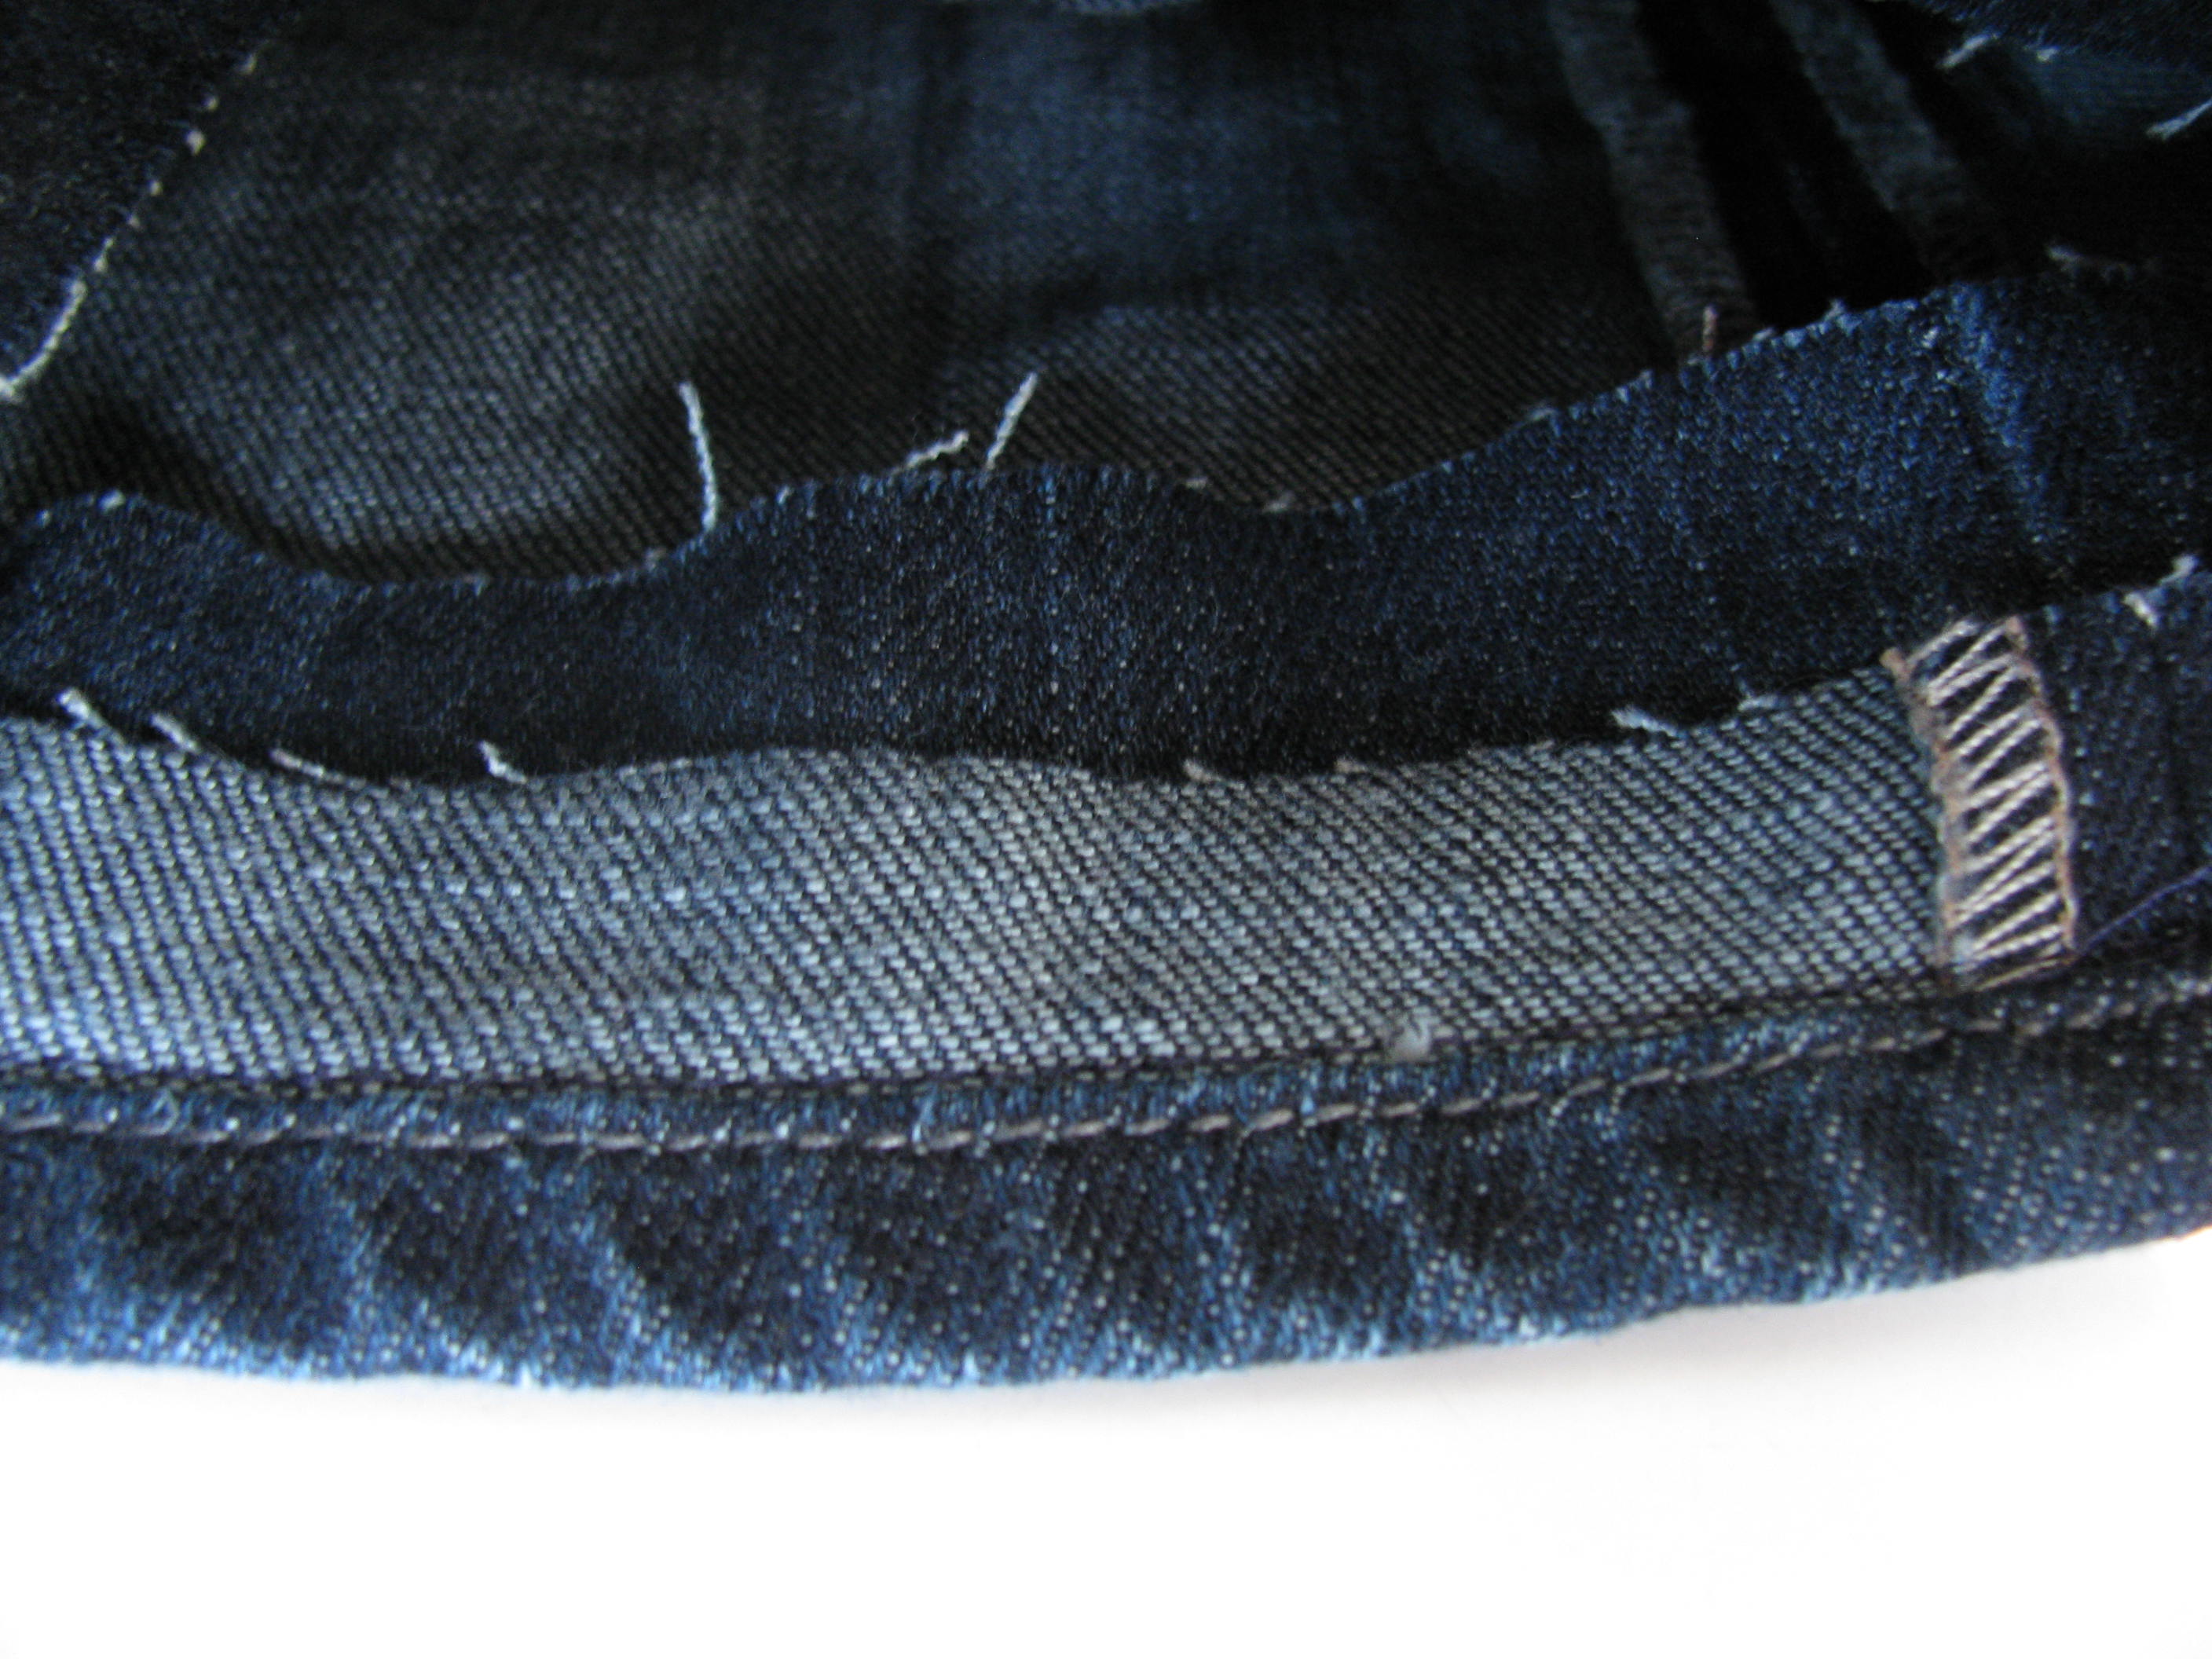
My raw edges are not finished yet.
I want my daughter to try them on first, before I trim anything or finish the edges.
This is what they look like after I pressed them on the outside:
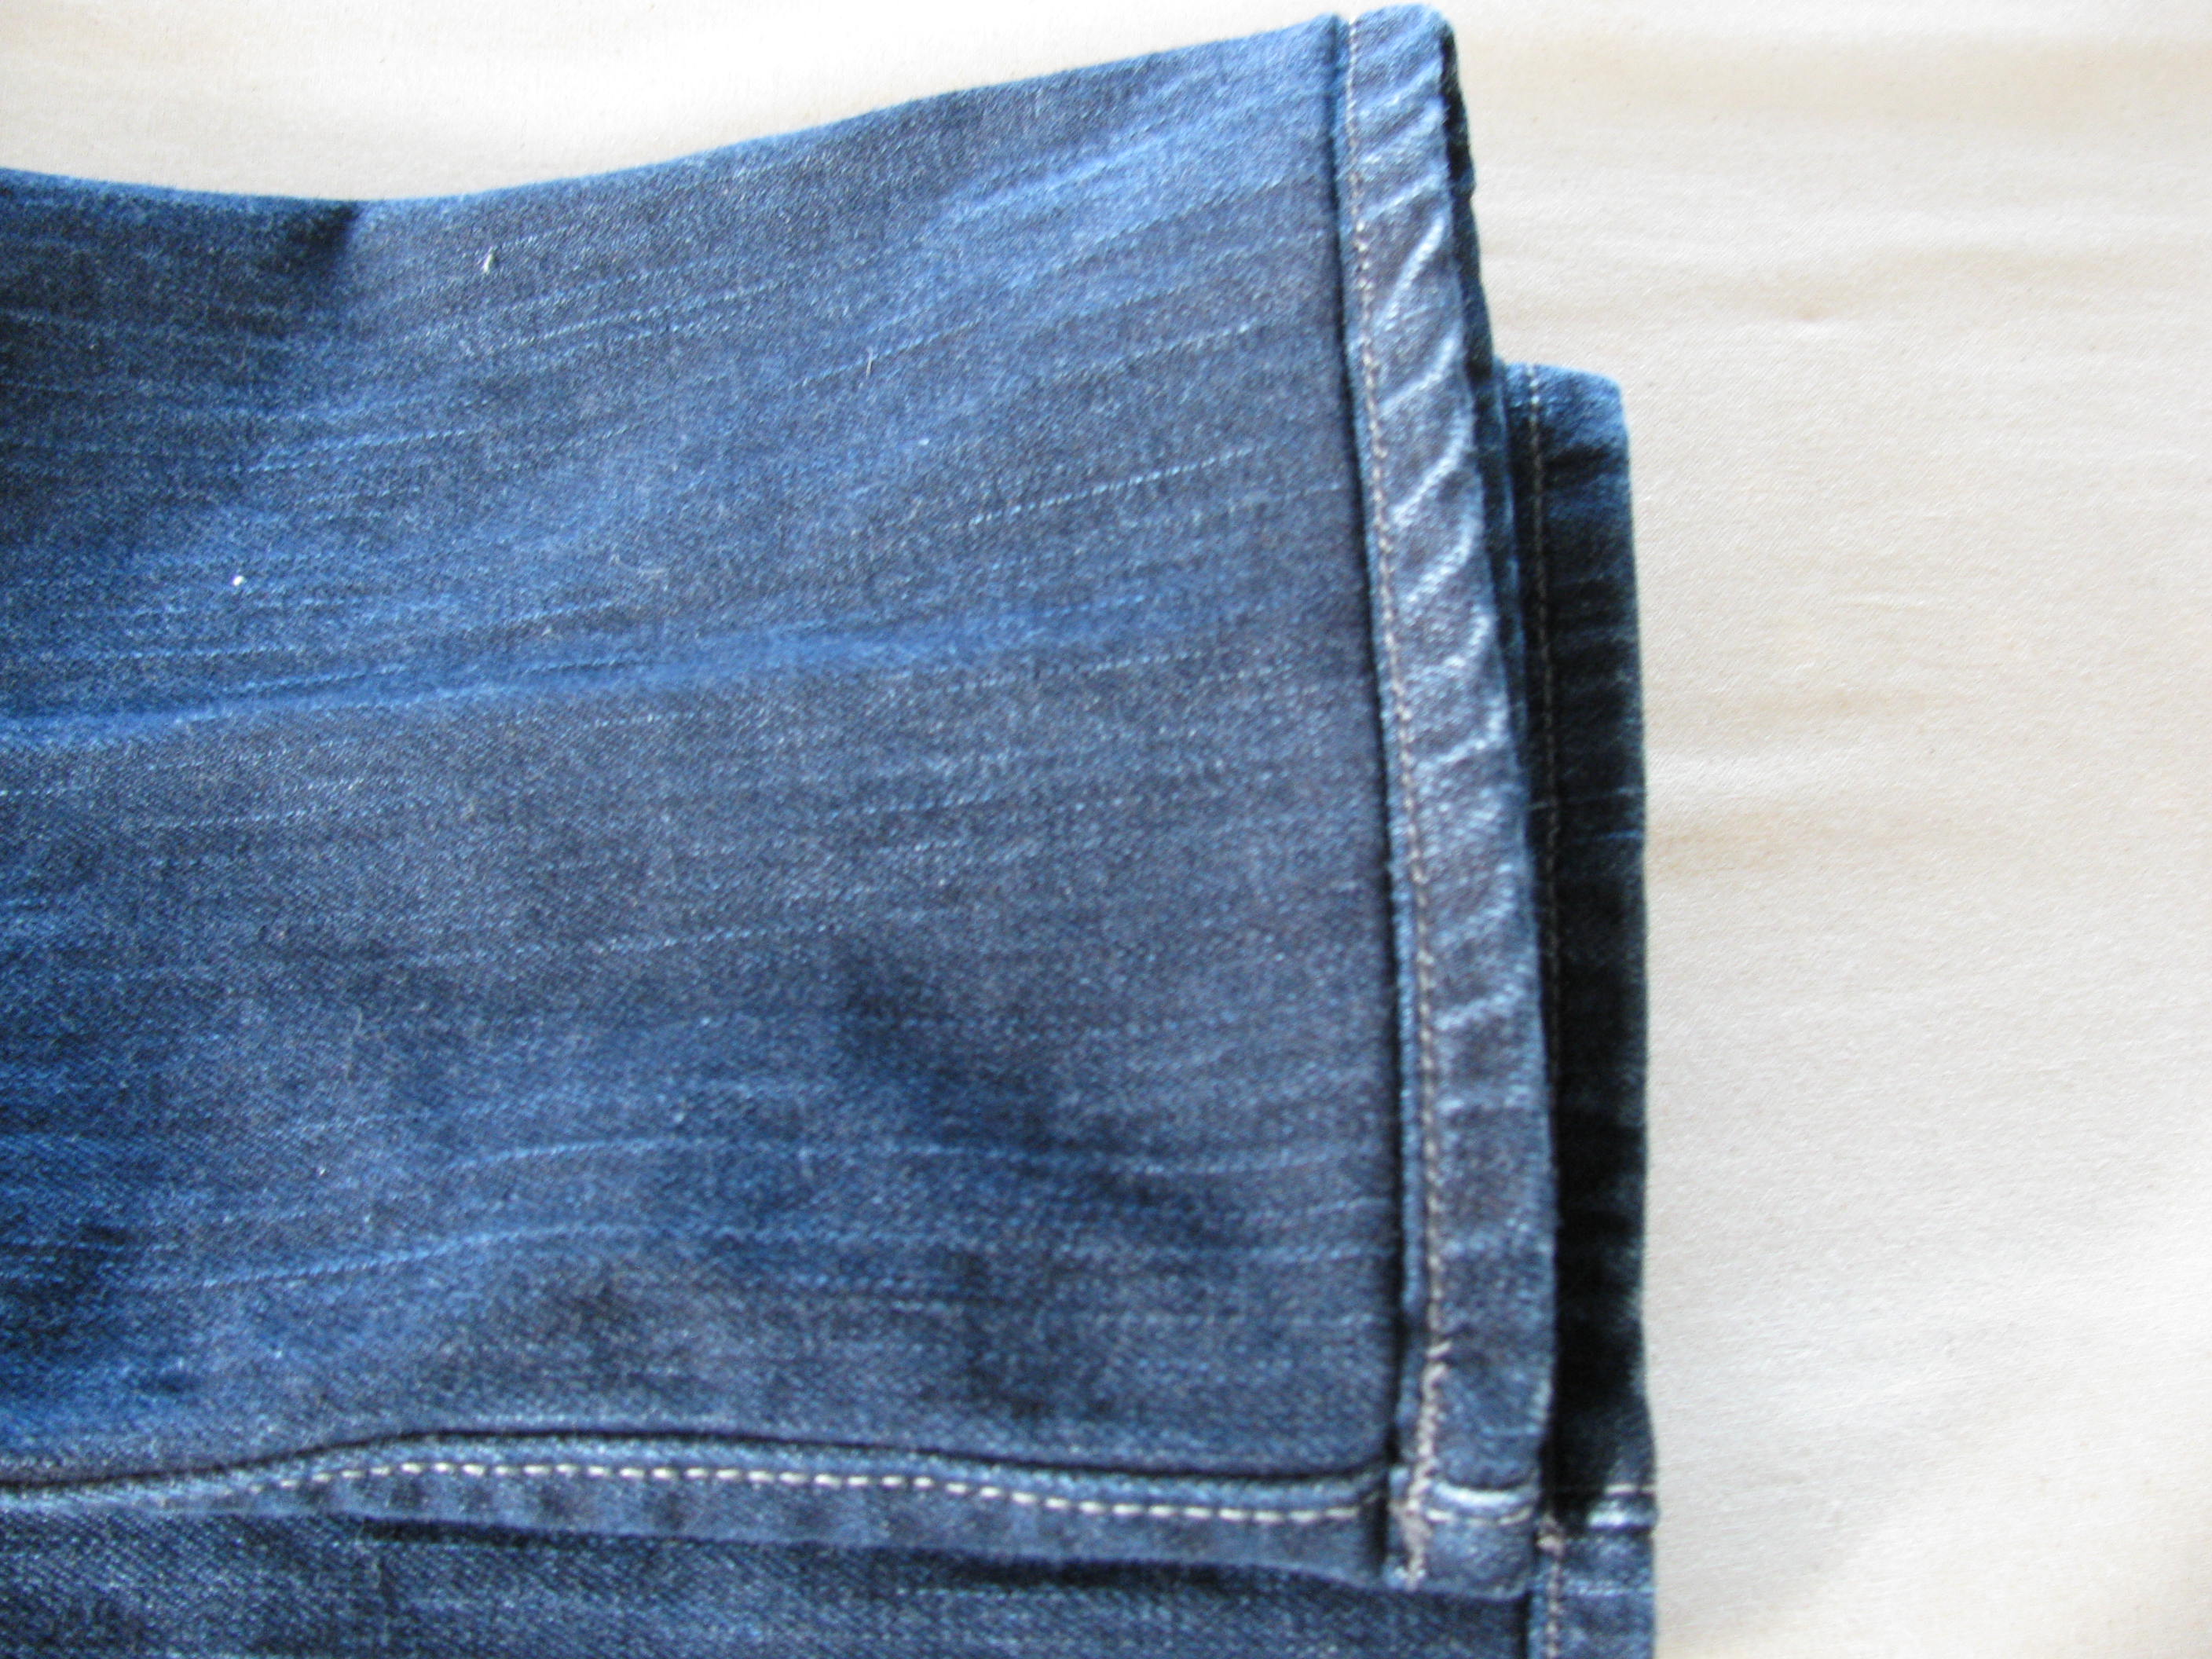
Ok, now you’ve seen this first technique.
For technique #2, jump over to Blankenmom’s website and see how she does it.
My daughter liked Blankenmom’s technique better.
I do too.
It seems like the hem will stay down better and not flip up.
It also encases the raw edges, which is another plus.
Thanks again, Teresa at Blankenmom!
We all learned something new.
****If your customers prefer a hem that doesn’t use the original edge, here is a post on How To Hem Your Jeans the Professional Way.

I was kind of surprised that you hadn’t done this before. You do a lot more fancy sewing than I do though. When I was up north, there were quite a few tailors who wouldn’t do it, so I made quite a bit of money on this one. I learned it from “Threads”!, so I guess that’s cheating?
It works better if you open up the hem and sew it like you showed, as close to the origional stitch line or wear line as you can. Then topstitch it down over the origional topstitch line. This makes it a lot less noticable and get’s that inside seam you have now, tucked into the roll of the hem.
I wish I had pics so I could show you.
I love that you use your daughter as your guinea pig; oh the many things I’ve tried out on my sons!
No, you are not cheating by getting your ideas from Threads! That is a great magazine.
Ok, so are you saying to open up the rolled hem? Love it! Which side of the wear line do you stitch it on? The side that doesn’t show which is next to your ankle? Hmmm. So, if you topstitch it down, you’re basically going over the same stitching line that you ripped out when you opened up the rolled hem, right?
Let us know exactly where you put that new seam in.
Thanks for all your help…awesome!
Linda
Yup, open the hem and sandwich it around the cut end of the pant. Make sure you have it the way you took it off or you’ll notice the difference on the side seams when the stitching doesn’t line up.
1) Cut the pants to the length you want, as apposed to the length you’ll need plus seam allowance, like you normally would. I would also cut the hem off sideways as apposed to lengthwise up the leg, that way it’s one continuous looped hem still.
2) Stitch rip and open up the hem.
3) Lay the origional hem and pant, right sides together, at the bottom, matching cut area’s like you origionally did, just shorter so the cut’s can both fit inside the new hem.
4) Sew right up next to the fold from the origional hem to the right side of the fold crease. (So towards the cut edges)
5) Fold it over, sandwiching the cut edges with the origional hem, some what pulling on it so it lays flatter.
6) Topstitch either very close to where the two seams meet or over the top of the origional stitching, depending on what exactly your trying to preserve. (Sometime the jeans have a nice wear above the stitching that you don’t want to break up and sometimes it’s just the very bottom)
Whether you sew it from the outside so you can match the origional stitching or from the inside is up to you and/or how straight you can sew. I sew it from the outside since I can’t sew a perfectly straight line to save my life and tend to miss parts of the fold, this keeps it on the inside and doesn’t show.
So short story long, really the only difference is that you put the cut edges inside the hem. 😉
BTW – this also VERY useful for when you have customers who come in with home hem jobs gone wrong.
thank-you for this step by step pic and directions—i know about this but have not seen it so easily explained THANK-YOU
shelly
You’re welcome. Check out the other comments too as they have some more great ideas.
Well, I was never happy with my results, so I wouls rather cut – turn up the little hem and stitch with jeans thread or matching. It is faster for me and looks like the original..to me anyway. . I make the turn up axactly the width of the original. All my customers are happy and think that I performed magic..ha ha ha.. Yes, THREADS is my bible of sewing.. cheers and thanks for sharing! I will try it again and see what I think!
Personally I like the look of actually cutting and rehemming better than moving the original hem up. I’ll share a clever thread matching trick shared to me by a dressmaker friend. Rather than trying to find heavy weight matching topstitch thread you can “make” it match by using 2 regular threads in the same needle (one bobbin thread, 2 top, sort of like twin needle sewing). E.g. combining tan thread and gold thread can make a more faded looking gold top stitch.
Nancy,
Oh that’s an awesome tip! I have never thought to do that. I can’t wait to try it!
Thank you so much!
Linda
Ok – Sorry it took so long, but I had to figure out a way to get pics. The only way I could figure it out was to put it on my blog and send it to you. So, I’m not implying you need to read mine, it was just an easier way to get it to you. 😉
Let me know if this helps and if you still have questions.
http://blankenmom.wordpress.com/2011/01/05/hemming-jeans-with-the-original-hem/
Yes, that helps so much! thank you for the photos and the step by step. Now I get it! I hope you readers will check out her website and see how it’s done. Thanks!
Hi Linda,
I know it has been while since you have heard from me but my husband got another job so we have been moving. Of course, my new apartment home is in a wreck right now. Please pray that I get some order soon.
I will need to start over in my business. In the meanwhile, I will practice until I can get re-established.
I have tried this alteration before but did not like the result so I never did it again. Instead, my customers don’t seem to mind the regular hem. The results of your original hem alteration does not look professional, like mine. You have a nice daughter because she let you do this to her jeans. I like the pics from blankenmom so I am going to try it again. I will let you know of my results.
Not busy with business,
Linda
Yes, after looking at Blankenmom’s jeans, I don’t like mine as well either. do you have any photos of yours? I’d love for us all to see them.
Meanwhile, I will take apart my daughter’s jeans and redo them like Blankenmom’s.
Thanks!
Linda
I have been hemming jeans with the same look. However, I only make a tuck on the inside right above the hem and stitch that in place. Then I stitch in the ditch on the seams on the outside to tack the tuck in place. Easy–no cutting–fast. Great for children’s jeans, too, since you can let the hem down easily.
Judy
Love it! I love the idea of a tuck. Do you have any trouble with the hem flipping up while wearing it? Do you press the tuck toward the hem or up toward the knee?
Linda
Linda, I have had no redo’s on my jeans! I don’t do this on jeans that are more than 4 or 5 inches too long. I press the hem up toward the knee and stitch outside in the seam lines on both sides. You know, we could trim that tuck down after stitching if it would stay in place (maybe)? Judy
I love the “tucking” idea! Sounds like it would save a step!
Thanks! I have been searching for a solution for ages. I also appreciate the comments from Blankenmom. What a great online sewing community!
I agree, Sara. I sure like it when others help me out! I am hoping to fix my daughter’s jeans this morning!
Thanks for writing in!
Linda
I am a seamstress in a tailoring shop and just thought I would let you know what we do. We actually use the same technique as you showed in your tutorial with a couple slight changes…
In the step in which you sew the original hem back on, sew as close to the original stitching as you can without sewing over top of it. Then flip it down, you may have to give it a tug to show the thread. Also if the side seams are chunky and won’t sit flat, us a hammer to soften them up. Once you have done that, top stitch on the right side of the jeans. You want to top stitch on the opposite side of your seam than the original hem, but as close to the seam as you can (hope that makes sense), make sure to use thread that matches the colour of the denim so it does not stand out. To finish it off, surge the raw edge inside and give it a good pressing.
Most customers want the euro hem/original hem because they want the identical thread (sometimes jeans have odd colour thread that we don’t have) so opening it up and resewing just is not an option.
Hi Megan,
Thanks so much for the tips. It does make sense and I appreciate your sharing it with us.
Linda
Hi Linda,
I think I am finally getting settled in my new environment. Now, I am ready to get down to businss once again.
So (or sew), I altered a pair of jeans according to the above technique #1 but the results were not attractive using that method. Today, I read Blankenmom’s tutorial (technique #2) on the original hem and I tried it on my teenage son’s jeans (poor guy) but there was over a 4″ hem difference. As mentioned in the above comments, it appears that one cannot use technique #2 when the difference is over 3.5″ because the hem edge closes to the ankle is more narrow than the leg area, even on straight-leg jeans. Instead, I just turned under the hem twice and doubled the thread using Guterman’s #875 and #539. This makes the hem look like an original hem as stated above and my teenager was very pleased!
Thanks goes to Nancy for a great tip.
Linda M.
I’m so glad her tutorial helped and that you are letting us know about the wider hems. Thanks so much!
Linda
I have been hemming jeans for a local boutique. I use the technique Blankenmom uses, except I press the raw edge of the original hem inside so that it matches the other pressed side. It then looks like a casing, similar to double sided bias tape. I slip the new edge of the jeans down in it and pin really good, then sew all the way around. On flared jeans I have to take the original hem up so that it fits the new edge of the jeans. I also open up the side seams of the hem and press flat to keep it from being so bulky with all those layers. Works well and everyone has been please so far. The down side is that it is hard to find thread that is the same thickness as the newer style of heavy topstitching. The best I have been able to find is Gutterman top stitching thread. I need to find bigger spools because I do big volumes and one spool only lasts for about four pair of jeans. Any suggestions? I would also like to know if anyone has done original hemming on jeans that have a slit on the outside.
Hi Allison,
Great idea! I too, have the problem with the thread being just right. There are even new jeans out now that have a braided look. It looks like three threads are braided together…..impossible for a regular machine to duplicate. I would like to hear what other commenters have found for thread. Great question.
Linda
If it were something I was working on and I absolutely couldn’t find something to match (even after combining threads to make my own) I’d go for a complete mismatch as though I did it on purpose (well, I guess that would be true a this point?) I’ve got several pairs of jeans that have two different colors of threads or a stray color they use only in one spot (maybe around the zipper or pockets). So if all the thread all over the jeans is a shade of gold, use a complete opposite color of gold, adding a touch of it somewhere else if you’d like. If the jeans are black and the thread is white (I hate those ones) you can always go with black thread.
I’m wondering if the braided chain look could be made with a type serger?
Thanks for all your help on this. Great comments! How did you know there was a new comment? I’m impressed! The lady at Nordstrom’s said she does have a special serger for the chain stitch especially for the Big Star and Silver jeans.
Here’s a few good links for larger spools. http://www.bglieberman.com/ and http://bergentailorsupply.com/threads1.aspx. If you’d like to do another search, look under “industrial sewing thread supplies” or “industrial sewing supplies” and “tailors supplies”. Not all of these places will sell to smaller businesses, but many will at a slightly higher cost.
http://www.albertzoll.com/index.php?cPath=236_239&osCsid=fff85e3b4ca6c710cffb2fee9842eaae (This one had a great selection of heavy duty top threads in a ton of colors – you know, for those REALLY hard to find colors!)
Hope some of these helped!
Thanks for the info. I am so glad I discovered this site. I knew there was a new comment because I have it set to go to my email. I just started searching this week to find something in bigger volume,so I will definitely check out those sites. I look forward to eventually upgrading to a nicer machine, but for now I am using a Viking Emerald 116. It is very nice compared to my old Kenmore. I have a Juki serger still in the box that I need to learn how to use. That is on my new year list of things to do. The “jeans-hemming” has really been a blessing. I never thought so many people would respond when they found out someone knew how to do it. We will see where it leads. Thanks again!
Hi Allison,
I’ve heard Vikings are great machines. Our Home Ec department used those exclusively when I was in junior high. I know that was a long time ago, but if you have a good one, hang onto it for dear life! Glad the hemming info has helped. Blankenmom is the BEST!
Linda
I was thinking the same thing.I’m sure they are using a fancy industrial machine to do all of this topstitching. Most people dont really mind if the hem stitching can be replaced just as it was, because the stitching around the pockets and down the sides is what is most noticeable. I hem a lot of “MissMe” brand jeans, and the popular thread right now seems to be metalic silver. I just use gray thread and it does fine. My main issue right now is finding it in a bigger spool.
I used to know a wholesale place you could buy larger spools, but they are out of business. Have you tried Nancy’s Notions, JoAnn’s online or Clothilde?
WAWAK.COM has man jean thread colors. Guterman is on sale through tomorrow if any one uses it( regular poly ,nor jean). Anyone had luck with their jeans thread? Love to make some thrift store jean finds into shorts.
Hooray for the shout out to WAWAK! Their customer service is excellent, their prices amazing, and shipping is reasonable: <$5.00 [or free on $100 orders.] I stock my 'sewing pantry' from the monthly sales and order other supplies as needed. Their July specials include Buy 2 Get 1 Free Invisible Nylon Zippers [as low as $0.36 each,] and 25% off their Spun Poly [$2.16] and Gutermann Blind Stitch [$4.46] threads.
Whoops–I forgot to log in! The “Anonymous” WAWAK post is mine.
There’s a much simpler method to use the original hem WITHOUT cutting off the hem as you’ve described.
You fold up and sew the original hem FIRST.
THEN you trim off the excess material (or leave it folded up for a while until you’re satisfied with the new pants length).
Finally, you finish off the “exposed” edges with a zigzag stitch or serger.
The nice thing about my method is that you don’t have to cut anything UNTIL you’re happy with the length of the pants leg.
Can you send me a photo of the finished hem? We’d love to see it. Thanks
What a great idea! Makes total sense!
What a great idea! Makes perfect sense!