My husband had a job for many years where he had to wear dress shirts to work.
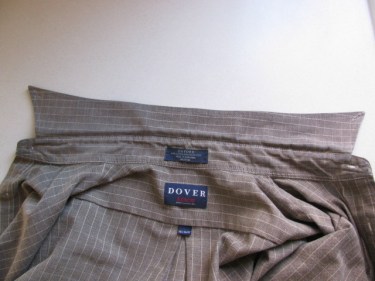
Invariably, the collars would be the first thing on the shirts to wear out. It’s hard to see in this photo, below, but the collar is beyond help. It is worn out.

Because my husband has his favorite shirts, and it’s hard to part with them, the fabric invariably gets worn out over time and the threads unravel or the interfacing would show through.
Or, over time, I couldn’t get the stains out…the “ring around the collar” stains.
But the rest of the shirt was in good condition.
This would happen with casual shirts too: flannel, plaid, and corduroy.
It can happen with any shirt.
So, I’d flip the collars..
And the shirts would last twice as long.
Let me explain what I mean.
Here’s a shirt with the ring around the collar problem. I’ve tried soaking it in all manner of detergents and solutions, but the ring won’t come out. So, I needed another solution instead of throwing the shirt away. I needed to flip the collar to extend its use.

A typical shirt has two parts to the collar: the upper collar with the points on it, and the stand (the lower collar that is the long skinny piece just below the upper collar which “stands” up). The lower collar usually has a buttonhole on one end of the stand and a button on the other end.
To do this method, you will not have to change anything about the buttonhole and you will not have to move the button. That sounds awesome, doesn’t it?!
Here is that shirt again. Now, let’s talk about your shirt…
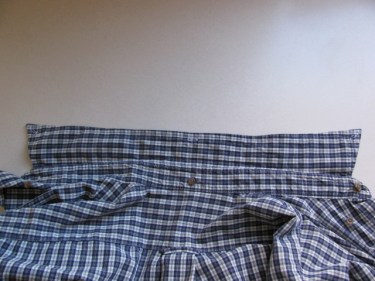
To see if your collar is “flippable”, look at the back of the collar like this shirt below.

As you can see in the photo above, the back side of the upper collar has permanent bubbles in it. These bubbles are caused by the iron-on interfacing that some companies use and the wrinkles are caused when the interfacing was not applied correctly. Or, the interfacing shrinks and the shirt doesn’t, causing the bubbles. There’s no way an iron will smooth them out. I’ve tried. If your collar looks like this, then I don’t advise you to flip the collar. I haven’t had success with that because the bubbles will then show on the collar as it is worn.
Sometimes, those bubbles are on the front of the collar, so look and see if the back side is better than the front!
I also want to say that I’ve noticed that alot of shirts have no interfacing in them anymore. So, the bubbling might not be a problem or consideration with your shirt. That may make your decision on whether to save the shirt much easier.
The shirt in the photo above has permanent wrinkles and bubbles and it wouldn’t be a good candidate.
But, if the back side of the collar is smooth and lays flat, you can flip it.
If your collar has stains on it, it will be a good candidate if there is no staining on the underside. When you flip the collar, there won’t be any stains because you are flipping the collar so that the stains will be on the underside.
Ok, enough of all of that. Let’s get to the alteration!
I chose this shirt (below) as an example so that you can see the two different fabrics. There is a cotton denim and a cotton plaid fabric. Hopefully, having 2 different fabrics will make this tutorial easier to follow.

This shirt does not have any bubbles on the back of the collar:
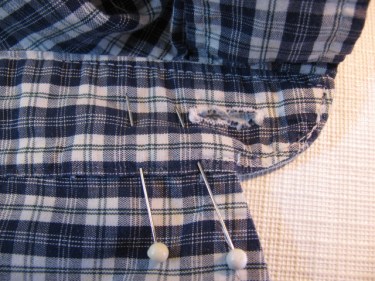
Now, notice how your shirt is stitched along the collar.
There is a horizontal row of stitching that runs between the tips of the blue pens in the photo below.

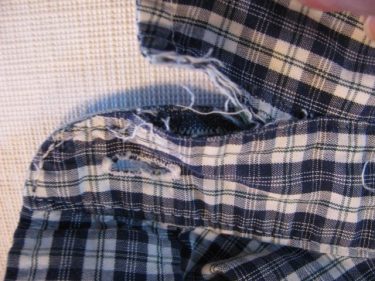
Using a seam ripper, take out that horizontal row of stitching, starting at the place where the seam ripper is in the photo below. You don’t need to rip along the curve of the collar. We are just going to rip along the straight.

I just flipped the shirt over to the back side so you can see the stitches easier to take them out. Ripping out the stitches from the backside also keeps you from accidentally tearing the top fabric of the shirt.

Continue ripping out all the stitches between the two points of the collar (between the two pens in the photo you saw earlier in this post.)
Once you have that seam taken out, there is another hidden seam that holds the upper collar to the lower collar. Take that seam out too. You may want to take both the topstitching seam and this one out at the same time.

When you are finished, you should have the upper collar separated from the lower one.
Now, all you do, is flip the collar over and pin it back in place in the exact spot you took it out from.
You can pin it in place along that horizontal edge, making sure the upper collar is sandwiched inside the 2 edges of the lower collar. Double check the back of the collar to make sure that no raw edges are exposed. I usually like to stitch from the front side of the collar since that is the side that most people see. The underside hardly ever is seen.
Before you stitch, look for the old stitching holes left behind from when you took the collar apart to use as your guide.
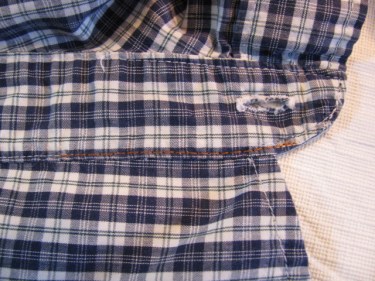
Then re-stitch it back in (I used orange thread here so you could see it better), stitching along the same line of stitching, or the old holes from ripping out the collar, that you took out in the first place. You don’t need to worry about putting in that second row of stitching, because this new stitched line will hold everything in place, especially if you sew real close to the edge like you see in the photo above and below.

It just takes less than 30 minutes to do the whole operation.
Isn’t that simple?
And you just doubled the life of the shirt by doing so!

What a great idea! Thanks for sharing.
You bet. Hope it helps!
9 years after, this is still teaching the public, I didn’t think about the wrinkle collar
Thank you, Jermaine! Yeah, that’s the cool thing….as long as we are sewing and wearing clothing, the same principles will apply. Clothing construction hasn’t changed that much over the centuries, so once we figure it out, we’ve got it!!!