Does your machine come with a blind stitch hem foot?

Have you used it before? Most of the time, it is used for stitching hems, but some folks use it to stitch down appliques for quilting or decorating clothes or hand towels.
They can make a hem look rather professional. (I used contrasting thread here, but if yours matches the fabric, you won’t see it.

Make sure your machine does this type of stitch. Then, follow your sewing machine manual to set up your particular machine. If you don’t have a manual, you can usually get one from the manufacturer or on ebay.
Basically, you will set your machine so that the needle is to the far right (so it misses the middle divider on the foot as it sews). Also, you’ll adjust the machine to a special stitch which resembles a zig zag, only it takes about three straight stitches and then one zag. The wider the width you choose for the zag, the more or less it will stitch onto the pant leg or skirt fabric. You don’t want a big wide stitch because it will show up on the right side. So, take the smallest width you can that will be able to hold the hem tightly enough for use.
First, you want to fold the hem up on the foldline and then fold it back like this. (The area near my thumb is what you put under your presser foot).

Then, as you stitch, the machine takes about three straight stitches to the right of the needle:
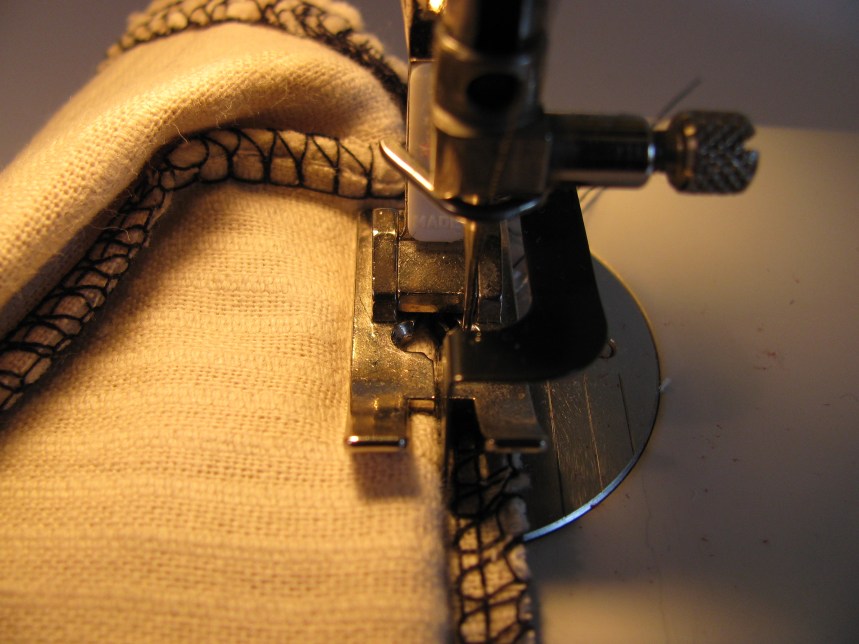
and then take it takes one stitch (a zag) onto the pant leg (or skirt body).

If you are appliqueing, you can take several stitches next to the applique and then one onto the applique itself.
You continue stitching all around the hem until you reach the end where you started, making sure you catch the pant leg with each zag. When you near the side seams of the pants of skirt, you want to make sure you catch the side seam areas which are thicker, so you may have to widen the zag to accomodate. Just be sure to readjust the zag to a narrower width for the rest of the hem.
It should look like this:

This is how it will look from the outside:
Of course, yours will look better because you’ll use matching thread.
Check out this post on How To Hem Pants and Skirts.
There are all kinds of posts on how to hem on this blog. Click on “Alterations” above and then click on the hem topic you’d like to read about. There is more than one page of how -to’s concerning hemming, so grab a cup of coffee and enjoy!
