I have a customer who loathes zippers in her robes.
So, she asked me if I could take the zipper out and put in buttons.
No problem, I answered.
However, before I started, I wanted to make sure that she understood that she was going to lose some of the width in the front.
Putting in buttonholes and buttons means one side will overlap the other (just like a shirt that is buttoned does) when I am finished.
That’s the main decision in changing a garment from zippered to buttoned.
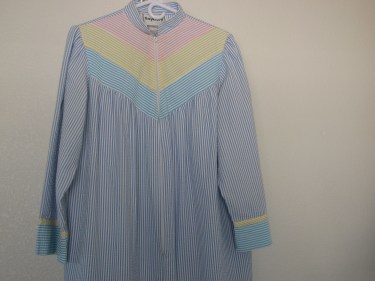
In this case, there was another little challenge to ask her about. With this robe, the diagonal yoke stripes won’t match in the middle, once I do the alteration.
But that was fine with my customer.
She just wanted buttons, no matter what the robe looked like. She figured no one would see her in it anyway.
Here’s the robe:
The good news is that the garment you work on most likely won’t have this diagonal yoke type of problem.
To begin with, remove the zipper with your seam ripper.
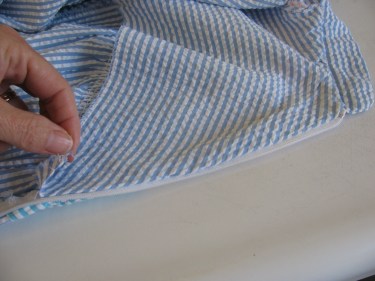
On this robe, there is a facing on the inside top of the robe and the zipper is sandwiched inside of it.
So, if you have a facing in your shirt, robe or other garment, you’ll need to rip out the facing and then the zipper. Sometimes you can take out both at the same time.
For this illustration, I decided to take off the facing first and then peel back the zipper like this:
Once you have the zipper out, you’ll notice that this garment did not separate in two down the center front. There was a center front seam running down most of the robe.
In other words, the zipper didn’t go all the way to the hem of the robe.
So, I needed to open the robe up at the center front.
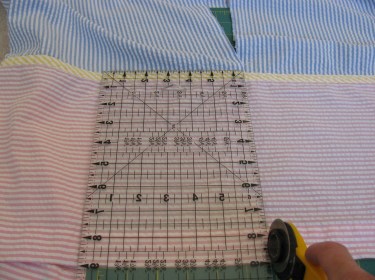
To do this, I lay a cutting mat in between the front of the robe and the back of the robe (so that I don’t cut the back of the robe by accident) and used a rotary cutter and long ruler to cut the robe open.
Line up the ruler perpendicular to the hem and make sure it lines right up to the zipper opening.
And then cut it:
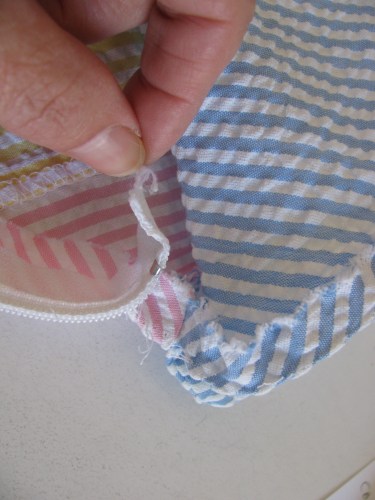
Once you’ve cut the opening, look to see if you’ve cut across any seams.
If you have, you need to anchor those seam edges so that they don’t come undone as you work on your garment. Just back stitch at the edges of those seams.
Next, the robe was topstitched on the yellow trim, so I just locked in the topstitching with some back stitching (shown in the photo below):
Next, take a few stitches out of the hem, at the center front area, so that you can open that hem area to work on it later.
Serge the raw edges of the center front opening, if you have a serger or overlock machine.
If you don’t have one, zig zag the raw edges with your sewing machine so they don’t unravel:

Since there is no facing currently, you’ll need to make one, or fold back the raw edge and topstitch it. But, I want a more finished, professional looking end product, so I am going to make a facing.
Since I don’t have any fabric from the robe in which to make the facing, I will look through my fabric stash and find something that will not show through or clash with the robe fabric.
To make this facing, I cut a piece of fabric about 2 1/2″ wide and as long as the length of the front of the robe. This fabric happens to be 100% solid white cotton fabric.
Next, cut some “iron on” interfacing a little narrower and a little shorter than the facing strip, so that when you press it on, it doesn’t stick to the iron or the ironing board.
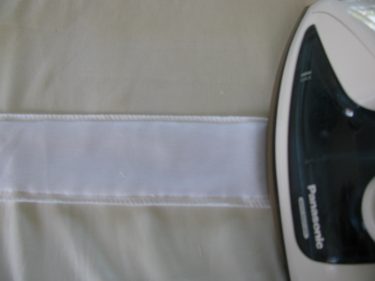
Now press the interfacing onto the wrong side of the facing strip.
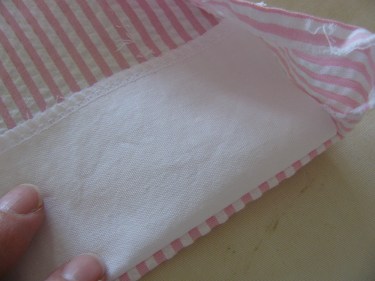
Lay the facing strip right sides together down the front edge of the robe.

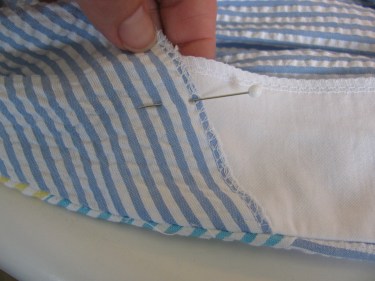
Do you see the facing that is hanging free in the photo above? (It is the blue and white striped fabric on the upper part of the photo that looks like a triangle.) Just fold that over to the wrong side of the center front and make sure it will cover the top edge of the new facing strip). In the photo below, you can see that when the original facing is folded over, it will cover the white facing strip after it is sewn.
So pin it in place like in the photo above, and stitch it down.

Now pin the original facing to the facing strip being careful not to catch the front of the robe in the pin.
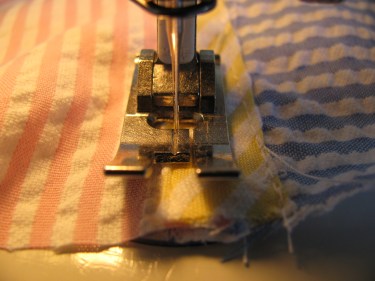
Open this area out flat and stitch it in place so that you don’t catch the front of the robe in the stitching like this:

At the bottom of the robe, trim off the white facing strip even with the folded hem edge of the robe. As you can see, it will be hidden once the hem is stitched in place.
Open out the hem and facing. Take the bottom edge of the hem and fold it up right sides together onto itself and pin in place:

Stitch along that seam line (in the above photo) where the pin is. Of course, you don’t want to stitch over the pin! I just put it there so you could see the line better.
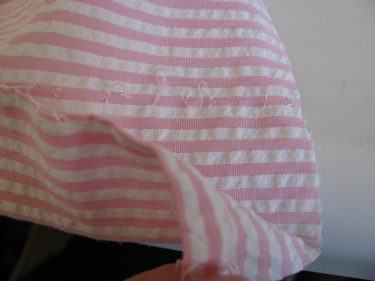
When you turn it right side out, it should look like this:

Now stitch the hem by hand or machine, using a top stitch or a blind hem foot.
Next, make buttonholes of whatever size you’d like based on the size of the buttons you or your customer chooses.
I am not including instructions on making buttonholes because every machine is different and some have built in buttonhole makers.
So check your sewing machine’s instruction manual.
Sew on the buttons with a thread shank if you need it.
I realize every garment is a little different than the one I just explained, but the technique should be applicable to whatever you are working on.
Enjoy your “new” garment!

Have you ever done the opposite of this?
It seems like I have once before. The only problem is that you have to take out the buttonholes and that might not leave you with enough circumference around the robe or garment. You most likely will need to remove any facing he garment has as well. It’s time consuming, but doable.