You probably already know how to sew on a button, (we’ll cover that in this post if you don’t), but do you need a thread shank on your button?
Let’s talk about that.
Some buttons come with a built in shank. It is usually a metal loop or a molded plastic piece on the underside of a button.
Typically, buttons that do not have holes, have a shank. It’s a way to attach the button.
If your button has holes in it, you might need a thread shank.
But why?
What is a thread shank?
A thread shank is something you create to elevate the button above the fabric so that when you button your garment, the fabric underneath the button lays flat and doesn’t look puckered when it is buttoned.
This is especially important if you are buttoning thick fabric or textured fabric. Most heavier coats (and trousers that button at the waist) have a thread shank. Ideally, all garments should have a shank, whether made of thread or of plastic or metal.
Not only do shanks make it easier to button, it will look more professional to have the area pucker free.
So, let’s look at how to sew on a button with a thread shank.
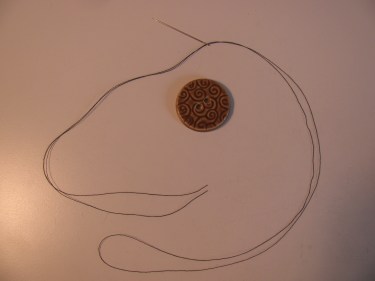
As you can see, I am going to sew on a thick clay button. In this case, this button will go on a bag. Because it is a heavy button, and the loop that I will use to button it with is thick, I’ll need a thread shank.
***Here is a time saving tip: When sewing on a button, you can double the thread and then thread the 2 cut ends through the needle at the same time. This will allow you to have a four stranded thread to sew the button on with. It will make your job go twice as fast, because you’ll only have to make half as many stitches. Does that make sense? Read that again. Just make sure you have a long length of thread to start with (36″ might be good):

Once you’ve threaded the needle, simply tie a knot at the end of the threads.
You’ll see that you have 2 cut ends and a loop near the knot. That’s exactly how it should look. You can cut the loop if it bothers you.
Ok, now to sew the button on.
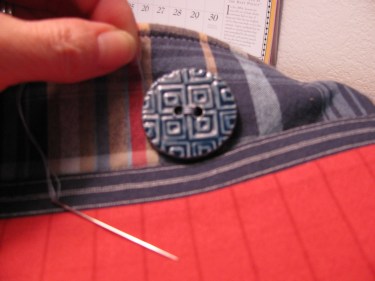
Place the button where you need it to be and hold it there with one hand. Or, you can put tape across the top and bottom of the button, as long as you don’t cover up the holes in the button.
From the back of the item you are sewing on, pierce the fabric with your needle and come up through one of the holes. Now, take your needle and go down through the other hole and pull until you don’t see any excess thread. Don’t pull tight though. (If you have a button that has four holes, come up through the third hole and go down through the fourth hole with your threaded needle).
Now, before you come up through the first hole again, put a toothpick (if the button is large like mine) or a thick needle through the top of the threads on the button like this:

Do you see the thread on the toothpick? You may have to work the toothpick or the thick needle into that area a little, but you’ll get it in there. You can loosen the thread a little if you need to, that is why we didn’t pull the thread tight after we stitched the first holes. Once you get the toothpick or needle in there, keep it there while we finish sewing on the button. You’ll see why this is necessary in the next few steps.
Keep sewing on the button by coming up through a hole and then down into the other one (Work either clockwise or counter clockwise if you have more than 2 holes in the button), until you have the button sewn on securely. Also, be sure you have at least 12″ of thread left when you stop.
Keeping the toothpick (or thick needle) still in place, bring the needle up from the back (but don’t come up through a hole. Come up on the underside of the button instead (As in the photo below):
Now, take the toothpick out. The toothpick has made it possible to have excess thread between the button and the fabric.
Now, wind the thread around the button between the button and the fabric. You can go either clockwise or counterclockwise.
Wrap it 5-10 times around the button.
Now, take your needle and poke it underneath the button (on the right side of the garment or bag) and pull it through to the back of the garment or item.
Knot it several times and then take a small stitch and cut the thread off.
If you look at the item, you’ll see that the button is raised up from the garment. In other words, it is not sitting against the fabric. It is sitting up. When the item is buttoned, this gives the fabric below the button plenty of room to sit without looking puckered.
Good job!

I learned how to do this in home ec class a long time ago but I’d kind of forgotten how to. Thanks for the informative post. 🙂
Oh, good, glad it helped. You had a good teacher if she taught you this!
Linda
Nice blog thanks for posting
Thank you, Leonard, for the feedback. So glad you liked it!