A question came in yesterday asking how to line the inside of a nightgown.
Without having the original pattern, you might think it’s impossible.
But, even if you don’t have the original paper pattern for a garment or any item (and you won’t have it if the item was purchased online or in a store), you can still make a duplicate garment without it.
This is especially rewarding when you have a favorite item in your closet and you can’t find anything like it in the stores. You can make a duplicate and add it to your wardrobe with something you know you already love!
So, let’s look at how easy it is to make a sewing pattern from the garment or item you already have.
Call it my early Christmas gift to you! Ha!
All you need is some wide paper of any kind. If you don’t have wide paper, you can tape together computer paper or any other type of paper you have lying around the house. I wouldn’t use tissue paper, however, because it is pretty fragile and tears easily.
If you have access to the end rolls of newsprint, that is my favorite paper for this project.
Our local newspaper office gives these ends out for free, so I grab one or two a year.
They are great for all kinds of purposes.
You might be able to find rolls like this at an office supply store.
This is what my roll of newsprint looks like:

Begin by rolling out a length of paper for your project.
Do this on the carpet, not on your floor.
You’ll see why in a minute.
I chose a simple T-shirt as my example.
Lay your garment on the paper. Spread it out as flat as possible.

You are going to do what I call “pin tracing”.
So get out your stash of straight pins for this. You actually don’t need a stash, just one pin will do.
You are going to “trace” each piece of your garment with pins.
It’s different than tracing with a pen or pencil.
You will need to pin trace the front, the back, the sleeves, the collar pieces, the plackets, the cuffs, the leg, the waistbands, etc. whatever your garment has, you’ll need to trace each item individually and apart from each other. I’ll explain why in a moment.
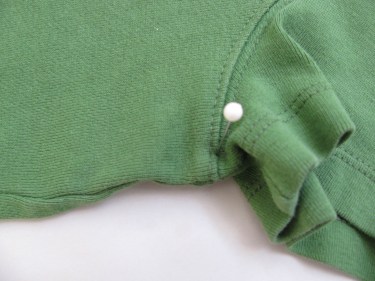
Ok, with this shirt, I’m going to pin trace the front of the shirt first to give you an example of how to do this.
To pin trace, you are going to start at one point (any point) on the first piece (front, back, sleeve, etc.) and poke a pin (through the paper) along the edge of that piece every inch or so like this:

This is why you need to work on carpet, because the pins can scratch your floor and it makes it difficult to poke them through.
On this shirt, I will need to trace the armhole, the shoulder seam, the neckline, the side seams and the hem. That is what you will trace for the front piece only.
Pin trace all the way around that piece.
If you’re not sure what a pattern piece should look like, take out a similar one in any of your Simplicity, McCalls, Butterick, etc. pattern envelopes and study it.
Just keep poking your pin all around the piece.
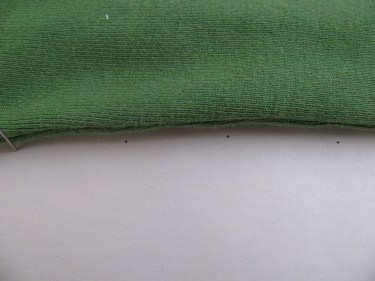
Along the side seams, it will look like the photo below.
Can you the pin holes? Look closely.
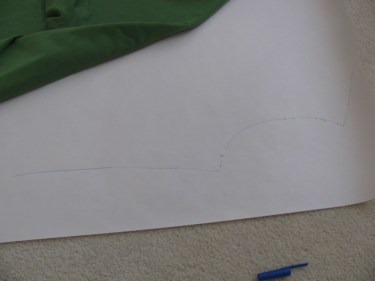
Now, just connect the dots with a pen or a marker:

I’ve done only a partial section of this shirt, but you get the idea, right?
Can you see the shoulder seam, armhole and side seam in the photo below?
If you have an gathers in the original item, just gently pull that area as wide as you can and measure that. Then make the gathered area that measurement before you move on. Gathers can add double to the area. Again, if you have a pattern that has gathers, take a look at the piece that coincides with the piece you are tracing and see what the shape of that pattern piece looks like. That will give you some clues as to what your piece should look like. This isn’t always the case if the item is asymmetrical or has unusual components to the item.
When you are finished tracing, be sure to add on your seam allowances. If you want seam allowances of 5/8″, then use a small ruler and draw a line all the way around this piece that is 5/8″ farther than the original line.
Next, move the shirt to a fresh spot on the paper and trace the next piece, making sure you’ve left enough room for it and the seam allowances it will require.
There’s nothing more frustrating than tracing one piece over another.
But I wouldn’t know anything about that!
Be sure to think ahead. If you are tracing a sleeve, you’ll need to either: fold the paper and line up the edge of the sleeve on it, or trace half the sleeve, move the sleeve and trace the remaining half.
Does that make sense?
I sometimes weigh a section down with a heavy item while I maneuver the shirt to continue pin tracing. That is especially true with sleeves and collars.
Just be sure to think through each piece well before you cut it out of fabric to make the new garment.
Don’t forget darts, pleats, pockets, zipper fly areas, collar stands, plackets on the front of the shirt and cuffs.
Be sure to add enough fabric for hems and facings.
It really doesn’t take much time. You should be able to trace an entire garment within 15 minutes.
Next, you might want to use a piece of fabric from around your house that you aren’t going to use for any other project, or buy an inexpensive piece of muslin or similar fabric and make the garment or item out of that fabric before you make the item with your “good” fabric. That way, if there are any trouble spots, you can adjust whatever you need to before you make it in its final version.
When you go to use the pattern, just cut it on the seam allowance line and then once all the pieces are cut out, you can use pins or pattern weights to hold the pieces in place on your fabric while you cut your fabric out.
Be sure to write directly on the pattern what the pattern is for. I also assign a number to it (just like the pattern companies do) so that you don’t get it mixed up with another pattern you’ve made. Write the size on each piece and also the name of each piece (front, back, collar, etc.) This will ensure you stay organized. Then, store the pattern for future use in a plastic bag or wherever you like.
This technique works well with garments, linings, backpacks, tents, draperies, etc. The possibilities are endless!

Brilliant post – so helpful. Thanks so much for our Early Christmas Present!
Glad you liked it! Have a great Christmas season!
Linda
I have a teddy bear from when I grew up, and I have searched high and low to find the company no longer makes them. I therefore came up with my own test bear trying to mimic the original pattern, I traced around the original and added seam allowance, the body is doable however the head is a nightmare, and I have tried countless ways. I plan to make the final bear for my son out of soft dyed rabbit fur (we have a lot of rabbits this time of year eating at the garden) so this is doable. I know only little about leather work and the hide is thin, I would have to hand sew using a special needle.The fur doesn’t iron and getting flatter ears that don’t ballon out is what I need along with a head pattern, any suggestions on making the head, a pattern, strong hand-sewing methods that hold well and finding glass teddy bear eyes and attaching them? I can send you pictures of my test bear and my original bear if that would help. Any advice would be greatly appreciated!
I’ll see if I have one and send it to you. Perhaps other readers have one as well. As far as the construction, there may be other websites that have those instructions. I know I have seen the really long needles for hand sewing the eyes in at JoAnn’s Fabrics before.
Linda
On Fri, Apr 19, 2013 at 3:59 PM, Sew for dough
Hey, hey, great idea!. Thanks for the tip.
Winnie
Thanks for sharing your idea. I wanted to learn how to make pattern.
Great! I also saw a Nancy Zieman clip where she uses a cerated tracing wheel (not the smooth circle) and runs it atop he seams, etc.
I think your idea is less stress for the garment. Thanks! 🙂
That is interesting about Nancy Zieman. I wonder if the wheel would slip on the seams or not. It might be worth a try!
Thank you for your comment! Linda
Brilliant! Thank you!
If you dont have carpet or dont want to bend, you can put a thick towel (or a few towels) on a table and use that to pin trace