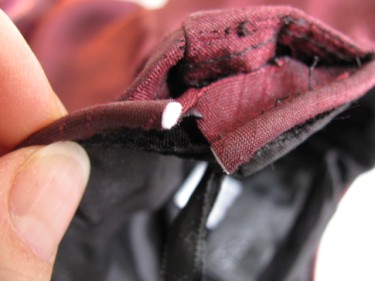
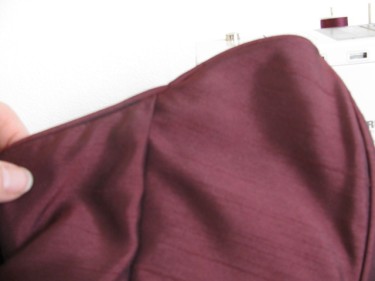
This formal dress has piping that goes all along the very top edge. (Piping is cord that has been covered with fabric to make a nice decorative feature on a garment.)

This dress has to be taken in at the bust area, which means I need to alter the piping when I take in the bust. You might like to see the post entitled How To Take In The Bust on a Top or Dress before you read the rest of this post.

Now, let’s talk about how to take in a dress with piping, because it’s not as difficult as it may seem.
But there are a couple of things to consider as you approach the alteration.
I could take off all of the piping, make the alteration, and then re-stitch the piping in.
However, that would involve taking out the piping, taking off the hook or eye near the zipper, putting the piping back in and sewing the hook and eye back on the dress.
Many of you would go that route.
But for some reason, I would rather eat mud than try to get the piping to look perfect again once I took it off. Also, I am not a fan of having to hand stitch a hook and eye back on.
And I really don’t like trying to match the ends of the piping so that the top of both sides at the zipper meet again, after you zip the dress up.
Have I convinced you yet?!
(On a side note, it may be that your dress would be easiest to alter by removing the piping entirely, but I haven’t ever had to do that, so I hope you don’t either).
Hands down, I always like to alter the piping at the armhole, whenever possible.
So, let’s look at altering the piping one step at a time.
Just so you know…..We will end up making a seam in the piping, but it will be barely noticeable once it’s finished.
You’ll see what I mean.
First, take out the under stitching on the wrong side of the top of the dress with your seam ripper. Because I need to take in about 1 inch at the side seam, I will take out about 2-3 inches of under stitching so that I have enough room to work as I do the alteration:
Once you have removed that under stitching, pull the lining away from the piping:
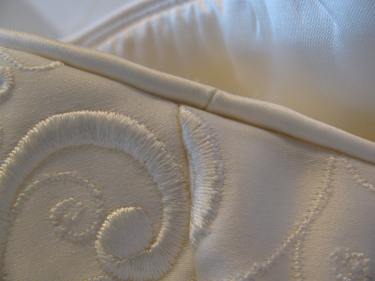
You might (or might not) have to take out the ribbon “hanger” (shown in the side seam above). I didn’t have to because mine was in the side seam. If yours is in the top seam where the piping is, you’ll need to take it out now.
Then, take out the stitching that holds the piping to the dress:
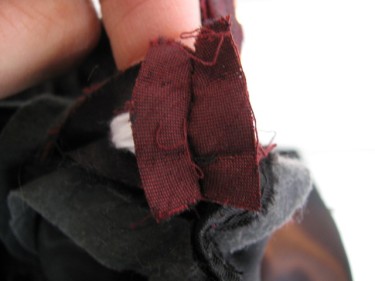
Next, take a pair of scissors and cut through the piping, making sure you are cutting at the point where the side seam of the dress lines up to it. In the photo below, you can see that the blade of the scissors lines up with the seam going vertical above the scissor blade:
Alter the bust area accordingly.
If you’re not sure how to do that, here is a post on How To Take in the Bust On a Top or Dress.
Once you’ve made the alteration to the bust area, you’ll now address the piping:
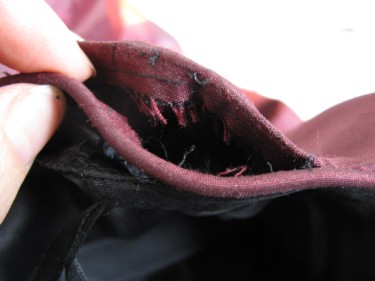
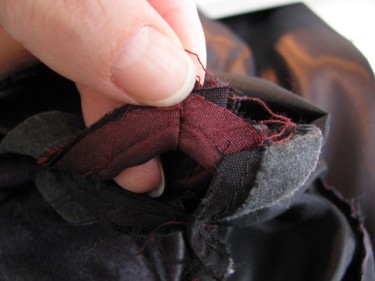
Take out about two inches of stitches on both sides of where you cut the piping strip (the red fabric below) :
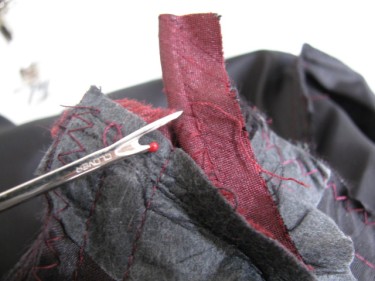
Next, open that up and you’ll see the white cording material inside:
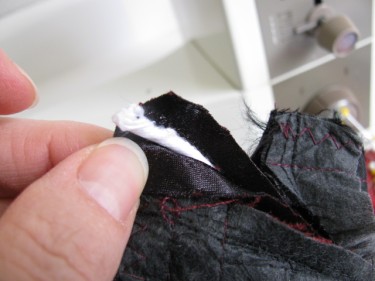
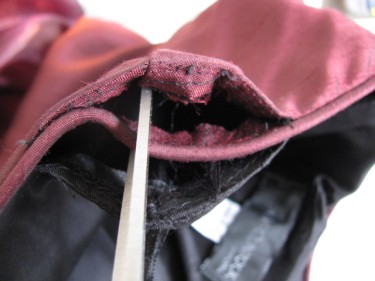
You’re going to trim that cording off 1/2 the total amount of the alteration.
For example, if you’re taking in a total of one inch on this side seam, cut 1/2 inch off of the cording on the right of the cut and 1/2 inch off the cording on the left of the cut:
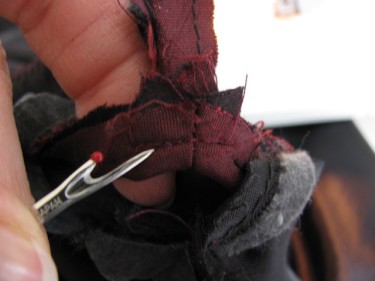
Next, mark with a pin, the amount you want to take in.
You can tell the amount, because it will line up to the new side seam you just altered:
Next, pin the cut edges of the fabric strips right sides together.
Note: this fabric is red on one side (the right side) and black on the other (wrong side).
Stitch across the strips, parallel to the cut edge like this:
Be sure all parts are laying flat or you’ll have some puckering in the seam and you’ll have to rip it out and re-stitch the seam.
This is how it should look on both sides of the seam. The new seam should be nice and flat with no puckers:
Don’t worry if the cording didn’t get stitched into the seam.
Trim your seam and finger press it open. I don’t use an iron. You shouldn’t need to either. Besides it is a tiny space and an iron probably won’t fit in there.
Fold the strip wrong sides together, like this:
Be sure and match the edges well.
Stitch on the old seamline with a basting stitch, if you want. That will hold it in place until you stitch all the parts together.
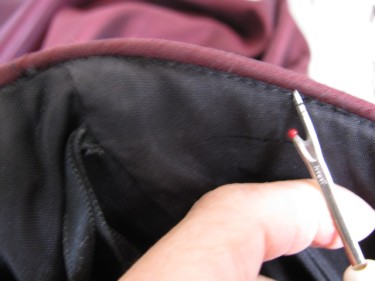
The tip of my seam ripper (below) shows where I have stitched that down:
You don’t need to stitch it down, but I like to, so that I don’t have to keep wrestling with the seam while I pin it to the dress.
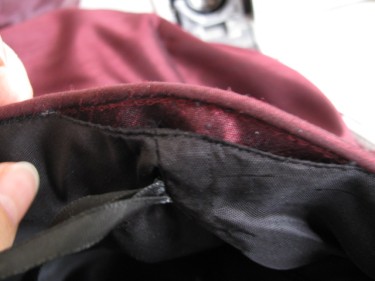
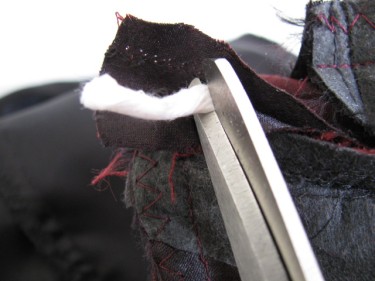
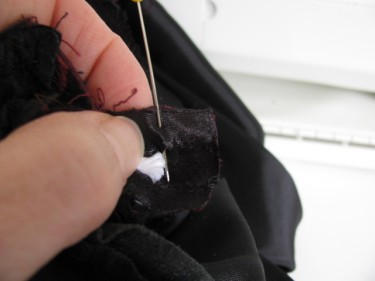
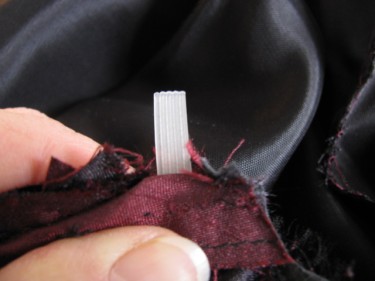
Next, if you had boning in the dress, you probably need to trim a little off of the end (shown in white in the photo below) and tuck it back down into the side seam.
If you took out a ribbon hanger from the dress in the beginning, this is the time to put it back in:
Next, line up the cut edge of the dress and lining with the piping sandwiched inside (between).
Make sure all these line up and lay flat.
If not, alter the areas that need it and then come back to this step.
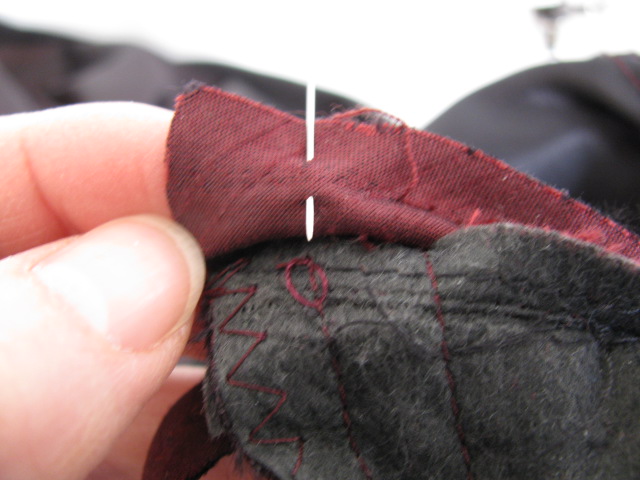
Once they all line up, place a pin through all the layers:
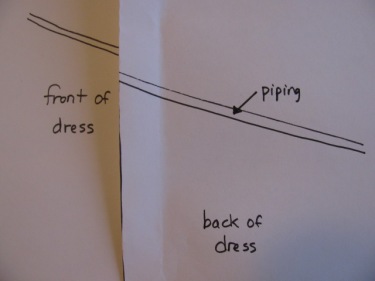
If you’re taking in the bust of the dress or top, most likely your old side seams aren’t going to line up along the top edge at the side seam.
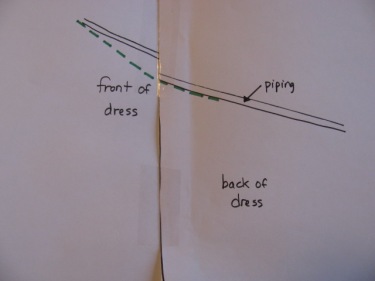
That’s ok. I have a remedy for that.
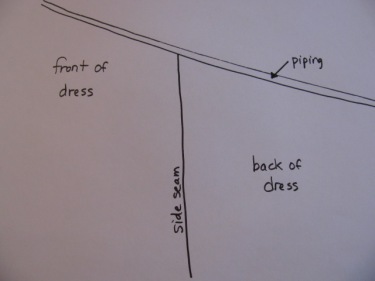
But. let’s look at this diagram so you can understand what is happening. This diagram shows that the front of the dress is higher than the back of the dress:
When you take in the side seams (fold the paper along the vertical fold which represents the side seam), you see that the front and back don’t line up at the top in a smooth line any more:
So, you’ll need to line up the outer fabric and the piping and then sew a new seamline. in the diagram below, the new seamline is a dotted line in green ink:
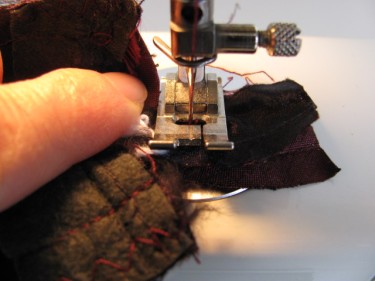
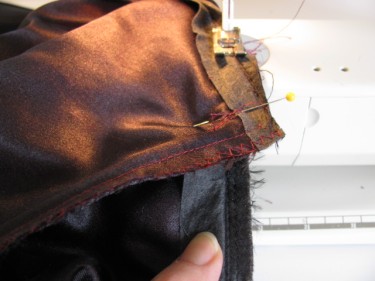
Once you pin the layers together, start stitching close to the piping.
If you need to mark the new seamline with a marker, you can. You can also stitch it from sight as you notice the piping sticks up when you press on it.
Do you see my new stitching line that I sewed with burgundy thread in the photo below? The pin is poking in right on the new seamline:

Once you’ve checked the outside of the dress to make sure it looks good, run a second row of stitching either right on top of the first, or right next to it for added reinforcement.
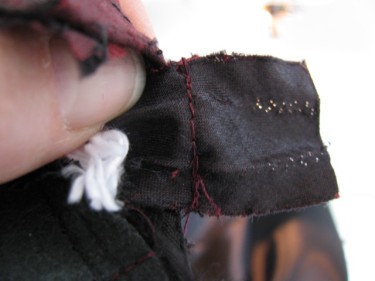
On the outside of the dress, you’ll see a tiny little seam in the piping, but it’s hardly noticeable. The seam is under the arm, so when your arm is down, no one can see it and if you raise your arm, no one is looking at it.
Here’s an example of another dress I altered this past week. The piping seam didn’t line up perfectly, but I think it is just fine:
If you need to under stitch the inside of the dress, be sure and do that.
If you’re not sure how to under stitch, look at the instructions at the end of the post on How To Take In Side Seams and Facings.
I think you’ll find that you can use this technique to alter piping on many applications from clothing to upholstery.

I am so glad you made this! I did this last year for a bridemaids dress and a wedding dress (same wedding) and I was unsure if that was the correct way of doing it. FEW!
Ok, I can rest easy now. 😉
EXCELLENT JOB OF HOW TO TEACHING. VERY EASY TO UNDERSTAND.
hi you make things look so simple lets see if I can do it just as it looks, my daughter has a ball gown that is to big for her after her losing 2st she was regtertably going to sell it so Im sure she would be over the moon if It works …. fingers crossed
Great job, Linda. I’ve done this same alteration several times and it works very well. Your explanations are very clear. Keep up the good work.