One of the more common alterations I do is taking in the waist and center back on pants, jeans and skirts.
Most people try and solve this problem by just making a dart or two in the back of the pants.
That doesn’t work too well if your pants or skirt is made of thick fabric and has double stitched seams.
This is when this alteration comes in handy and it works on pants and skirts alike.
For this illustration, I have a customer’s skirt:

Pin how much you need to take in and record the amounts along the waist and the center back seam (as I did in the second photo of How To Take In the Bust.)
Or use your favorite method of transferring measurements.
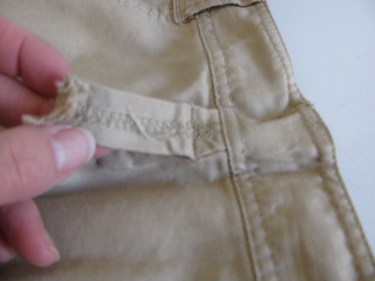
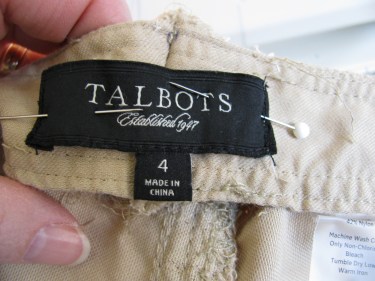
This skirt has a belt loop at the center back. With a seam ripper or a pair of small pointed scissors, take off the top of the belt loop, making sure you pay attention to how it is attached because you are going to reattach it in the same way after you make the alteration:
Remove any tags that are sewn in:

Open up the horizontal waist seam by about four inches or more (2″ on either side of the center back) with your seam ripper or scissors:

If there is stitching along the top edge of the waistband, take out about 3 inches of that (1 1/2″ on either side of the center back seam).
Now, this skirt does not have a center back seam in the waistband. Most pants and jeans don’t either.
If yours doesn’t have a center back seam, don’t worry, we are going to put one in and it won’t show, because of the belt loop, as I’ll illustrate later.
If the garment does not have a belt loop, that’s ok. Most people don’t tuck in their shirts anymore, so the seam won’t matter and won’t really be noticeable.
This skirt needed to be taken in 3/4″ total in the waist. So, that means, I need to take in 3/8″ on both sides of the center back.
I took a ruler and marked the skirt 3/8″ away from the center back (make sure you mark to the left of the center and to the right of the center), one at the top of the band and one at the bottom of the band:
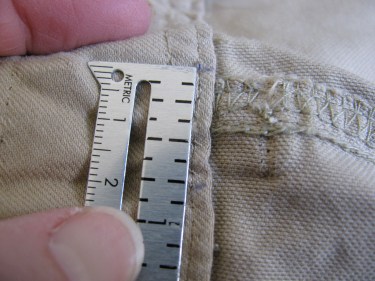
See the blue pen marks in the photo above (just to the right of the seam gauge)? Well, you probably don’t want to use a blue pen, but I thought you’d be able to see it better than my marking pen.
Make these marks on the outside waistband and the inside waistband because you have to take in both!
Just to clarify, your markings should look like this:

As you can tell in the diagram above, if you don’t have a center back seam, you can draw one with a washable marker, or press it in, or eyeball it.
When you don’t have a center back seam, you are going to create one to take the waistline in. Don’t worry, because, again, it will be covered by the belt loop. .
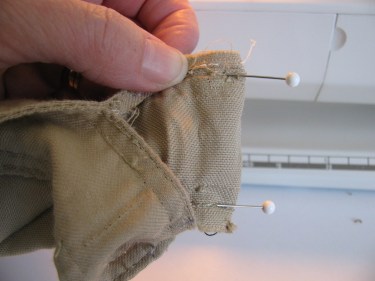
To take in the waistband, fold the waistband along the new imaginary seamline, right sides together. (If your garment came with a center back seam, of course you’ll just stitch a line parallel to the seamline.) Match the blue dots to each other and pin them in place:
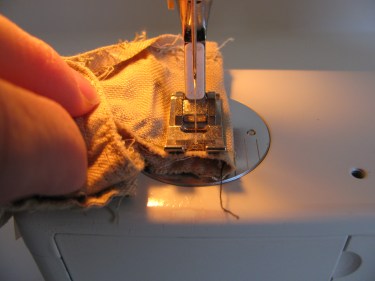
Stitch in that new 3/8″ seam:
Most of the time, I cut the fold and spread the new seam out flat to reduce bulk in the waistband area:

However, if this is your first time with this alteration, wait and make sure everything is going fit together well before you trim it. If you have taken in a small amount, you may just want to leave it alone and not trim it. It’s up to you.
Now, we’re going to move to the skirt (or pants) for a few minutes, so leave the waistband until later.
Turn the skirt or pants to the underside. You need to take out the topstitching next.
Sometimes, the manufacturer will stitch the topstitching with a chain stitch. These are great because you can grab one thread and pull and the whole seam will come out. Just make sure you don’t pull out more than you meant to!
On this skirt I had one row of chain stitch and one row of regular stitching:

Take out the top stitching with a seam ripper or scissors.

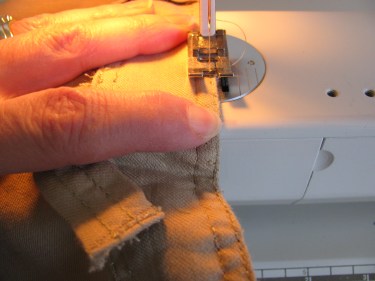
Take in the skirt or pants the desired amount, tapering the seam towards the original seam like this:

Again, I don’t just guess on how much to take in, I have pinned it first and then transferred the markings so I know exactly where to stitch the new seam.
Once you have the new seam stitched, turn the garment to the right side and top stitch the seam just like it was originally. You may be stitching one row of stitches 1/8″ away from the fold and the second row 1/4″ away from that 1/8″ row. Don’t worry if the old stitching holes show. They will fade as soon as the garment is washed.

Next, you want to reattach the belt loop. Stitch that belt loop to the center back seam before you stitch up the waist.

Next, stitch the labels back on. I usually just stitch the two ends of the label down. No need to go back over the entire label. Make sure you don’t stitch through to the right side of the waistband. Just stitch on the single layer.
Now, on the right side of the waistband, top stitch the top edge of the waistband. Many times this is 2 rows of stitches. It might be one. Or, there might not be any. Just follow whatever the original garment had.
Stitch the waistband to the skirt (or pants). I usually top stitch this area closed. Make sure that belt loop is hanging free:

Top stitch the top of the belt loop and then the bottom to hold it in place. Make sure you back stitch several times to hold it in place. If the area is super thick, use a Jean-a-ma-jig to help you keep from breaking your needle. Hand walk it over the bulky area if you need to.

Here’s a look at the inside:

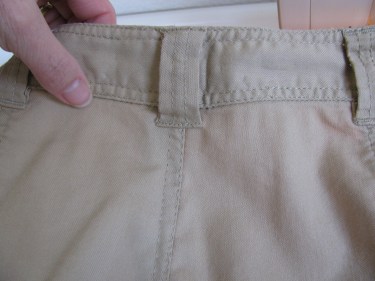
This is what it should look like on the outside. The waistline should look the same as before you started, only smaller!

thank you so mush for sharing your knowledge. This is exactly what I was looking for. I hope you will do YouTube next 🙂
Thanks alot for probably the best explenation on the internet how to do this!
Oh, glad you liked it and thought it was helpful!
What do you do if it is a jean with top stitching? How far down the back do you need go?
Hi there! How do you take in back seam/hips and inch, when its a heavy denim skirt with back pockets?
The alteration above should be what you’re looking for. Because you are only taking in an inch, it shouldn’t affect the pockets at all. Just do the alteration as if there were no pockets there.
I have a pair of pants that hang low on my hips…they are my go-to pants for work. I recently lost weight and haven’t been able to put it back on! (size 4). I usually buy a size 6. This alteration is great for jeans but what do I do if there is no belt loop!?? I tapered the crotch up to the waist band ending in approximately 1 inch on each side (2 inches to take in). My waistband has no seam. Can you suggest anything? I would really appreciate it. They are really good pants.
Thank you,
Paula Ieraci
Hello. This is exactly what I was looking for. I’m new to sewing and want to learn how to alter my own skirts. In any case found instructions helpful. It would be so wonderful if you could do a video tutorial for those who are visual learners and are super new to sewing.
Thanks again!!!
Hi NC, thank you for your very nice comments. I have been asked to make videos before and I haven’t done so because of the time involved. Many alterations take a long time to do and I’d have to look and see if this site could support it. Meanwhile, I hope the photos serve as the visual learning experience you need. If you ever have a question about a certain step in an alteration, just email me at TheSewingGarden@gmail.com. 🙂