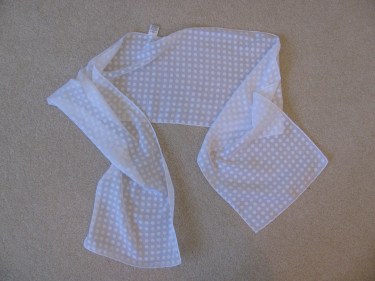
A dear friend of mine had a bone marrow transplant for cancer and is in remission. She lost all her hair from chemo and it’s growing back. In the meantime, she is wearing scarves over her wigs and wants the scarves altered.
Here is the collection of scarves that I need to alter:

Maybe you have alot of scarves that you would wear if they were shorter or a different shape.
In todays’ post, we’ll look at three different alterations plus one super fast way of getting the job done.
Scarf #1
My friend has requested that the first scarf be altered to a width of 2″ and a length of 35″. Maybe you want yours with different measurements. The technique is the same, just change the measurements to fit your needs.
So, I begin by measuring the length. I want to remember to add a seam allowance onto the final measurement, so I am going to cut the length of this scarf to 35 1/2″. This will give me a seam allowance of 1/2″. The remaining long side and one end of the scarf are already finished, so I am going to leave them alone. If you needed to alter both ends, just add extra for the extra seam allowance.

I cut across the scarf at the 35 1/2″ mark.
Now, I need to cut the width. Again, I want the finished width to be 2″. Since this scarf already has one seam that runs the length of the scarf and the scarf is folded (doubled), I will add a seam allowance to the edge I am going to cut and cut this scarf 2 1/4″ wide, meaning that I am giving it a 1/4″ seam allowance.
Why the different seam allowances you ask? (There’s a 1/2″ seam allowance on the short end and a 1/4″ seam allowance along the long edge.) Well, the original seam running down the length of the scarf on both long edges is 1/4. So, along the long edge, I am adding 1/4″.
I am making the end seam allowance a little wider because it will get alot of use as she ties the ends in a knot behind her head each time she wears it.
So, in the photo below, I cut the width of the scarf at the 2 1/4″ mark using my rotary cutter and cutting mat. You can also mark the line and cut with a pair of scissors.

Once you’ve done that, turn the scarf inside out so that the right sides are facing each other and pin the long edges together. It is especially important to pin this if your scarf material is the silky, slippery kind.

Now, stitch a 1/4″ seam along the long edge of the scarf, making sure you leave a few inches unsewn somewhere in the middle of the scarf, so you can turn it right side out again. I leave the opening in the middle instead of at one of the ends because it is easier to stitch up the opening in the middle than at an end. Trust me on this.
Go ahead and stitch across the end of the scarf.
Turn the scarf right side out now. I use a Fast Turn tube turner like I did for making spaghetti straps.
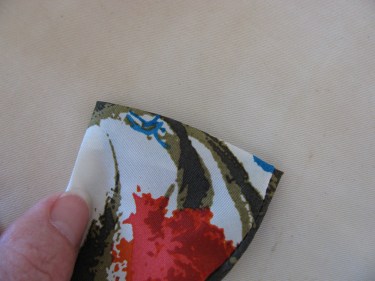
Then, I use a small screwdriver, pencil tip, crochet hook (or anything else with a point that won’t poke through the fabric) to push out the corners and make them sharp.

Now you are going to press the edge so that it lays flat.
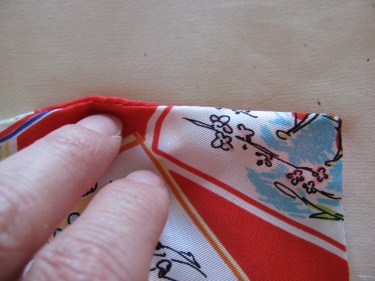
When you get to the opening, press under 1/4″ on both sides of the opening.

Stitch the opening closed by machine, stitching close to the edge or by hand stitching it closed.
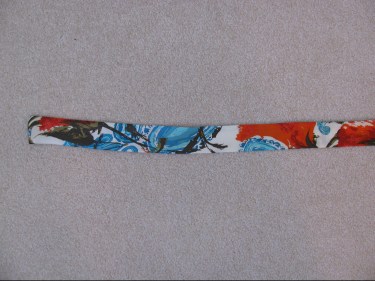
And there you have it….a 2″ x 35″ scarf all ready to wrap around your head!

Scarf #2……looks like this to begin with….a large square of fabric:

This is to be a 2″ x 35″ scarf as well, only it’s a little different than the first scarf.
For this scarf, my friend wanted the paisley turquoise object to be on the top of her head when she wore it. This means I needed to cut across the diagonal (or bias) of the fabric to get what she wanted.
So, that’s what I did.
I figured that if I wanted a 2″ x 35″ scarf, I would make it with one seam down the long side and then stitch the ends closed.
That meant I needed to cut the fabric bigger than those measurements.
Ok, to get the width, I needed to double the measurement of 2″ and make it four inches because we are going to fold it in half along the long edge
We also need to have a little more than that for seam allowances. We’ll add 1/4″ + 1/4″ for both sides of the scarf for our seam allowances.
With me so far?
So, I cut the width at 5 inches. That means I have a 2 1/2″ width on each side of the scarf. (2 inches for the final measurement plus 2″ for the backside of the folded scarf and 1/4″ for the seam allowance on each side of the scarf. E-mail me if that doesn’t make sense at thesewinggarden@gmail.com.

Next, I folded the scarf in half lengthwise with the right sides facing each other and pinned to hold it in place.
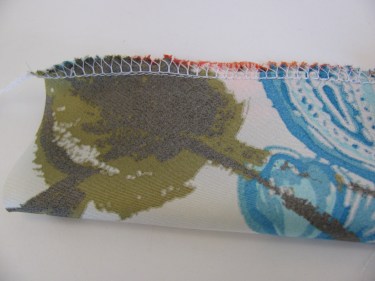
I then stitched a 1/4″ seam along the long edge of the scarf.
Then, I used a serger to finish the long edge.
Turn the tube right side out and stitch the ends closed by machine or by hand.
Press the long edges flat
And, there you have it!
Scarf #3……is an easy one:
For this scarf, she just wanted it half the width that it is now.
It has such a nice finished edge to it, so I left that alone.
Be sure to take all the tags off with a seam ripper if they are in the way:

All I had to do was fold it right sides together, pin it and stitch down the long edge:

Turn the scarf right side out, stitch the ends closed, and press flat.

Doesn’t that look easy?
It really is easy.
Scarf #4….the fastest way yet!
Let’s say that you don’t want to have any seams on your scarf. Let’s say that a single thickness is what you prefer for your scarf. The fastest way to do that is by using your overlocker or serger.
You will need to use your rolled edge foot for this technique.
Follow the manual for your serger on how to set up your rolled hem foot. If you have an older serger, you may have to replace the hem plate with another hem plate that is provided with your machine. The newer machines don’t have that extra step. Either way, once your rolled hem foot is in place, you just serge along the edges of your scarf.
That foot will make the edge look like this:

The beauty of this foot is that you don’t have to sew any seams! You just serge down each end and you are finished!
You could have this done in two minutes flat!
