
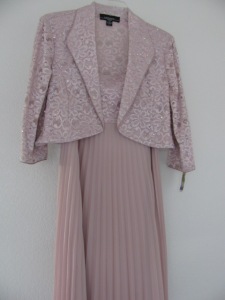
This is a mother of the bride dress and jacket that a customer brought in.
The short jacket needs to be altered at the sides. The jacket does not have lining, but it does have facings.
And because of the facings, we will need to alter both.
So, let’s learn how to take in side seams and facings, shall we?
Because I need to take in quite a bit on both sides of the jacket, I also needed to take in some fabric in the sleeves too.
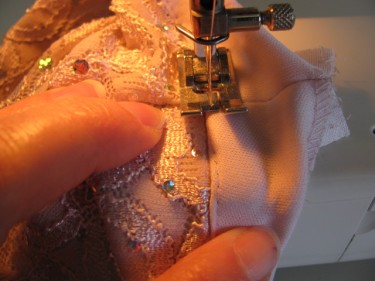
Can you see the yellow headed pins and how I’ve pinned into the upper sleeve area as well? This works if the sleeves are really large and baggy in circumference around the upper arms.

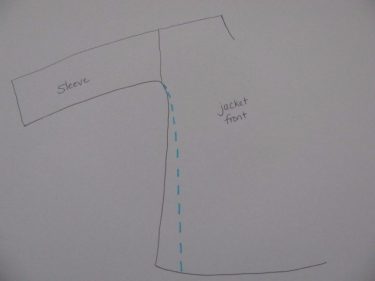
(The other option in taking in the side seams, is to leave the sleeve alone and just taper your stitches back to the underarm seam as the diagram below shows). The new seamline would be the blue dotted line:
This is the method to use if the customer doesn’t want any excess fabric taken out of the sleeve as it sometimes hinders the mobility of her arm.
Ok, now for the jacket I am working on.
Looking at the diagram below, you can see my plan to take in the side seams as well as part of the sleeves. This is because the jacket was too big in the sleeve area too. Notice that I didn’t take the sleeve in all the way to the cuff. The cuff was fitting just as the customer wanted it to. Not taking in the cuff also means less work because I don’t have to alter the cuff area. I can leave it alone:

However, if your sleeve is too wide at the cuff area, you may need to take in the facings or take out the hem and re-stitch it with the newer, slimmer sleeve.
Now, let’s go back to the hem area of the jacket itself.
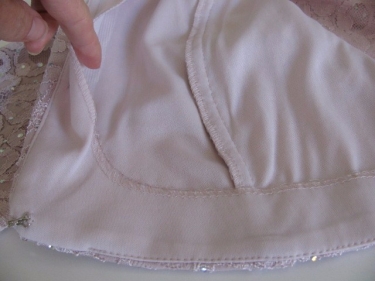
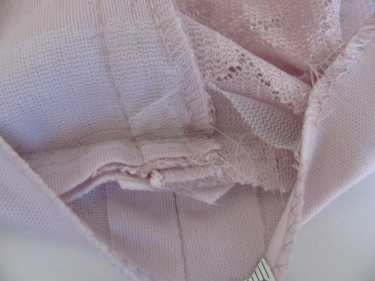
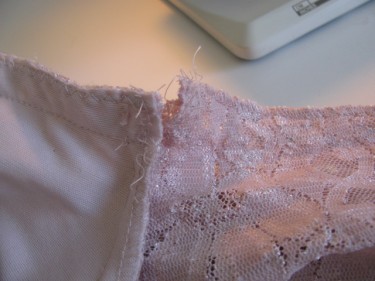
In the photo below, you can see that there was a facing on the inside of the jacket at the hemline:
So, now I will show you how to alter that.
Once you understand this process, you can alter the facing, or hem, at the wrist with the same method.
To begin, I looked for under stitching .
This is usually found on the inside edge of the facing at the hem:
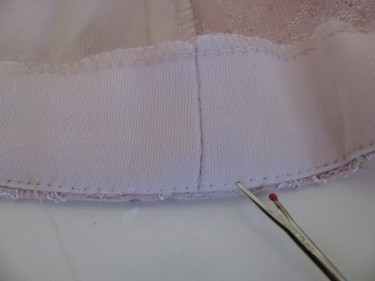
I needed to take the jacket in about a total of two inches on the side seams. So, with a seam ripper, I took out about four inches of under stitching. This gives me enough room to work on the alterations easily.
Next, take out the stitching that holds the facing to the garment. Many times, it will be a bar tack of stitches. Sometimes, it will be several stitches in a line. Other times, you may have a ribbon that attaches the side seam to the facing. It all depends on the manufacturer.
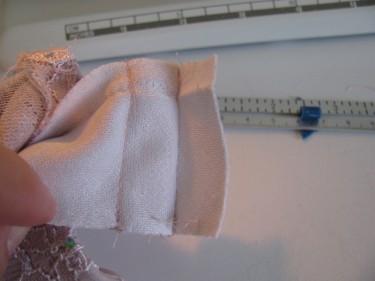
If you pull back that facing, this is typically what you’ll see:
Next, I took out the lowest horizontal seam along the bottom of the jacket:

Once you get that opened up, you’ll see that we can alter that facing:
In this case, I took in about an inch (which translates to two inches total, if you count the front and the back).
Whatever amount you are going to take in at the lower side seam is the amount you will take in the facing because you want them to be the same so they’ll match up when you go to put the jacket all back together again.
Next, trim off the excess fabric and press the seam open.
If you can’t press the seam open because the original seamline stitches are in the way, take out the old stitches and then press the seam open.
Leave that hem area for a moment and travel up to the underarm seam.
If your underarm seam is continuous all the way from the hem to the wrist, you won’t have to do the next step.
But, most jackets have the side seam interupted by the underarm seam.
In other words, the side seam was sewn first and then the sleeve was sewn on.
If that is the case, you’ll most likely have a serged edge on that underarm seam, which the manufacturer did to keep the seam edges from fraying.
Remove more stitches than you need to so you have ample room to work in that area without having to come back and take out more:
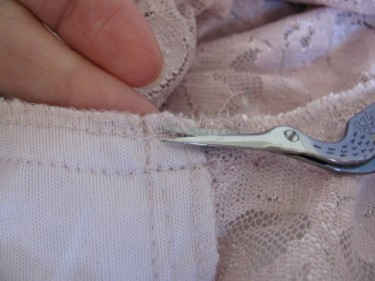
I like using my little stork scissors for this type of work, but a seam ripper does the job too.
Once those stitches are taken out, pull the seam apart so you can work on it.
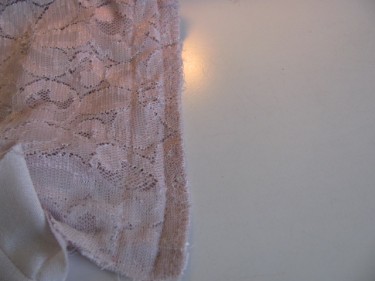
Now, take in the side seams of the jacket the amount you needed to alter it by. In the photo below, you can see the new seamline parallel to the original seam line:
Trim off the excess fabric and finish the raw edge.
Next, if you needed to take in the sleeve seam, do that now. When sewing it, taper it back to the original seamline, just above the wrist, as my last diagram showed.
If you hold the sleeve seam next to the side seam, they should match up.
Now, match the sleeve seam to the side seam and re-stitch the underarm seam along the original seamline. In other words, attach the sleeve to the side seam:

Finish the raw edge with your serger or a zig zag stitch.
Now let’s go back to the lower edge of the jacket again.
At the lower hem edge, match the facing seam to the jacket side seam and stitch along the original seamline:

Understitch this area.
To under stitch, pull all the seam allowances toward the facing and stitch along the original stitching line.
This helps keep the facing turned under.
Reattach the side seam to the facing with a few stitches. You can do this on the seam allowance of the jacket.
That’s all there is to it!
You can use this technique on any garment that has facings.
If the garment has lining, it’s basically the same idea, only you would need to stitch up the lining when you are finished.
Any questions?
If so, send me an e-mail and a photo, if possible, and we’ll figure it out together.

OMG’sh – thank you! Perfect timing. I have someone coming in next week w/a dashiki she wants taken WAY in. I told her I would attempt it, but w/that much being taken in, it might distort the dress a bit. But if she’s up for it, so am I. And bingo, your email showed up on that very subject. I’ll be studying it before she get’s here and hopefully, all will turn out well!
I love when stuff like that happens. So glad it helped and the timing was perfect.
I learned something from you too…I had to look up what a dashiki is. I didn’t know those shirts had a name….thanks!
I have been lurking around your blog for awhile and I just want to thank you so much for your excellent advice. I would have taken a much harder way to do the side alteration than you showed. Thank you so much!!!
you did a wonderful job explaining I’m trying to do alterations but this is still over my head thanks for a wonderful demonstration!
hi Linda
I recently had a problem with a side taper on a corset back wedding gown.
After taking ing the sides to spread the back as she was loop to loop,(a little too big bust to hip) and wanted a prettier corset look.
I got some slight diagonal pulls radiating from the corset base to the side right; about the hip area. any thoughts on how to correct this issue. thanks Lauren
Pulls always point to the problem, but I don’t know if you have any extra room in the corset area or the hip area, but you need more room in one of those spots. It may mean you need a wider corset in that area. I just don’t know if it’s possible without seeing it.
I have a terrible time with underarm seams angling to the back of a shirt or jacket. I have tried a number of alterations and can’t get it to look right. I thought of angling the back pattern piece from underarm to bottom of piece out to amount needed to get seam straight. Everything I have tried has changed the front to not hang straight. Any suggestions??
Hi Pat, I’m having a bit of a time picturing what you’re explaining. Could you email me a photo or two please? That would be very helpful. Thank you.